This topic contains the following sections.
Use a CogToolBlock to increase and improve the structure of your application by:
- Organizing your vision tools by function
- Creating reusable components
- Providing a simplified interface to the complex tasks of your vision logic
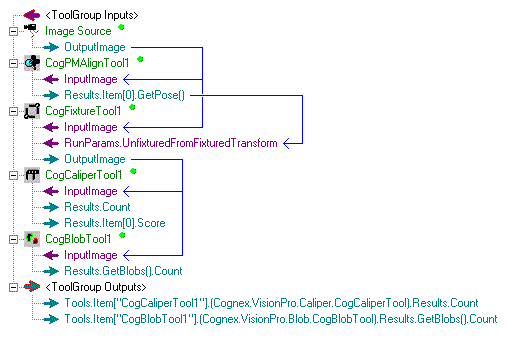
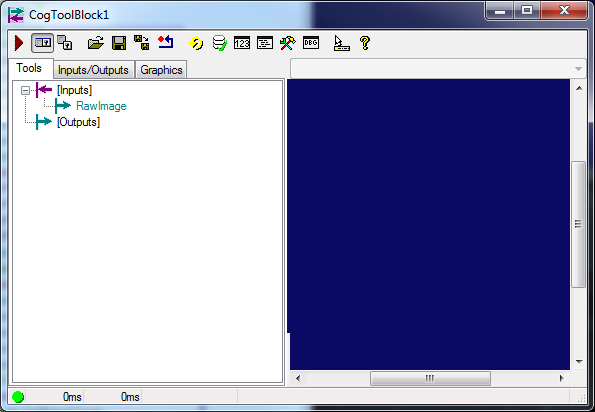
For example, the following figure shows a set of vision tools that acquire an image, generate a fixture based on an object feature, and then analyze the fixtured image with a Caliper tool and a Blob tool:
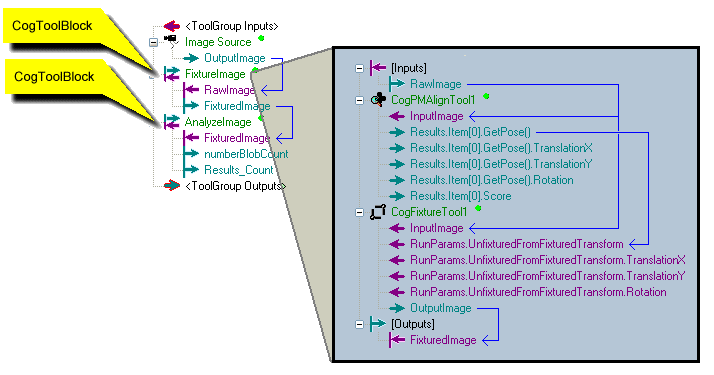
Using CogToolBlocks, the same vision tools can be organized by function while exposing only the necessary results terminals:
In addition, a CogToolBlock provides access to the Verification user control, allowing you to perform image verification and compare the results generated by a CogToolGroup to a database of graded images and verify that the vision tools you use in your application generate expected results. See the topic Inspection Designer for more information.
While the CogToolBlock is similar to the CogToolGroup for arranging vision tools into a logical collection and defining the data flow between them, the CogToolBlock offers several advantages not provided by a CogToolGroup:
- An intuitive drag-and-drop interface for connecting Input and Output terminals and linking results between vision tools and other CogToolBlocks
- An edit control that allows you to configure, view and set the values for incoming data the CogToolBlock will use and the outgoing data it will generate
- A simpler scripting method designed to minimize the coding effort in CogToolBlocks where you want to customize and extend the capabilities of the vision tools it contains
- Access to Input and Output terminals by index, name, or unique GUID, whereas terminals from CogToolGroups can only be accessed by index and name
Programmatically, be aware that the CogToolBlock class does not support the following API that is supported by CogToolGroup:
- DefineScriptTerminal
- SetScriptTerminalData
- GetScriptTerminalData
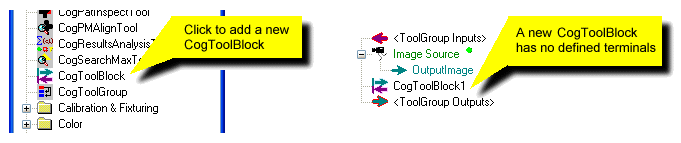
To add a CogToolBlock to a Job, double-click a CogToolBlock in the tool palette.
Drag and drop any exposed terminal from another vision tool, or another CogToolBlock, to the new CogToolBlock, which reflects the new link:

You can also right-click on a terminal and use the Link To option to select an appropriate Input or Output terminal:

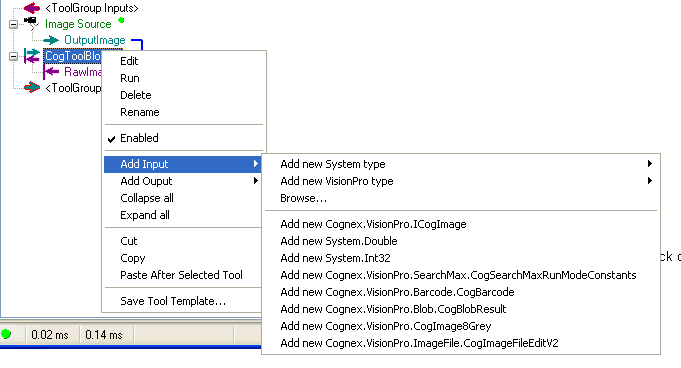
In addition to linking to known terminals, the CogToolBlock allows you to define inputs and outputs to results and other parameters that are not defined yet. Right-click on a CogToolBlock and choose Add Input or Add Output:
When defining an input or output terminal, a CogToolBlock allows you to choose from four different types:
- Commonly used system data types
- Commonly used VisionPro data types
- All available objects and their members defined by both Microsoft Visual Studio and the VisionPro programming interface, through the Browse menu
- A list of the last eight system or data types used in the CogToolBlock
This section contains the following subsections.
- Defining Inputs and Outputs using the Edit Control
- Using the Verification Control
- Connecting to a Database of Graded Images
- Performing a Verification
- Using Advanced Verification Settings
- Using the Graphics Tab
- Scripting with a CogToolBlock
- Simple and Advanced Scripting
- Simple Script Example
To add vision tools and optional script processing to a CogToolBlock, double-click on it and open its edit control:
The Tools tab shows all vision tools and links currently defined for this CogToolBlock. See the topic ToolBlock Edit Control for details on the edit control.
Use the Tools tab to accept incoming data (images, parameters) through the Input terminals and add the vision tools and results logic necessary for this part of your vision application. For example, the following figure shows a configured CogToolBlock renamed LookForDefects after it has been configured to accept an input image, use a Blob tool to locate defects, and then use one of three Results Analysis tools to determine the result of the inspection:
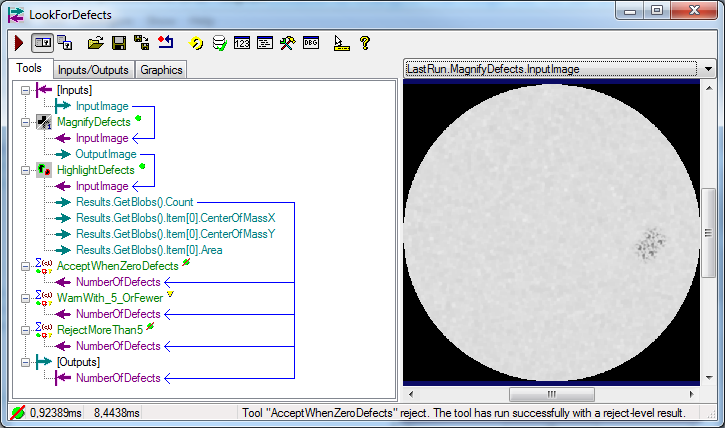
The CogToolBlock also exposes the number of detected blobs (defects) as an Output terminal so that other CogToolBlocks and vision tools contained in this Job can use this data.
In addition to the other methods of adding Input and Output terminals for this CogToolBlock, you can also use the Inputs/Outputs tab:
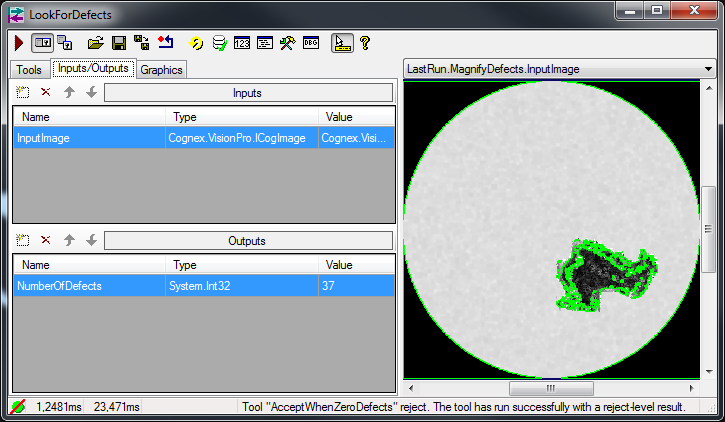
See the topic ToolBlock Edit Control for details on using the Inputs/Outputs tab. In addition to listing the name and type of each input or output terminal, the Inputs/Outputs tab also lists its current value. System data types can be modified directly by clicking on its Value field and entering the new value.
See the topic Inspection Designer for details on the Inspection Designer features of VisionPro. When you are ready to verify an image database using the vision tools contained with the CogToolBlock, click the Verification icon, highlighted in the following figure, to access the Verification control:

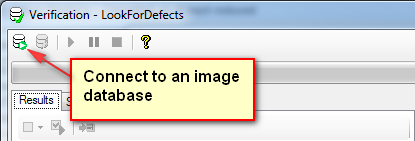
To perform a verification, you must connect the Verification control to an existing database of graded images by using the connection icon highlighted in the following figure:
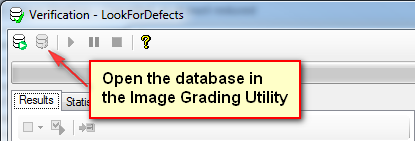
If necessary, edit the database using the Image Grading Utility by clicking the icon highlighted in the following figure:
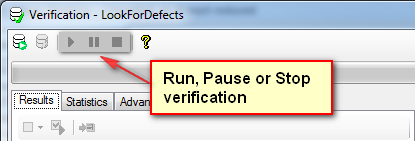
Start, pause and stop a database verification using the remaining icons along the top of the control:
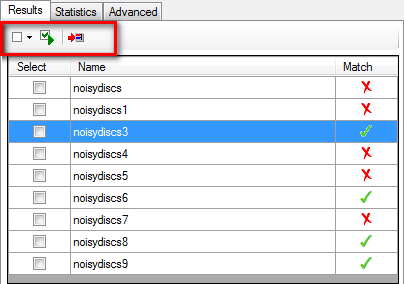
Once you begin a verification, the vision tools contained within the CogToolBlock examine each and every image of the database and compares the value of Result for the CogToolBlock against the grade previously assigned to the image, and populates the Verification control with results as shown in the following figure:
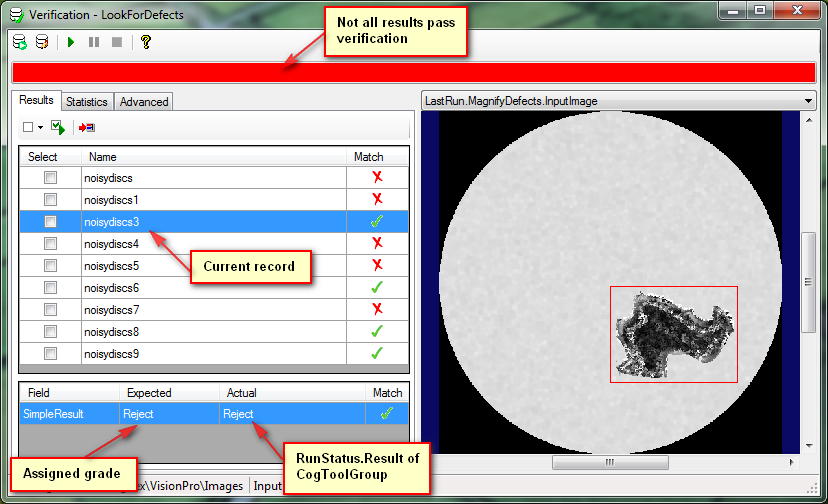
Be aware that the value for Result can be set by one or more Results Analysis tools within the CogToolBlock, or by using a script the CogToolBlock runs once all the vision tools have finished executing.
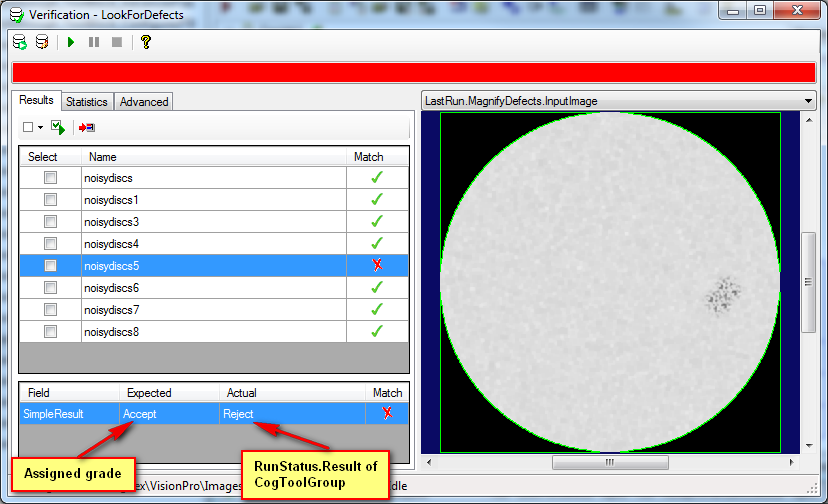
If the value of Result does not match the assigned grade for a particular graded image, the Verification control indicates that mismatch as shown in the following figure:
Once a verification has been performed, the Results tab of the Verification control allows you select and process a subset of the output records for additional processing, as well as push the image associated with the selected record back to the CogToolGroup as the next image to be analyzed, using the controls highlighted in the following figure:
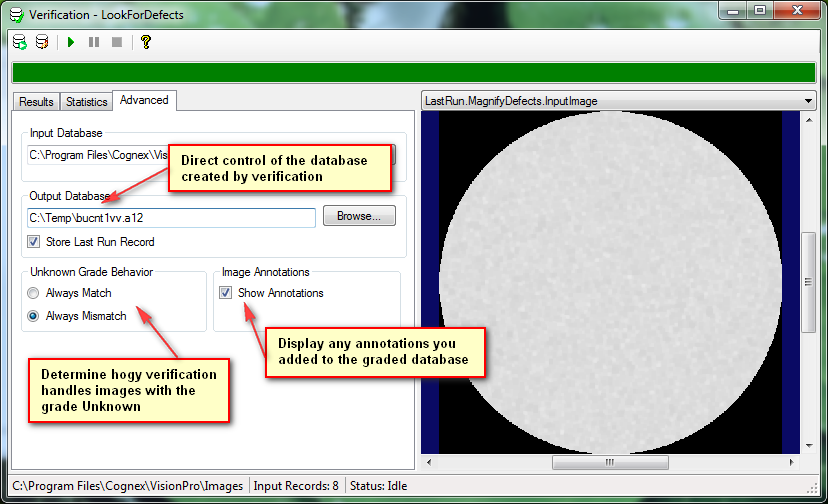
The Advanced tab of the Verification control, shown in the following figure, allows you to specify a particular name and location for the output database the verification will generate, along with determining how the Verification control will handle images in the graded database that have a grade of Unknown:
For a sample application that performs a verification, see the topic Verifying an Image Database.
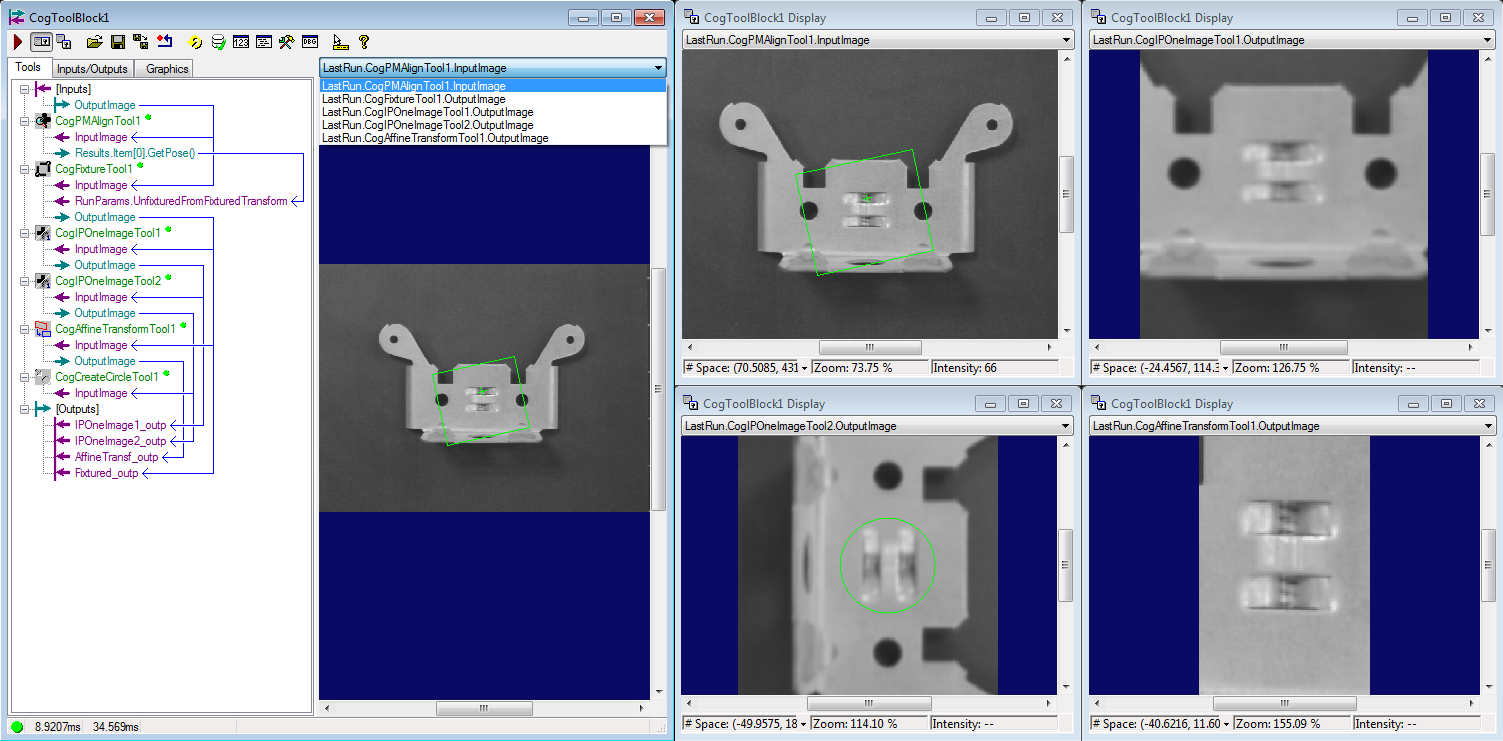
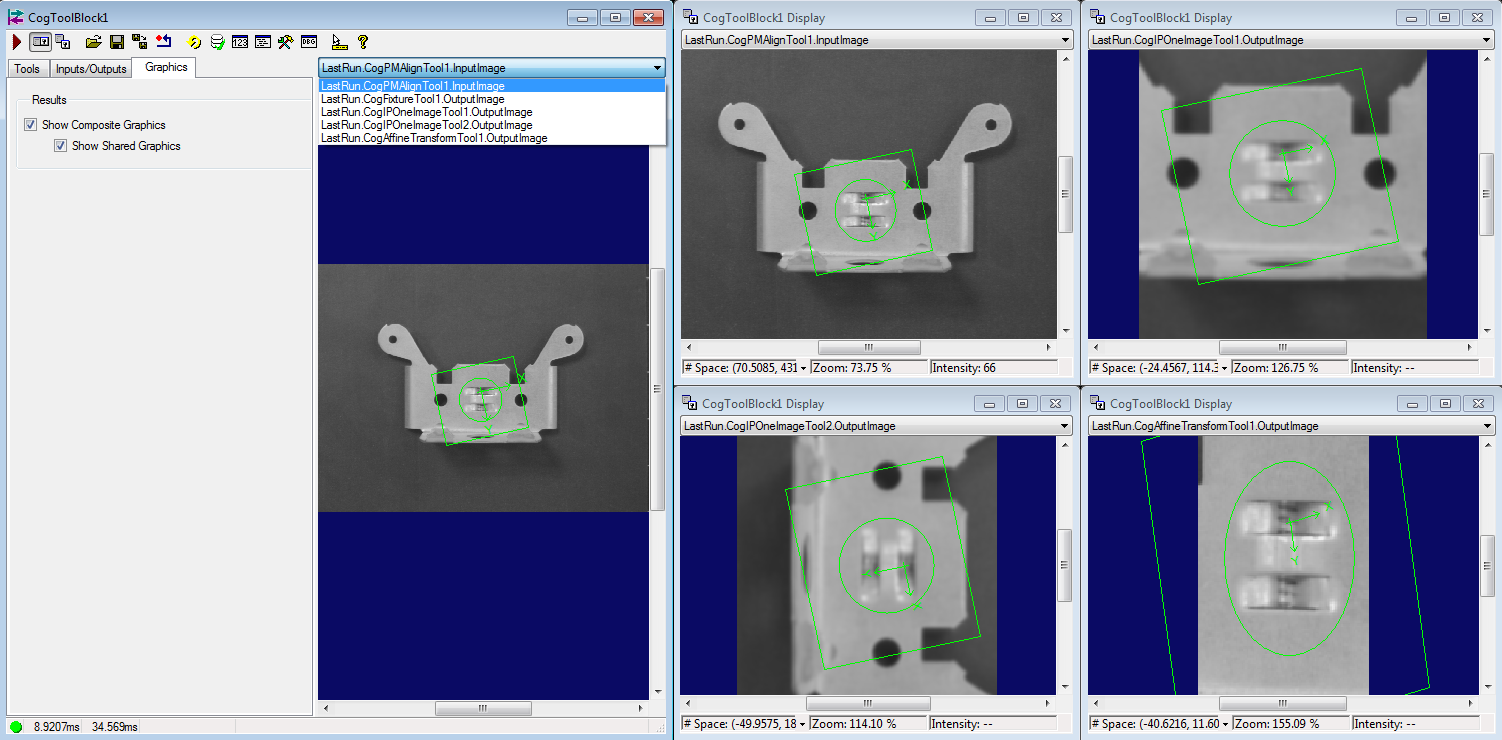
Fixturing and image processing tools can create a separate new picture from their input image and this caused that graphics drawn by tools were often unavailable on the new picture created during the inspection process. If you want to see all the graphics made by tools on a particular image, you can use the Show Shared Graphics checkbox. When checked, the graphics made by different tools are shared and appear on every picture that share the same coordinate space tree. For example: The Blob Tool cannot detect blobs on a colored picture, but if an Image Converter Tool converts it to greyscale and the Blob Tool marks the blobs, you can see the result on the colored picture as well.

With the Show Shared Graphics checked, the ToolGroup, in addition to creating the normal composite image records, will also create new records "sharing" all graphics between images having the same space tree. Note, that new top level last run records will not be created; only the existing ones will contain more graphics.
VisionPro supports scripting to allow you customize and extend the capabilities of any of the vision tools contained within a CogToolBlock, or to add additional logic to the results generated by the vision tools within a CogToolBlock. Any scripts you add to a CogToolBlock are migrated to your Visual Studio application when you use the Application Wizard.
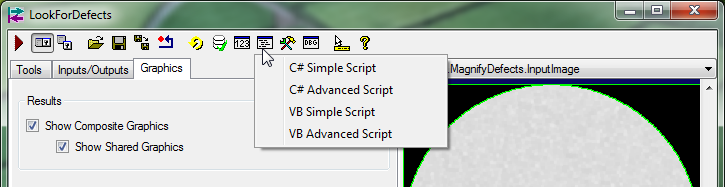
To add a script to a CogToolBlock, use the Create/Edit Script button along the button bar. If the CogToolBlock currently has no scripts, it offers the choice of Simple or Advanced scripting in two different active scripting languages:
When you add a script to your CogToolBlock you must choose between a Simple and Advanced script. Advanced scripting is similar to scripting supported by Jobs and CogToolGroups and described in the topic Scripting in QuickBuild. Use an Advanced script when your CogToolBlock needs to do either of the following:
- Define Input and Output terminals dynamically
- Gain access to the full API of all the vision tools contained within the CogToolBlock
Simple scripts largest advantage is the easier programmatic access to the vision tools and Inputs/Output collections already defined. For example, a CogToolBlock accepts a System.Double value for radians and uses a script to convert this value to its degrees equivalent. Graphically the terminals for this CogToolBlock are defined as follows:
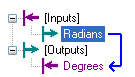
Using Simple scripting and its direct access to Input and Output terminals, the following statement performs the conversion:
Outputs.Degrees = Inputs.Radians * 180 / Math.PI;
While using Advanced scripting requires a data conversion:
this.mToolBlock.Outputs["Degrees"].Value = ((double) this.mToolBlock.Inputs["Radians"].Value) * 180 / Math.PI;
Choosing a Simple script allows the CogToolBlock to auto-generate information about the supported methods and properties for the vision tools it contains. Be aware of the following regarding auto-generated code:
- The script editor disables cutting any auto-generated code.
- Cognex strongly recommends you do not copy and paste any auto-generated code, which can lead to unpredictable behavior.
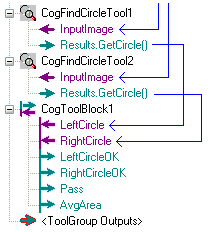
For example, a QuickBuild application uses two CogFindCircle tools and Simple scripting in a CogToolBlock to determine if both circles meet predetermined criteria. Graphically the tools can be represented as shown:
The following figure shows the Simple script that performs the analysis:

The VisionPro installation utility installs several QuickBuild sample Jobs that use CogToolBlock, available through the Navigator window. In addition, the \Samples\Programming\ToolBlock directory of your VisionPro install includes several C# and VB.NET programming samples.