This topic contains the following sections.
An application that uses the Inspection Designer capabilities of VisionPro analyzes an image for an Accept/Reject result and then compares it to the same image in a database where a result for that image has already been assigned. Inspection Designer components allow to you confirm that your vision application is generating the desired results for images you have previously analyzed manually.
To use the Inspection Designer features, you must first generate a database of graded images using the Image Grading Utility. Once the database is created, you create a CogToolBlock of vision tools to analyze those same images stored in a separate location (file or folder), and then use the Verification control of the CogToolBlock to iteratively compare an analysis of every image with its corresponding match in the graded database. The Verification control can graphically depict which analyzed images match or do not match the expected result.
If the results generated by the CogToolBlock do not match the results of the database, you can adjust the parameters of the vision tools you are using or try an alternative approach to the vision solution.
See the topic Inspection Designer for other details, and the topic Using a CogToolBlock for details on using a CogToolBlock and its Verification control.
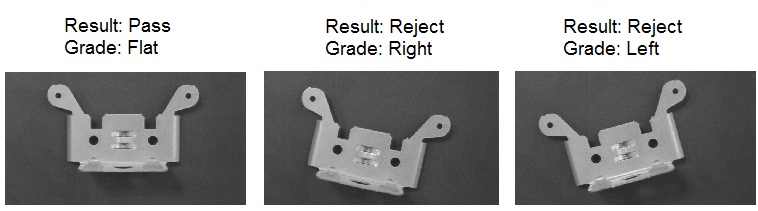
The following example shows you how to use QuickBuild to configure a CogToolBlock and compare an archive of images with a database of image records. The CogToolBlock must correctly determine the orientation and grade for each image as shown in the following examples:
To start, you must use the Image Grading Utility to grade a set of images stored in an image-database file.
Choose Start->Cognex->Utilities->Image Grading Utility.
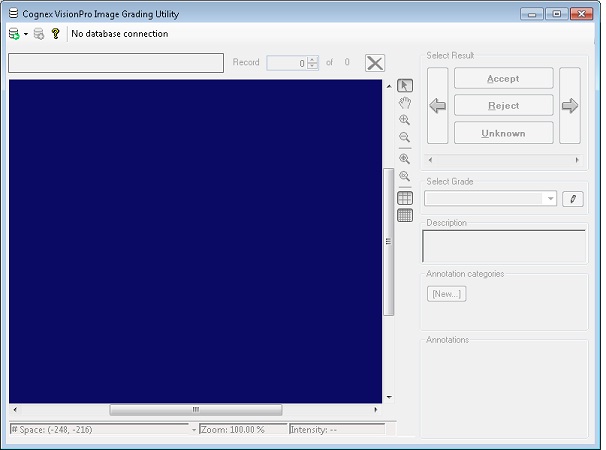
The Image Grading Utility launches as shown:
Click the Connect to database icon on the top left of the utility and choose Connect.
The utility connects to a database specified by directory name.
Create a new database by clicking Make New Folder and creating a new directory for storing the verification records.
This example creates a database in the directory C:\Verification.
Click the Import images icon along the top to select the image database file bracket_std.idb in the directory %VPRO_ROOT%\Images.
This example uses an image archive, but you can alternatively select individual files with a variety of file formats.
Keep the default import option of Accept for the default grade and click OK.
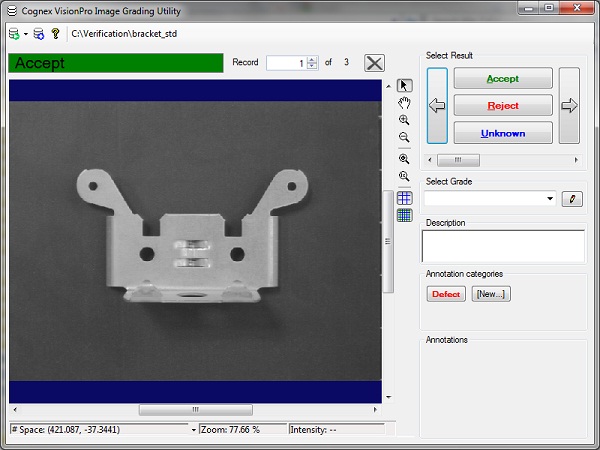
The Image Grading Utility creates a database record for each imported image, and assigns each a result of Accept. For example, the following figure shows the Image Grading Utility and the first record:
- Advance through the database and change the result for the second and third records to Reject.
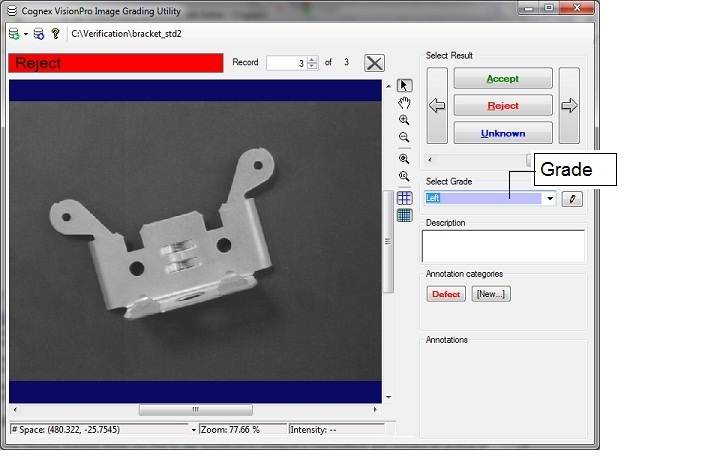
For each record, assign a grade to describe the orientation of the bracket. For example, the following figure shows the third record with a grade of Left.
- Close the Image Grading Utility.
With the database created, perform the following steps to design a QuickBuild application to analyze the same images from the image archive and determine a result for each bracket:
- Launch QuickBuild.
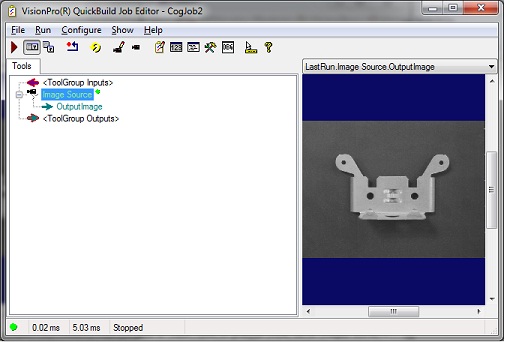
- Double-click on the Image Source for CogJob1 and configure the image to use the image database file bracket_std.idb, installed by default in %VPRO_ROOT%\Images.
Run the Job once to give it an initial image, as shown:
Add a CogToolBlock to CogJob1 and link the OutputImage from the Image Source to the CogToolBlock, as shown:
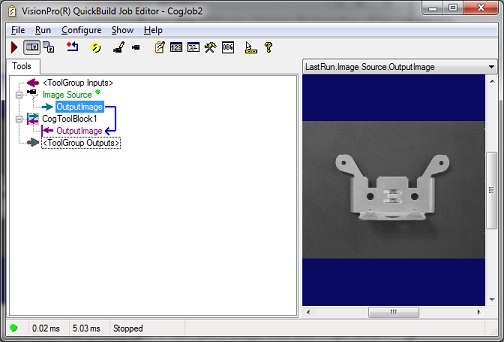
- Open the CogToolBlock and rename OutputImage to InputImage.
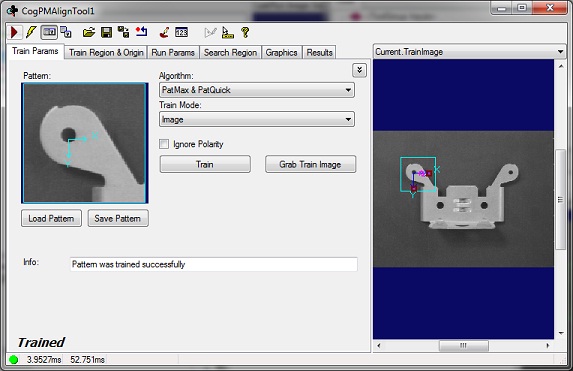
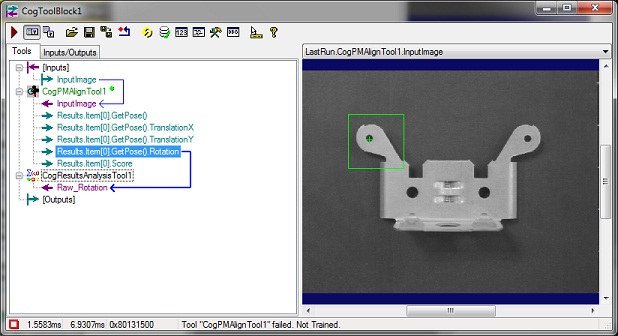
Add a CogPMAlign tool to the CogToolBlock and configure it to locate a corner of the bracket as shown:
- Add a CogResultsAnalysis tool to the CogToolBlock.
Open the CogResultsAnalysis tool and create an input named Raw_Rotation:
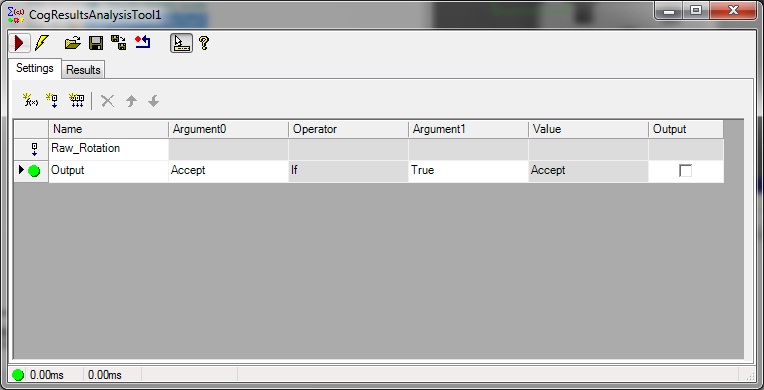
Assign the Rotation result of the CogPMAlign tool to the Raw_Rotation input of the CogResultsAnalysis tool:
Configure the CogResultsAnalysis tool to generate a Reject result if the bracket does not appear flat in the image. In addition, generate a Grade expression that can be assigned a grade of "Flat", "Left", or "Right". The following figure shows how a CogResultsAnalysis tool can be configured to generate these results:
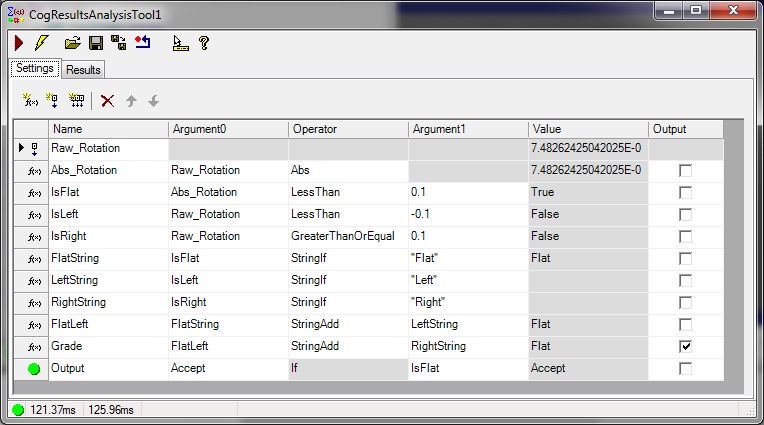
Be aware that you must output the Grade expression.
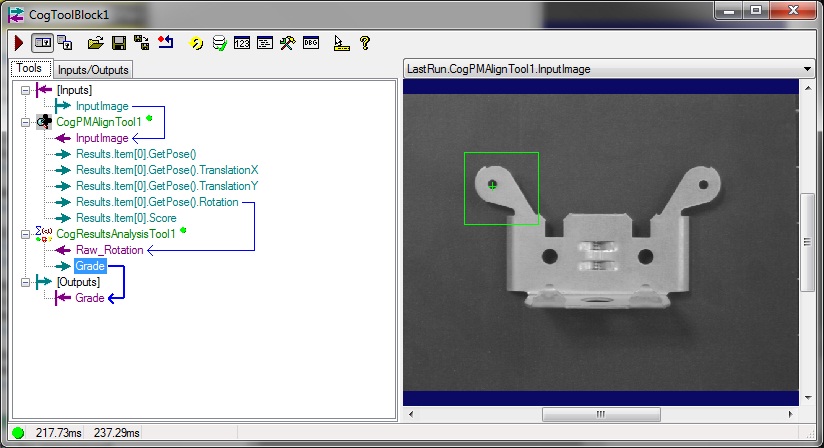
Pass the Grade expression as an output to the CogToolBlock:
- Test the Job several times with all the images in the image-database to verify that the CogToolBlock generates the correct result for the result and the Grade.
With the CogToolBlock configured you can now verify the image archive against the database generated with the Image Grading Utility.
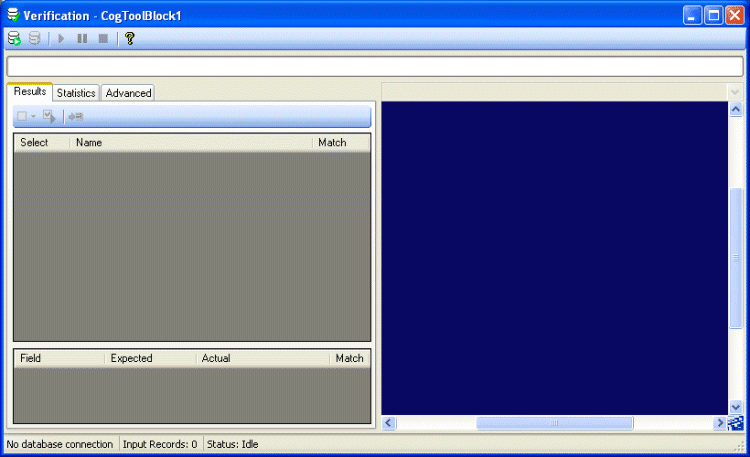
Click on the Verification button along the top of the CogToolBlock to open the Verification control, which appears as shown in the following figure:
- Click the Connect to database icon on the top-left of the Verification control to connect to the C:\Verification database created earlier in this example.
Click the Run verification button along the top of the Verification control to perform a comparison.
The Verification control compares each image of the image archive in bracket_std.idb to the image database and displays the results as shown:
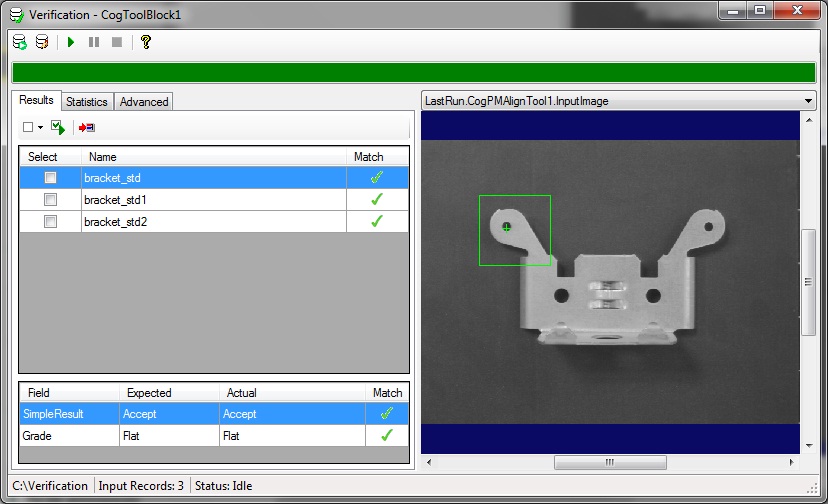
- Scroll through the results of the verification and observe how it returned accurate results for images marked as Accept in the Image Grading Utility and for images marked as Reject, as well as determining the right grade for each record.