This topic contains the following sections.
The Image Sharpness tool edit control provides a graphical user interface to the CogImageSharpnessTool tool, which you use to judge the sharpness of an acquired image. The edit control allows you to specify an operating mode, select a portion of the input region you want to analyze, and view a sharpness score for the last image. The following figure shows the Image Sharpness tool edit control:
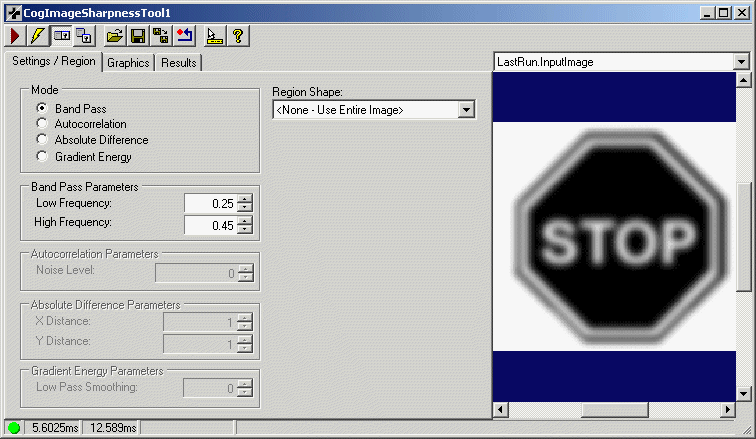
The edit control offers the following features:
- A row of control buttons at the top left provide access to the most common operations.
- A set of function tabs allow you to choose the type of sharpness algorithm you want to use, select display graphics, and view a result score.
- An image display window displays acquired images and graphical results of the Image Sharpness tool.
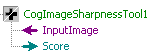
You can experiment with the edit control by using QuickBuild to create a CogImageSharpness tool. A new CogImageSharpness tool appears with the input terminal for the input image and an output terminal for the sharpness score, as shown in the following figure:
To include the edit control in your custom vision application, you must first add it to your Visual Studio.NET development environment. See the topic Add a Control for more information.

The following table describes the function of each button:
| Button | Description | Function |
 | Run | Generate a sharpness score for the Current.InputImage. |
 | Electric mode | Toggle electric mode, where the Image Sharpness tool executes automatically when particular configuration parameters change. In electric mode, a lightning bolt appears next to every electric property. |
 | Local image display | Open or close the local image display window. A Image Sharpness tool supports the following image buffers:
|
 | Floating image display | Open a floating image window, which supports the same image buffers as the local image display window. |
 | Open | Open a VisionPro persistence (.vpp) file that contains a set of saved properties for this vision tool object type. VisionPro reports an error if you try to open a .vpp file for another object type. |
 | Save | Save the current properties of the vision tool to a VisionPro persistence (.vpp) file. The edit control allows you to choose between saving the vision tool with or without its image buffers and tool results. |
 | Save As | Save the current properties of the vision tool to a new VisionPro persistence (.vpp) file. |
 | Reset | Reset the vision tool to its default state. |
 | Show ToolTips | Enable or disable the display of tooltips for individual items in the edit control. |
 | Help | Open this VisionPro online help file. |
This section contains the following subsections.
- Mode
- Band Pass Parameters
- Autocorrelation Parameters
- Absolute Difference Parameters
- Gradient Energy
- Region Shape
Use the Settings tab to choose an operating mode and specify any parameters the various modes require. The following figure shows the default Settings tab:
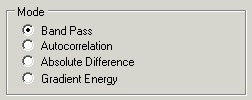
Use the following options to choose an operating mode:
| Mode | Description |
| Band Pass | Analyze the image based on a range of edge frequencies. |
| Autocorrelation | Analyze the image based on its blurriness. |
| Absolute Difference | Analyze an image based on the difference between each pixel in the image and a corresponding pixel at a specified offset within the same image. |
| Gradient Energy | Analyze an image based on the pixel-to-pixel contrast between adjacent pixels. |
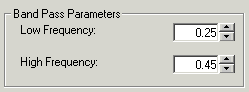
If you use the Band Pass filtering mode you must provide values for the following parameters:
| Parameter | Description |
| BandPassMinFrequency | Set the low frequency limit for the band pass range, where the minimum value is 0.0. |
| BandPassMaxFrequency | Set the high frequency limit for the band pass range, where the maximum value is 0.5. |
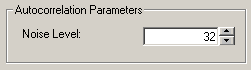
The Autocorrelation Noise Level represents the grey-level variation inherent in the sensor. It should be be significantly smaller than the grey-level range observed in the image.
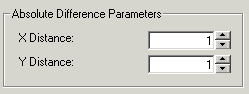
If you use Absolute Difference mode you must provide values for the following parameters:
| Parameter | Description |
| AbsDiffDistanceX | Set the image offset along the x-axis. |
| AbsDiffDistanceY | Set the image offset along the y-axis. |

Increase the GradientEnergyLowPassSmoothing parameter to remove potential high-frequency noise from the image.
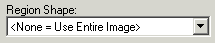
You can use the Image Sharpness tool on the entire image or select a specific area of the Current.InputImage to analyze. You can select any of the following region shapes:
The set of region-defining parameters that appear depend on the region shape you use. For more information on using a polygon as an input region, see Using Polygon Input Regions.
Use the Graphics tab to specify the graphics that the tool generates and displays. The following figure shows the Graphics tab:
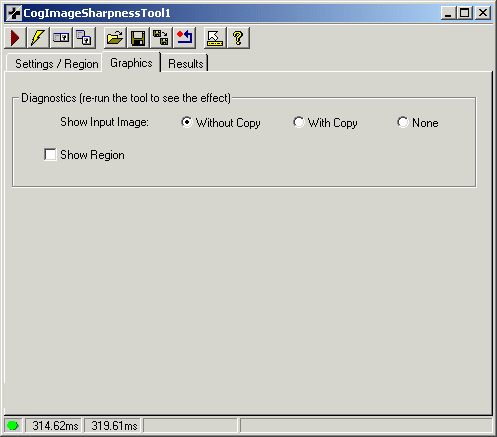
Choose which of the following graphics appear in the LastRun.InputImage buffer after the tool performs its image-processing operations:
| Option | Description |
| Show Input Image | Determine whether or not the input image is recorded as part of the diagnostic record, and whether the image is copied to the record or saved in the record as a reference. |
| Show Region | Display the input region if one was used. |
Use the Results tab to view the result score given to the last image the Image Sharpness tool analyzed. The following figure shows a Results tab:
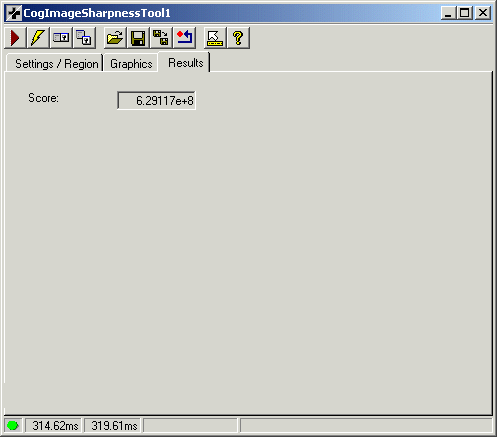
The Score varies depending on the operating mode you are using. The higher the score, the greater the sharpness of the image stored in the Current.InputImage buffer.