EtherNet/IP PLC Configuration
Perform the following steps to enable EtherNet/IP:
-
Launch In-Sight Vision Suite. Select the vision system you wish to configure on the Device Pane (1), then click the Industrial Ethernet button in the Utilities tab (2).
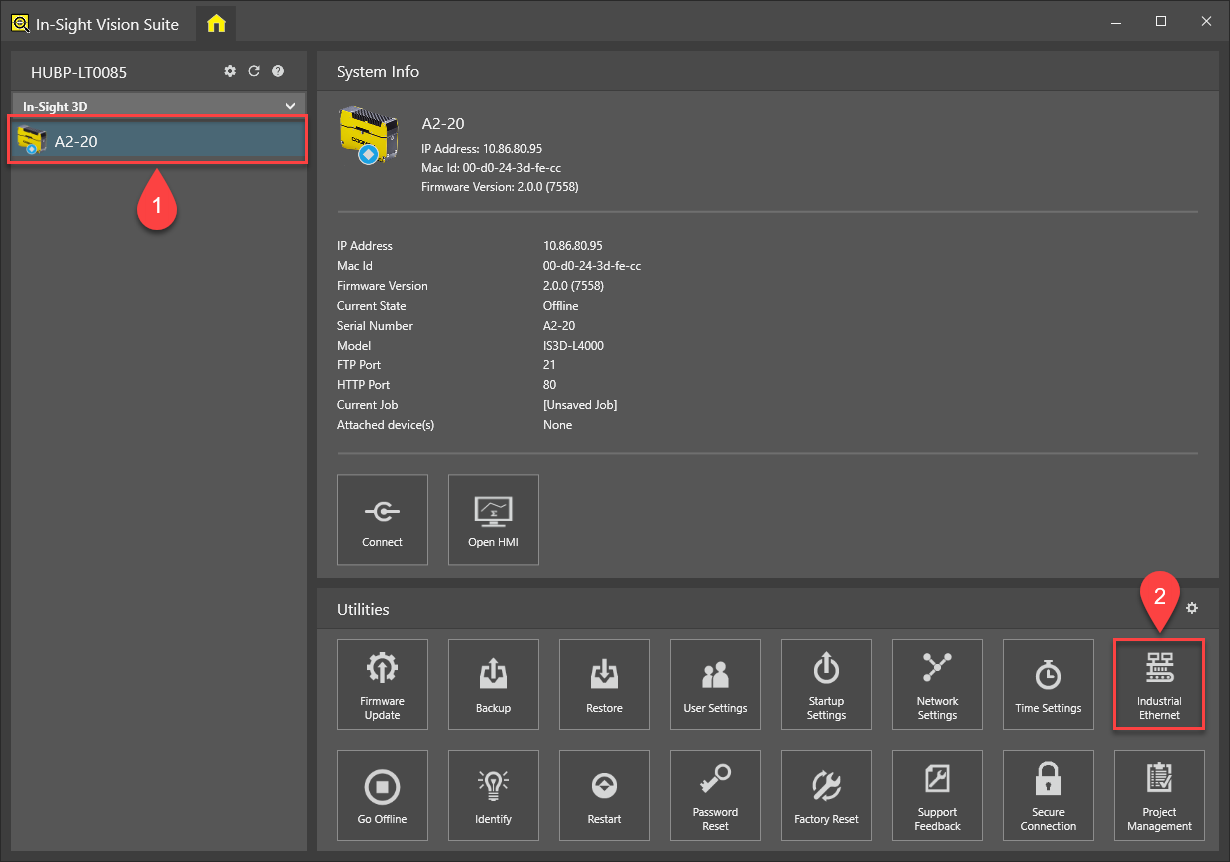
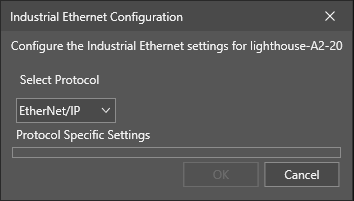
The Industrial Ethernet Configuration dialog will then appear.
 Tip:
Tip:- If you are already connected to a vision system, and have the In-Sight Spreadsheet adapter open, click the Home button at the top left corner of the application window to switch to the In-Sight Vision Suite interface. After that, select the vision system you want to configure and open the Network Settings dialog as described above.
- You cannot configure vision systems that you are already connected to (in other words, for which the In-Sight Spreadsheet adapter window is already open). The available utilities (including the Network Settings utility) are enabled only if you are not connected to that device.
-
Use the drop-down menu, and select Ethernet/IP as the protocol to use. Click OK to apply your changes.
Tip: If you are changing this setting from another protocol (such as PROFINET) to Ethernet/IP, the dialog may prompt you to restart the vision system. -
Install the Electronic Data Sheets (EDS) file for the vision system, which is installed along with the In-Sight software. See the Install the EDS Files topic for detailed instructions.
- Install the RSLogix5000 or Studio5000 application on the same PC on which the In-Sight software is running.
-
Configure the Rockwell Software so that it recognizes the In-Sight vision system. See the Establish the Connection Using the EDS Generated Profile topic for more information.
- See the Get Data from an In-Sight Vision System topic for more information on how to get data from an In-Sight vision system to a ControLogix PLC.
- See the Send Data to an In-Sight Vision System topic for more information on how to send data from a ControLogix PLC to the In-Sight vision system.