This topic contains the following sections.
You use the Add Font Models dialog box to create a normal font model and store a representation of the type of character you will see in each acquired image. The following figure shows the Add Font Models dialog box:
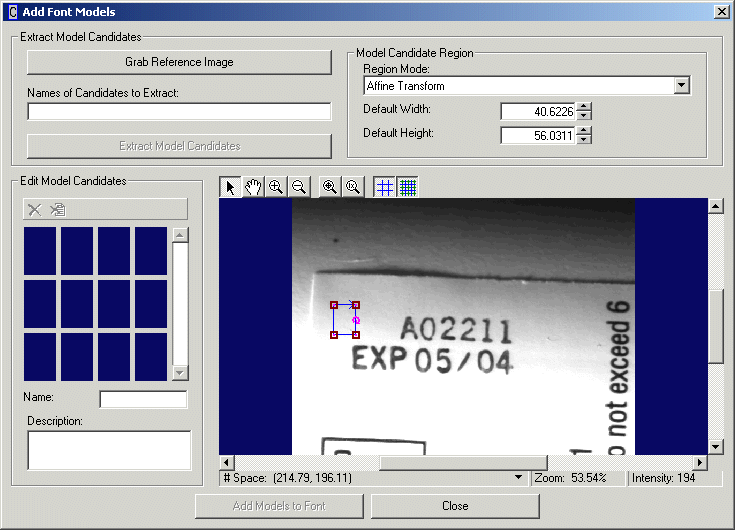
An image window in the dialog box shows you the image in the Current.PatternReferenceImage buffer or the current input image if no reference image is available. The graphics within the image allow you to select the particular character you want to use to build a font model, while a thumbnail gallery of font model candidates shows you the font models you will add to the current font.
You access the Add Font Models dialog box by using the


The Extract Model Candidates area of the dialog box supports the following features:
| Feature | Description |
| Grab Reference Image | Copy the latest image from the OCV tool Current.InputImage buffer and display it in the image window. |
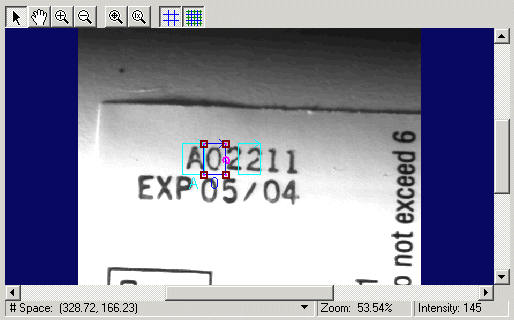
| Name of Candidates to Extract | Enter a name for this font model, or enter a name for each font model when you want to create multiple models simultaneously. When you want to create one font model, use a single character such as "E", "p" or "/" to name the model. If you use more than one character in the name, the dialog box assumes you want to create a font model for each character in the name. For example, you might use the name "EXP" to create font models for the characters "E", "X", and "P" simultaneously. In this case the image window displays multiple graphic regions, one for each font model you want to create. |
Extract Model Candidates | Extract the information currently contained within the region graphic of the image window and create a font model candidate from it, appending it to the current set of font model candidates. If you have multiple characters specified in the string, then multiple font model candidates are appended to the current set. The dialog box does not enable this button until you enter a name (or names) for this font model candidate (or candidates). |
Model Candidate Region | Use the Region Mode list to select the type of region the graphic in the image window represents. Choose from any of the following three region types:
For example, the following figure shows the region graphic around the letter "I" and how each will appear if chosen as a font model candidate using each of the three types of candidate regions: 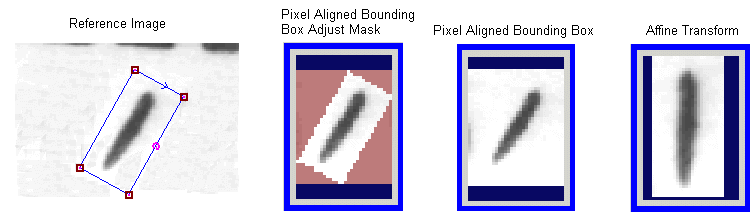 Most OCV applications can use the Affine Transform region to successfully create a font model candidate. Choose one of the other two types of region when the character in the image appears rotated and you know that each acquired image of the verification string will contain the same rotation of that character. Choose Pixel Aligned Bounding Box Adjust Mask when the features next to the character in each image can vary and you want to prevent them from analysis by the OCV tool. Use the Default Width and Default Height fields to specify an exact measurement for the width and height of the graphic region from which the models are extracted. |
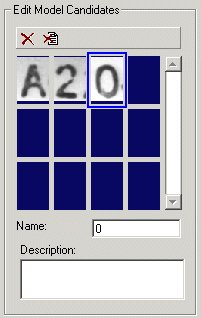
Use the Edit Model Candidates area to view the model candidates you create from the current image. The dialog box adds new candidates to the thumbnail gallery when you click the Extract Model Candidates button. Use the


The Name field reflects the name you gave the candidate model when you created it. You can change the name here so that it has multiple characters, such as "Logo". You can also provide an optional description of the candidate in the Description field.
The candidate font models are not added to the font until you click the Add Models to Font button at the bottom.
The image window of the dialog box shows the current image and the graphics you use to select the area of the image you want to use as a candidate font model. The top of the window contains a button bar for you to control the view of the image. Use the region graphic to select the character or characters from which you want to create a font model. The graphic contains size and rotation handles to properly enclose the character. For best results, the region should adhere to the following characteristics:
- The region size should be a minimum of 10 x 10 pixels up to a maximum of 64 x 64 pixels. Larger regions sizes might improve reliability but will increase the time tool requires to execute.
- No more than 10% of the character should be missing. Use the Image and Mask capability of the Font Editor to fill in pixels if necessary.
- The region should contain a border of white space between one and three times the stroke width of the character.
Read the background information on font models for more information on what characteristics make a good font model candidate.

Use the Add Models to Font button to add the model candidates in the Edit Model Candidates area to the current font. If you close the Add Font Models dialog box without adding the candidates to the current font, the OCV tool discards the candidates.