This topic contains the following sections.
The CogColorSegmenterTool tool analyzes a color input image and generates a grey scale output image where portions that have a desired range of color become light pixels and those portions outside the desired range of color become dark pixels. The output image the tool generates consists of collections of non-zero grey pixels that can be easily analyzed by a Blob tool.
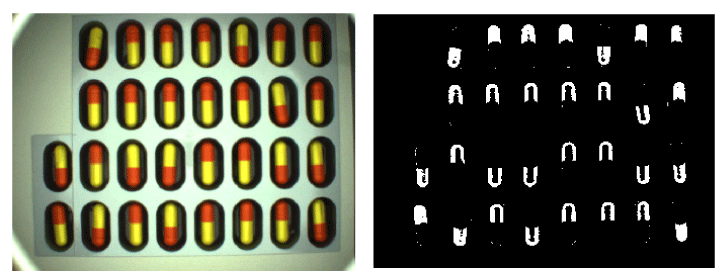
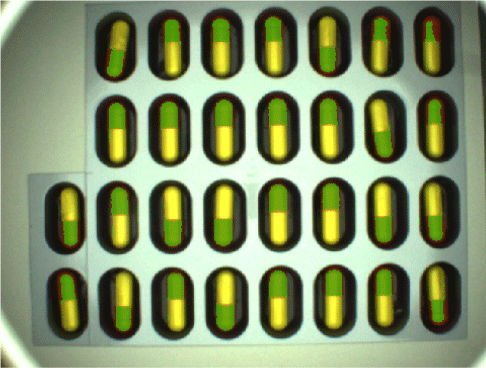
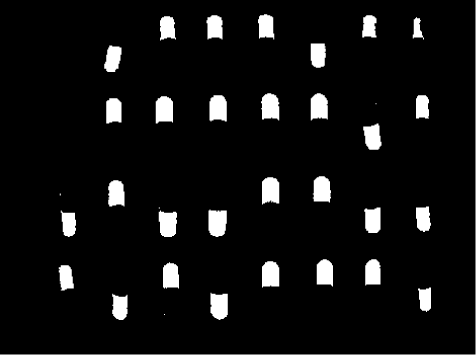
For example, the following figure shows a blister pack of medication and the output image it produces when a Color Segmenter tool has been configured to locate the red half of each pill:
For more information on the Color Segmenter tool, see the topics Color Segmenter Tool and Color Segmenter Tool Edit Control.
The following example shows you how to configure a QuickBuild Job to verify that a blister pack contains the correct number of pills, with the pills identified as being half red as shown in the previous figure.
- Launch QuickBuild.
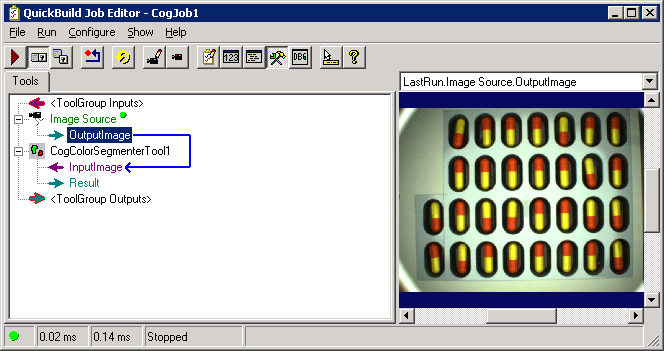
- Double-click on the Image Source for CogJob1 and configure the image source to use the image database file blister.tif, which is located by default in C:\Program Files\Cognex\VisionPro\Images.
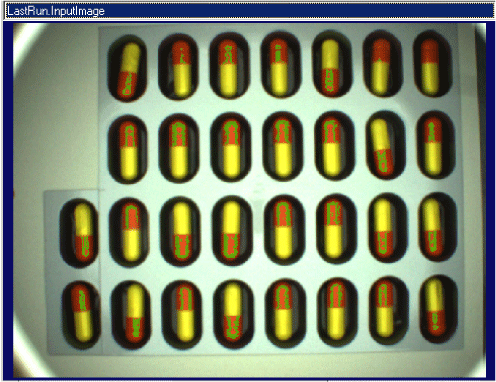
Close the image source dialog box and run the Job once to give it an initial image, as shown in the following figure:

Create a new CogColorSegmenterTool and give it the OutputImage from the Image Source, as shown:
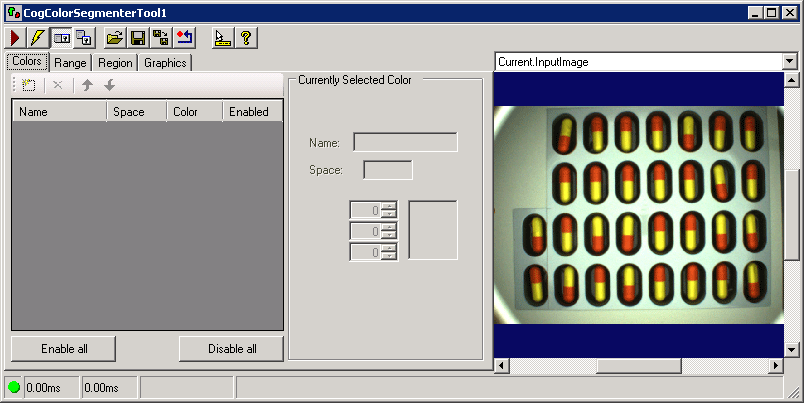
Double-click on CogColorSegmenterTool to open its edit control:
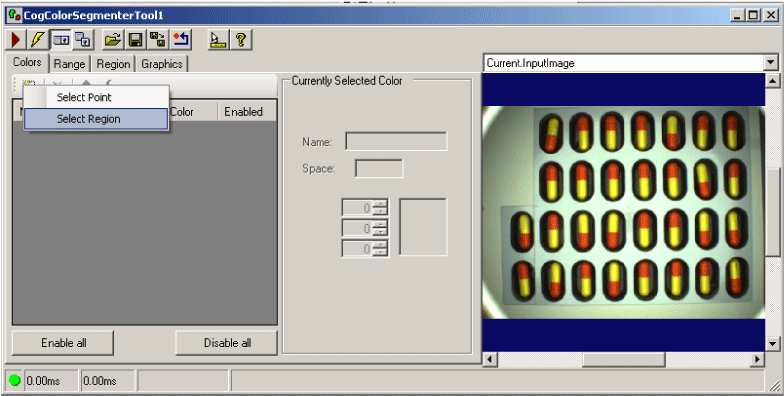
On the Colors tab, begin adding a color range for the red half of each pill by selecting the Add New button and choosing Select Region, as shown:
This places a region graphic over the Current.InputImage, as shown:

The default shape of the region is a CogRectangle, but the edit control allows you to switch to other region shapes. For this example, the CogRectangle is suitable.
Use the region graphic to closely surround the red half of any pill in the image. Zoom in on the Current.InputImage as necessary to help you align the graphic to the red color, as shown in the following example:
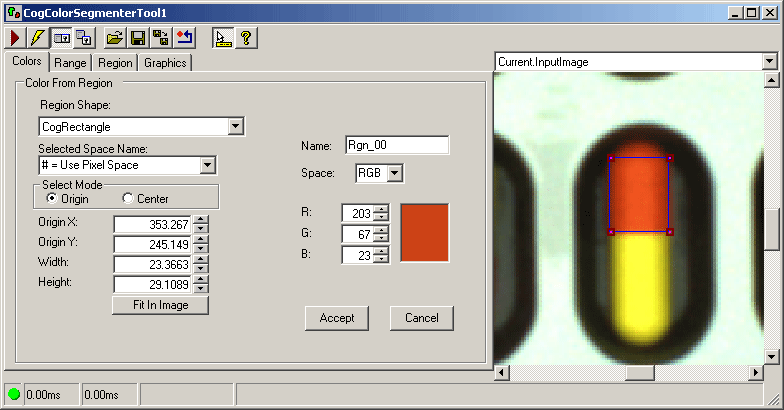
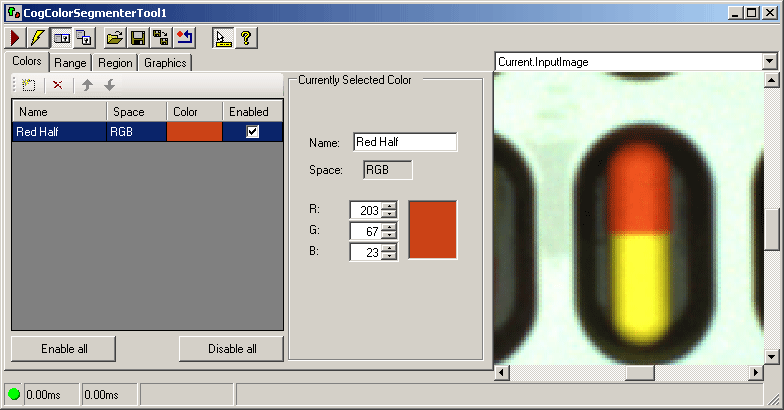
Use the controls in the Color tab to name the color range Red Half and click Accept to add it to the range collection, as shown:
The Color Segmenter tool generates an average color value from the pixels contained within the region you specify, and allows you to widen the range manually as needed as you test acquired images.
Click the Run button to run the Color Segmenter tool once, and switch to LastRun.InputImage to see the effect, as shown in the following example:
The green overlay color indicates the pixels in the Current.InputImage that the tool considers to be within the desired color range of Red Half. This image shows that the Color Segmenter has indentified many red pixels that fall in the Red Half color range, but fails to pick up many other portions of red.
Switch to the Range tab of the edit control.
The Range tab displays a histogram of pixel values for each color plane in the color space of the Current.InputImage. Since the current image uses the RGB color space, the Range tab contains a histogram for the Red, Green, and Blue color planes. The following figure shows the R-Plane for the red pixels in the image:
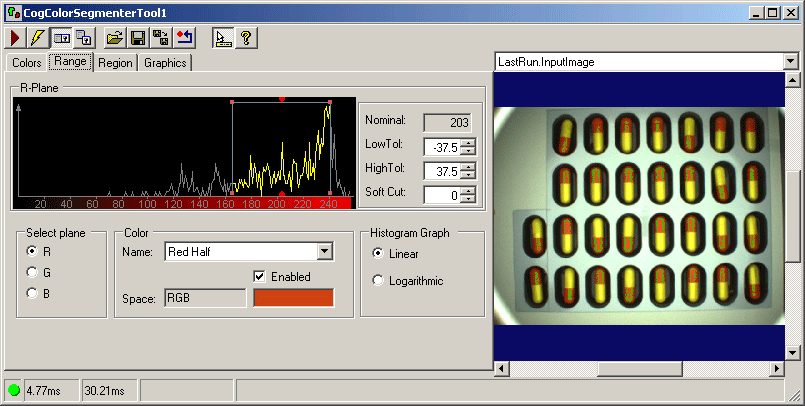
Each color range is defined by a nominal value along with its low tolerance and high tolerance. The following figure highlights these indicators for the current R-Plane:
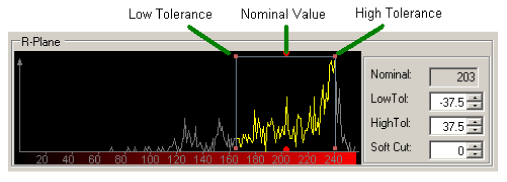
The nominal value cannot be altered, but the Range tab allows you to dramatically change the values for the low and high tolerances.
- Select the handle for the low tolerance along the R-Plane and increase the allowable range along the Red color plane and run the Color Segmenter tool again to notice any changes in LastRun.InputImage.
Select both the Green and Blue color planes and adjust the low and high tolerance values for those planes as well. After each modification, run the Color Segmenter tool again to notice the difference in the pixels it considers to be within the Red Half color range. Setting the ranges for each color plane is an iterative process: changing a value for tolerances, running the tool again to notice the difference, and making further changes in tolerance values.
For this image, you would likely need to increase the range in all three colors planes: Red, Green, and Blue.
Stop making changes to the color ranges when the Color Segmenter correctly identifies most of the red pixels, as shown in the following figure:
Correctly configured, this Color Segmenter tool produces a segmented image where only the red half of each pill can be identified, as shown in the following example:
If you increase the range of color too much for one or more color planes, the Color Segmenter will incorrectly identify the yellow portion of many pills to be within the color range defined by Red Half, which is undesirable and shown in the following figure:

- Close the edit control for the Color Segmenter tool and return to the Job editor.
Add a new Blob tool to the Job editor and give it the Result generated by the Color Segmenter tool:

Open the Blob tool edit control:

Modify the Blob tool parameter Polarity to be Light blobs, Dark background, and then run the Blob tool once.
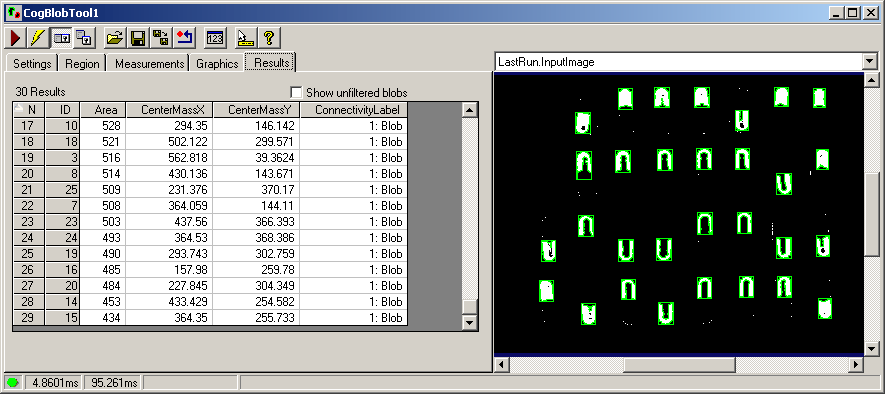
In this application, a typical blister pack contains 30 pills. Switch to the Results tab of the Blob tool to verify how many blobs the tool has counted. Depending on how precisely you have configured the color range for Red Half, the tool might count more than 30 blobs, as shown in the following example:

If necessary, switch back to the Settings tab and specify a higher Min Area than the default. For this application, a minimum area of 50 pixels should suffice. When the Blob tool is properly configured, it counts 30 blob pixels as shown in the following example:
- Close the Blob tool edit control.
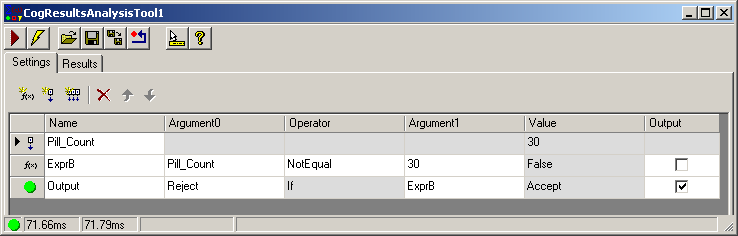
Add a Results Analysis tool to the Job editor and configure it to receive an input value titled Pill_Count. Expose the value of Pill_Count and link it the Count result of the Blob tool:

Build an expression in the Results Analysis tool to generate a False result when the value of Pill_Count does not equal 30, as shown:
- Run the entire Job several times to cycle through the images in blister.tif. When an image contains fewer than 30 good pills, the Results Analysis tool will generate a reject-level result.