Process Image for Defects with CogBlobTool
The CogBlobTool is used to count the number of imperfections (hereafter called "blobs") in the region you previously defined in the InspectImage task block which ran CogImageConvertTool.
During this procedure, you will use CogBlobTool to scan for blobs that have been identified in close proximity to the letter O in the word Jell-O on the Jell-O Box label.
Perform the following steps to add and configure a VisionPro tool block in your application that counts imperfections or "blobs".
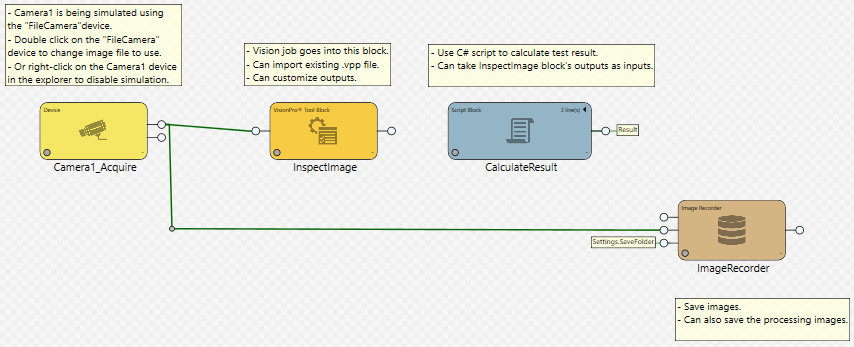
- In the Task window, verify that your work flow looks like the following before continuing. If Select an Image Source and Acquire Your Image, select the Task window and click
 .
. - Add a VisionPro Tool Block from the Toolbox pane to the Task Window by doing the following:
- Select the Toolbox tab in the upper-right pane of the Cognex Designer interface if it has not already been selected.
- From the Toolbox pane, select Vision > VisionPro Tool Block.
-
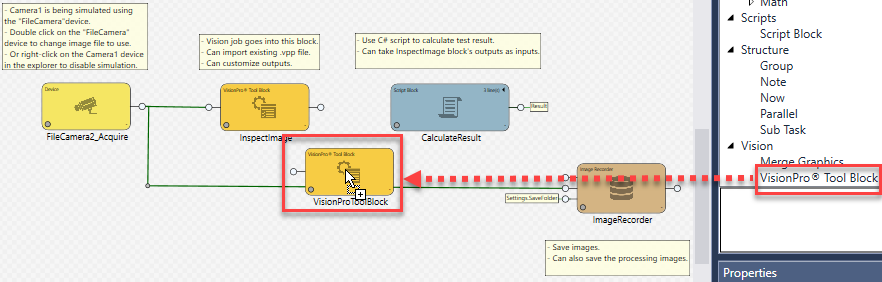
From the Toolbox pane, drag the VisionPro Tool Block to the Task window, placing it below and between the InspectImage and CalculateResult blocks.
-
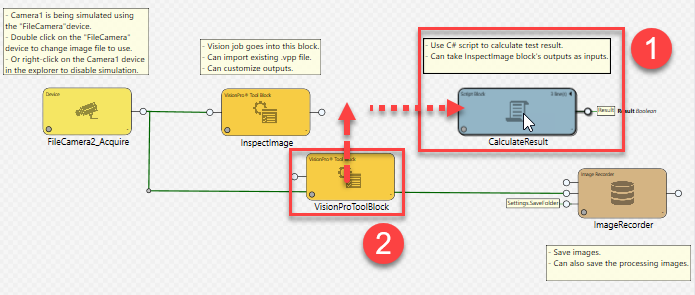
Select and drag the CalculateResult block to the right (1), so you can place the VisionProToolBlock between the InspectImage and CalculateResult blocks (2). Remember that when ordering blocks in a Task window, it is important to adhere to a left-to-right placement, as tasks execute from left to right.
-
Rename the VisionProToolBlock to reflect the processing this block will perform. While this step is optional, it is good practice and creates a well-documented application. Descriptive block labels make the functionality of your vision application apparent to everyone using your Cognex Designer application, both in development and deployment modes. Do the renaming as follows:
-
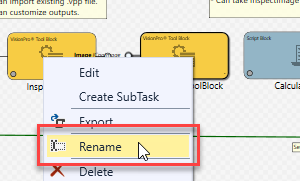
Right-click on the VisionProToolBlock that you have just added, and click Rename.
-
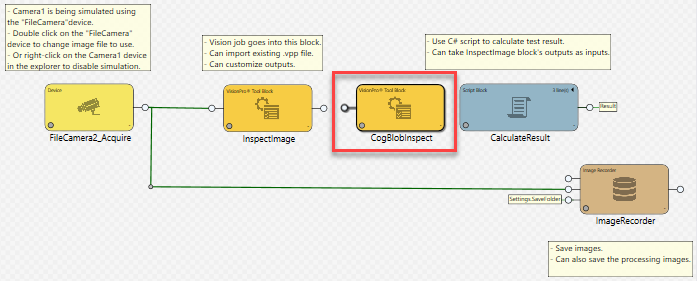
Type CogBlobInspect. Click any place in the Task window to rename the block.
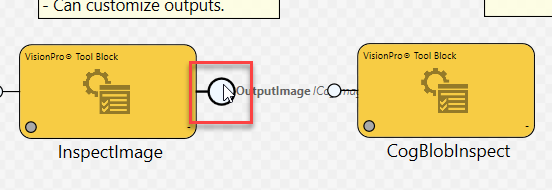
- Pass the OutputImage link from the InspectImage block to the CogBlobInspect block by drawing a connector line between the two blocks. Do this as follows:
Click and hold the left mouse button on the output pin of the InspectImage block. The selection of the pin is indicated with its increased size.
Drag the mouse to draw a connector line to the input pin on the left side of the CogBlobInspect block, and release the mouse button. The two blocks then get connected.
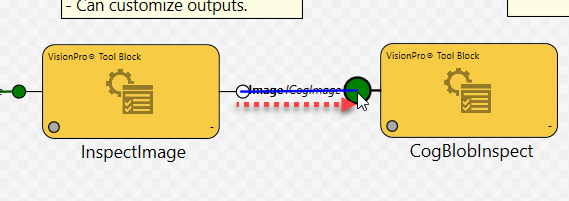
Tip:The status of the block connections in the Task is indicated by various colors:
- Connected lines are green.
- Incomplete lines (or lines that are being drawn) are red.
- Lines that are drawn and ready to be connected are blue.
- Configure the CogBlobInspect tool to find defects (blobs) in the image area you defined when you configured CogImageConvertTool as part of this vision application. Do this as follows:
- In the Task window, double-click the CogBlobInspect block. An instance of VisionPro Quick Build opens in the Sequence Editor. The window is labeled Task.CogBlobInspect.
- Run Task.CogBlobInspect by clicking the
 (Run) button.
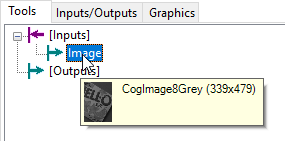
 In the Task.CogBlobInspect tab, point your mouse to Inputs > Image. A preview of the select region to be inspected (CogImage8Grey) appears.
-
Select, then drag-and-drop the CogBlobTool from the Toolbox pane to the Task.CogBlobInspect tab.

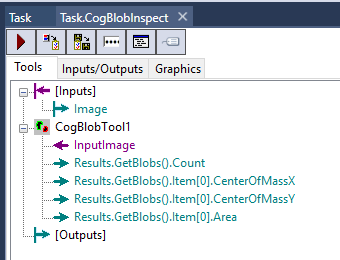
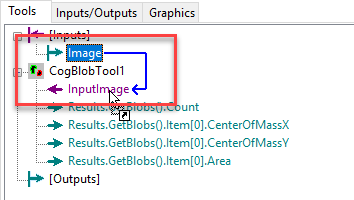
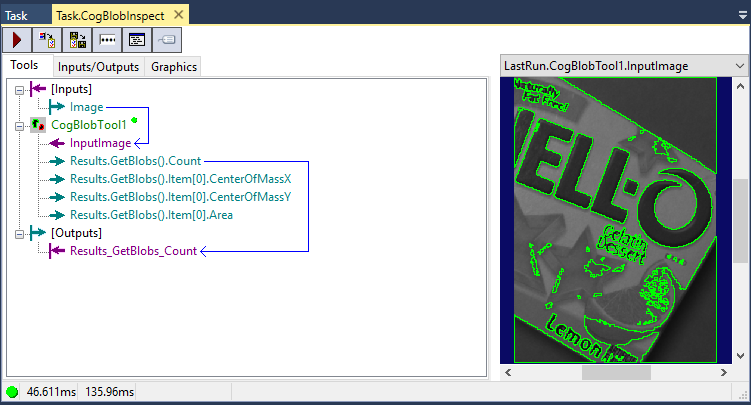
After you do, the Tools node should appear as seen below.
-
Define the cropped image that you have created previously in the CogBlobInspect block as the input for CogBlobTool. To do that, select the [Inputs] > Image node, hold the left mouse button, and draw a connection line from Image to CogBlobTool1 > InputImage.
-
Since the goal is to display the number of detected blobs on the project's HMI, you need to establish some additional connections. Select the CogBlobTool1 > Results.getBlobs().Count node, hold the left mouse button, and then draw a connection to the [Outputs] node, creating the link Results_GetBlobs_Count within the [Outputs] node. This way, you have defined CogBlobTool's blob count to be an output of the CogBlobInspect task block.
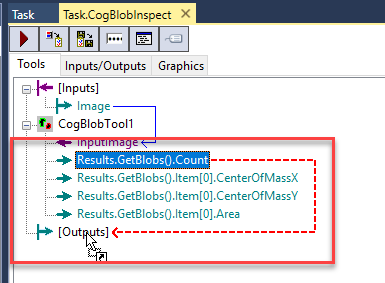
- Click the Task tab at the top of the pane to check the Task Editor and the current status of the CogBlobInspect task block. Since you defined an output for the CogBlobInspect block in the previous step, you now have an output pin at the right-side of that block in the Task window, as shown below. Note that the link name is the same as it was in the VisionPro Quick Build window: Results_GetBlobs_Count, defined as an integer.
- Click the Task.CogBlobInspect tab again to open the VisionPro Quick Build window. Run Task.CogBlobInspect again by clicking the (Run) button. You should see something similar to the following image displayed as LastRun.CobBlobTool1.InputImage.
- Click the Task tab again to open the Task Editor, and click the button. Move your mouse over to the output pin on the right side of the CogBlobInspect block. The pop-up then shows the value of the blobs counter (Results_GetBlobs_Count).
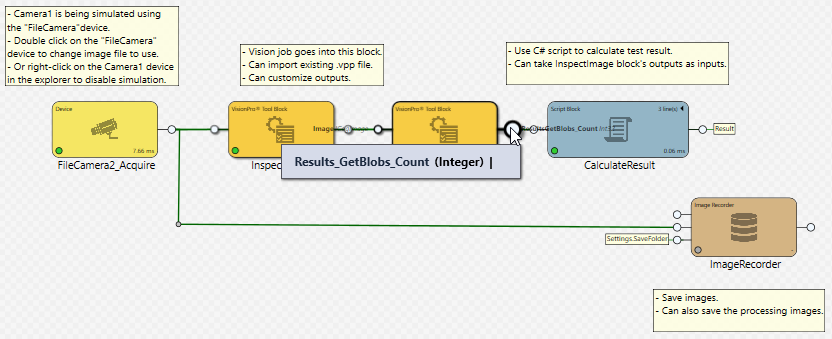
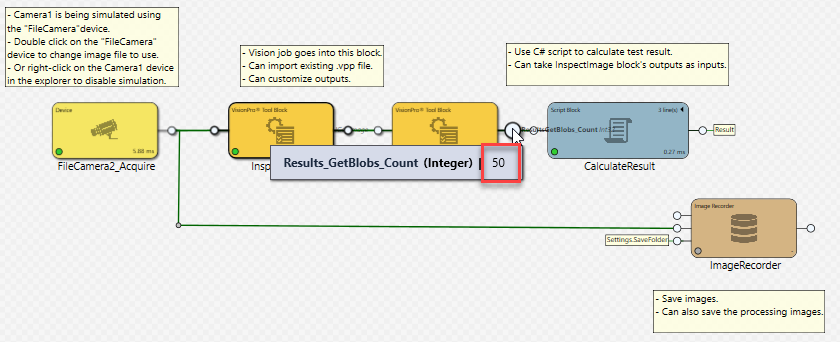
In the example above, the value of Results_GetBlobs_Count. is 50. The value of your Results_GetBlobs_Count result may vary from this example.
With this procedure, you configured CogBlobTool in a new task block (CogBlobInspect) to process the image you cropped with CogImageConvertTool. Also, you have created an output pin for the CogBlobInspect block to publish the number of blobs with the Results_GetBlobs_Count VisionPro node.
In the next step (Calculate Cumulative Blob Count Using a Script), you will edit the predefined script that comes with the predefined Single Camera project type used for this example to tally the cumulative number of blobs (defects) that your vision application finds after you run it multiple times.