This topic contains the following sections.
As your deployed application operates in your production environment, QuickBuild will use one or more supported cameras to capture images of the objects you want to inspect. For many applications, development begins by using previously acquired images stored on hard disk. QuickBuild allows you to capture images from stored image files and then analyze them with any combination of vision tools, simulating the results an application will generate with live images once you deploy it to your production environment.
You can designate that the image for a QuickBuild Job come from any of the following sources besides a connected camera:
- A file storing a single image
- An image-database file storing multiple images
- A directory of files containing both single images and image-database files
QuickBuild supports the following file formats:
Bitmap (*.bmp)
VisionPro supports 8-bit and 24-bit depths for bitmap images.
- Tagged image file format (*.tif)
- JPEG (*.jpg)
- Image database (*.idb)
- Portable Networks Graphic (*.png)
Cognex database (*.cdb)
You can use the Cognex IDB Editor to create image-database files or Cognex-database files.
In addition, VisionPro supports both monochrome and color images, but not all vision tools can analyze both image types. You must use monochrome or color images as appropriate for your vision application.
As you create and configure a QuickBuild Job you need to specify the source of each incoming image with the Image Source dialog box:
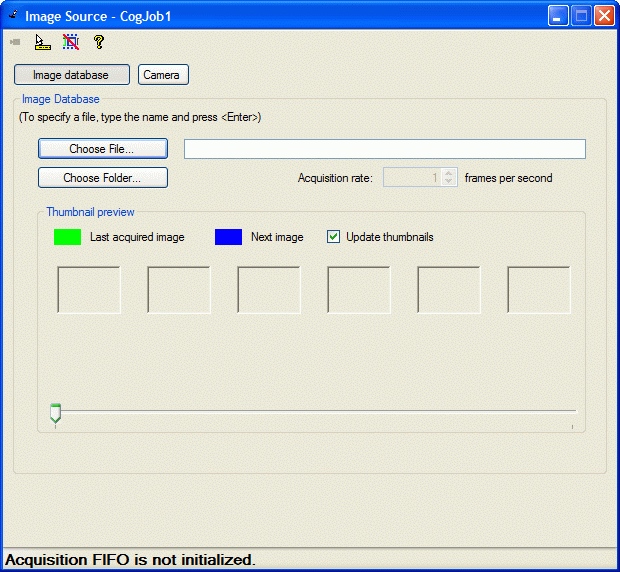
Select acquiring from a camera by clicking the Camera button and use the Camera fields when you are configuring a Job with a camera connected to your PC. When you want to use stored images as acquired images, click the Image database button and use the Image Database fields. This option is selected by default.
The text box along the top allows you to type in the name of the file directly and accepts environment variables, valid UNC syntax, and relative path names based on the current working directory. The text box changes color as you enter a filename, turning pink if its contents do not point to a valid path and blue while the path is valid, as shown in the following figure:
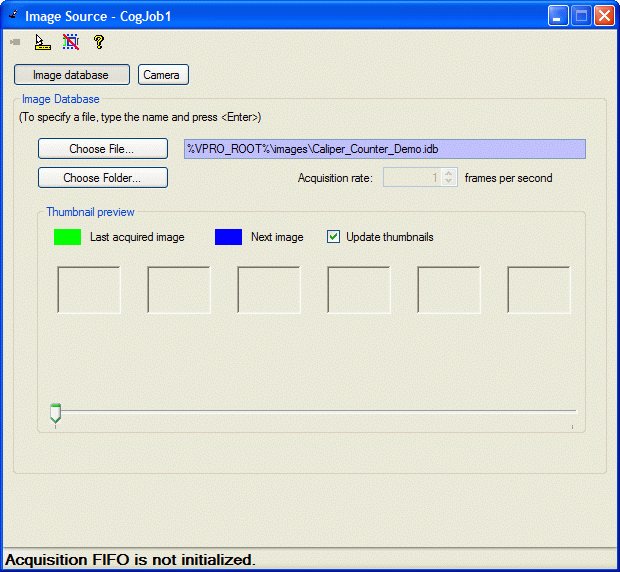
Alternatively, select Choose File to select a single file or an image-database file using a standard Windows dialog box.
Select Choose Folder to specify a folder of files, which can be either single files or databases of image files. QuickBuild displays a dialog box for choosing the desired directory, as shown in the following example:
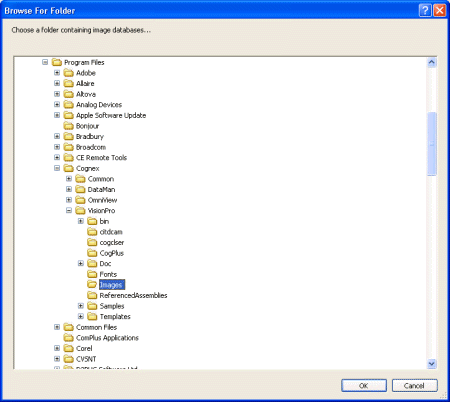
Use the dialog box to select the appropriate directory. Once chosen, QuickBuild will scan the directory for all valid file types and generate a list of files in alphabetical order. The directory can contain any combination of valid file types, and Cognex recommends you plan accordingly if you are storing images of various file types for later use. For example, QuickBuild does not differentiate between monochrome and color images. If you are developing an application to analyze color images, you might find it easier to store all color images together in a directory separate from any monochrome images.
For each image acquisition, QuickBuild uses the next file in sequential order:
- If that file is a single image (.bmp or .tif), the image is read and QuickBuild moves to the next file in the list.
- If that file is a database file (.idb or .cdb), QuickBuild opens the database file and reads the images it contains in sequential order. Once all the images have been read, QuickBuild moves to the next file in the directory, whether it's a single file or a database file.
You should be aware of the following behavior when using a directory of image files:
- QuickBuild ignores files that are not image files.
- QuickBuild does not search sub-directories for image files.
- Once all the image files in a directory have been used as image sources, QuickBuild will re-scan the directory for new files and begin cycling through images alphabetically again.
- QuickBuild will display an error message if you specify a directory containing no valid image files.
- QuickBuild will display an error message if you load a saved QuickBuild application where the Image Source dialog box points to a non-existent directory.
To view the current image file, or to view the images stored in the current directory, click the Show Live Display button along the top of the Image Source dialog box:
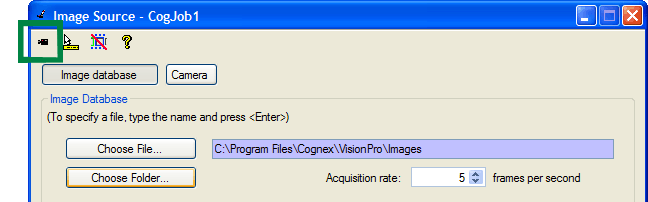
If you specified a single image, that image appears in a separate window. If you specified a database of images, or a directory containing more than a single image, then the window will cycle through all the images you specified. Use the Acquisition rate to specify how many images QuickBuild will acquire per second. Modifying this value can help you simulate a maximum frame rate for your application.
© 2011 Cognex Corporation. All rights reserved.
The Thumbnail preview lets you view the images to be acquired from files as a numbered list of thumbnails. You can also use this to specify on which images the Job should be run.
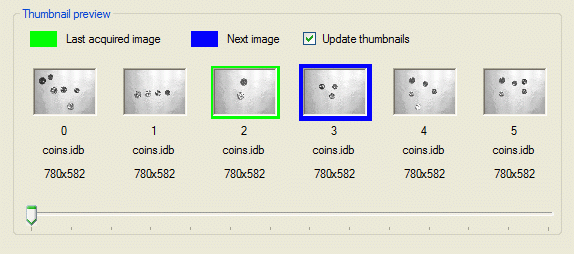
The Thumbnail preview gives you the file name and image size information for the images displayed as thumbnails. You can scroll through all the images without having to run any tools using the track bar at the bottom of the Thumbnail preview.
The last acquired image that has been processed is indicated with a green frame marker, while the next image to be acquired and processed is indicated with a blue frame marker. By default, the Job acquires and processes next the image that comes after the image that was previously acquired and processed in the file/folder. To specify another image to be acquired and processed next, double-click its thumbnail.
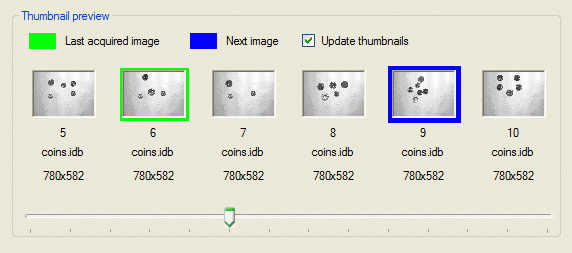
By default, the thumbnails are updated so that the last acquired and processed image is displayed in the middle of the preview. If you want the thumbnails to remain static and the markers to move, uncheck the Update thumbnails checkbox.
You can enable or disable the Thumbnail preview by clicking the Enable/Disable thumbnail preview button.
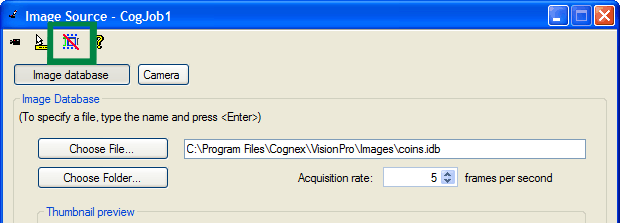
If you disable the Thumbnail preview, the Thumbnail preview elements will become inactive and will not get updated during subsequent Job runs. If you re-enable the Thumbnail preview and run your Job, then the Job will acquire and process the image that comes after the image that was previously acquired and processed (during the inactive phase) in the file/folder unless you select another image to be acquired and processed by double-clicking its thumbnail.