Blue Locate Tool Labels and Markings
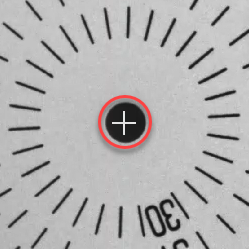
You perform Labeling with the Blue Locate tool by using your mouse and clicking on the features you want to identify. The mouse cursor will change to a cross-hair.
Once you have clicked on the feature, the feature identifier will be displayed, and you will need to assign an identifier to the feature, which will become the label for that feature. The identifier can be any single UTF-8 character. There are two ways to assign an identifier to a feature:
- Click on the feature, and then using your keyboard, type a character. This method only supports the numbers and letters on your keyboard.
- Click on the feature, and when the editing cursor appears, paste the desired UTF-8 character.
After adding an identifier, press the Enter key.
Once you have applied labels to all the features in your images, and you have trained the tool, the tool will apply Markings to the areas of the image that it thinks match the feature. The difference between labels and markings is their appearance.
- You can toggle the display of labels and markings by using Ctrl + L (Toggle Labels) and Ctrl + K (Toggle Markings).
- Labeled features can also be moved by selecting the labeled feature and dragging it to the desired location.
-
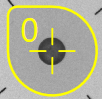
This indicates a labeled feature:

-
This indicates a marking of an individual feature:
-
This indicates that a label of an individual feature was used during training:
-
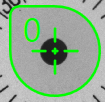
This indicates a labeled feature that is part of a Model:

-
This indicates that a feature is assumed to be a part of a Model, but has not been identified as such:

-
This indicates a marked feature that is part of a Model:

-
This indicates a labeled feature that was part of a Model and used during training:
