ViDiELRead
The ViDiELRead tool enables automatic recognition of text, including letters, numbers, and symbols, from images or live camera feeds. It offers two operational modes:
-
User-Trained: allows you to define specific text patterns by labeling examples and is ideal for achieving higher accuracy on user-specific characters or fonts.
-
Pre-Trained: uses built-in models for immediate deployment.
Additionally, the tool supports three fielding options to accurately detect and interpret text within different image contexts.
To add the ViDiELRead tool:
-
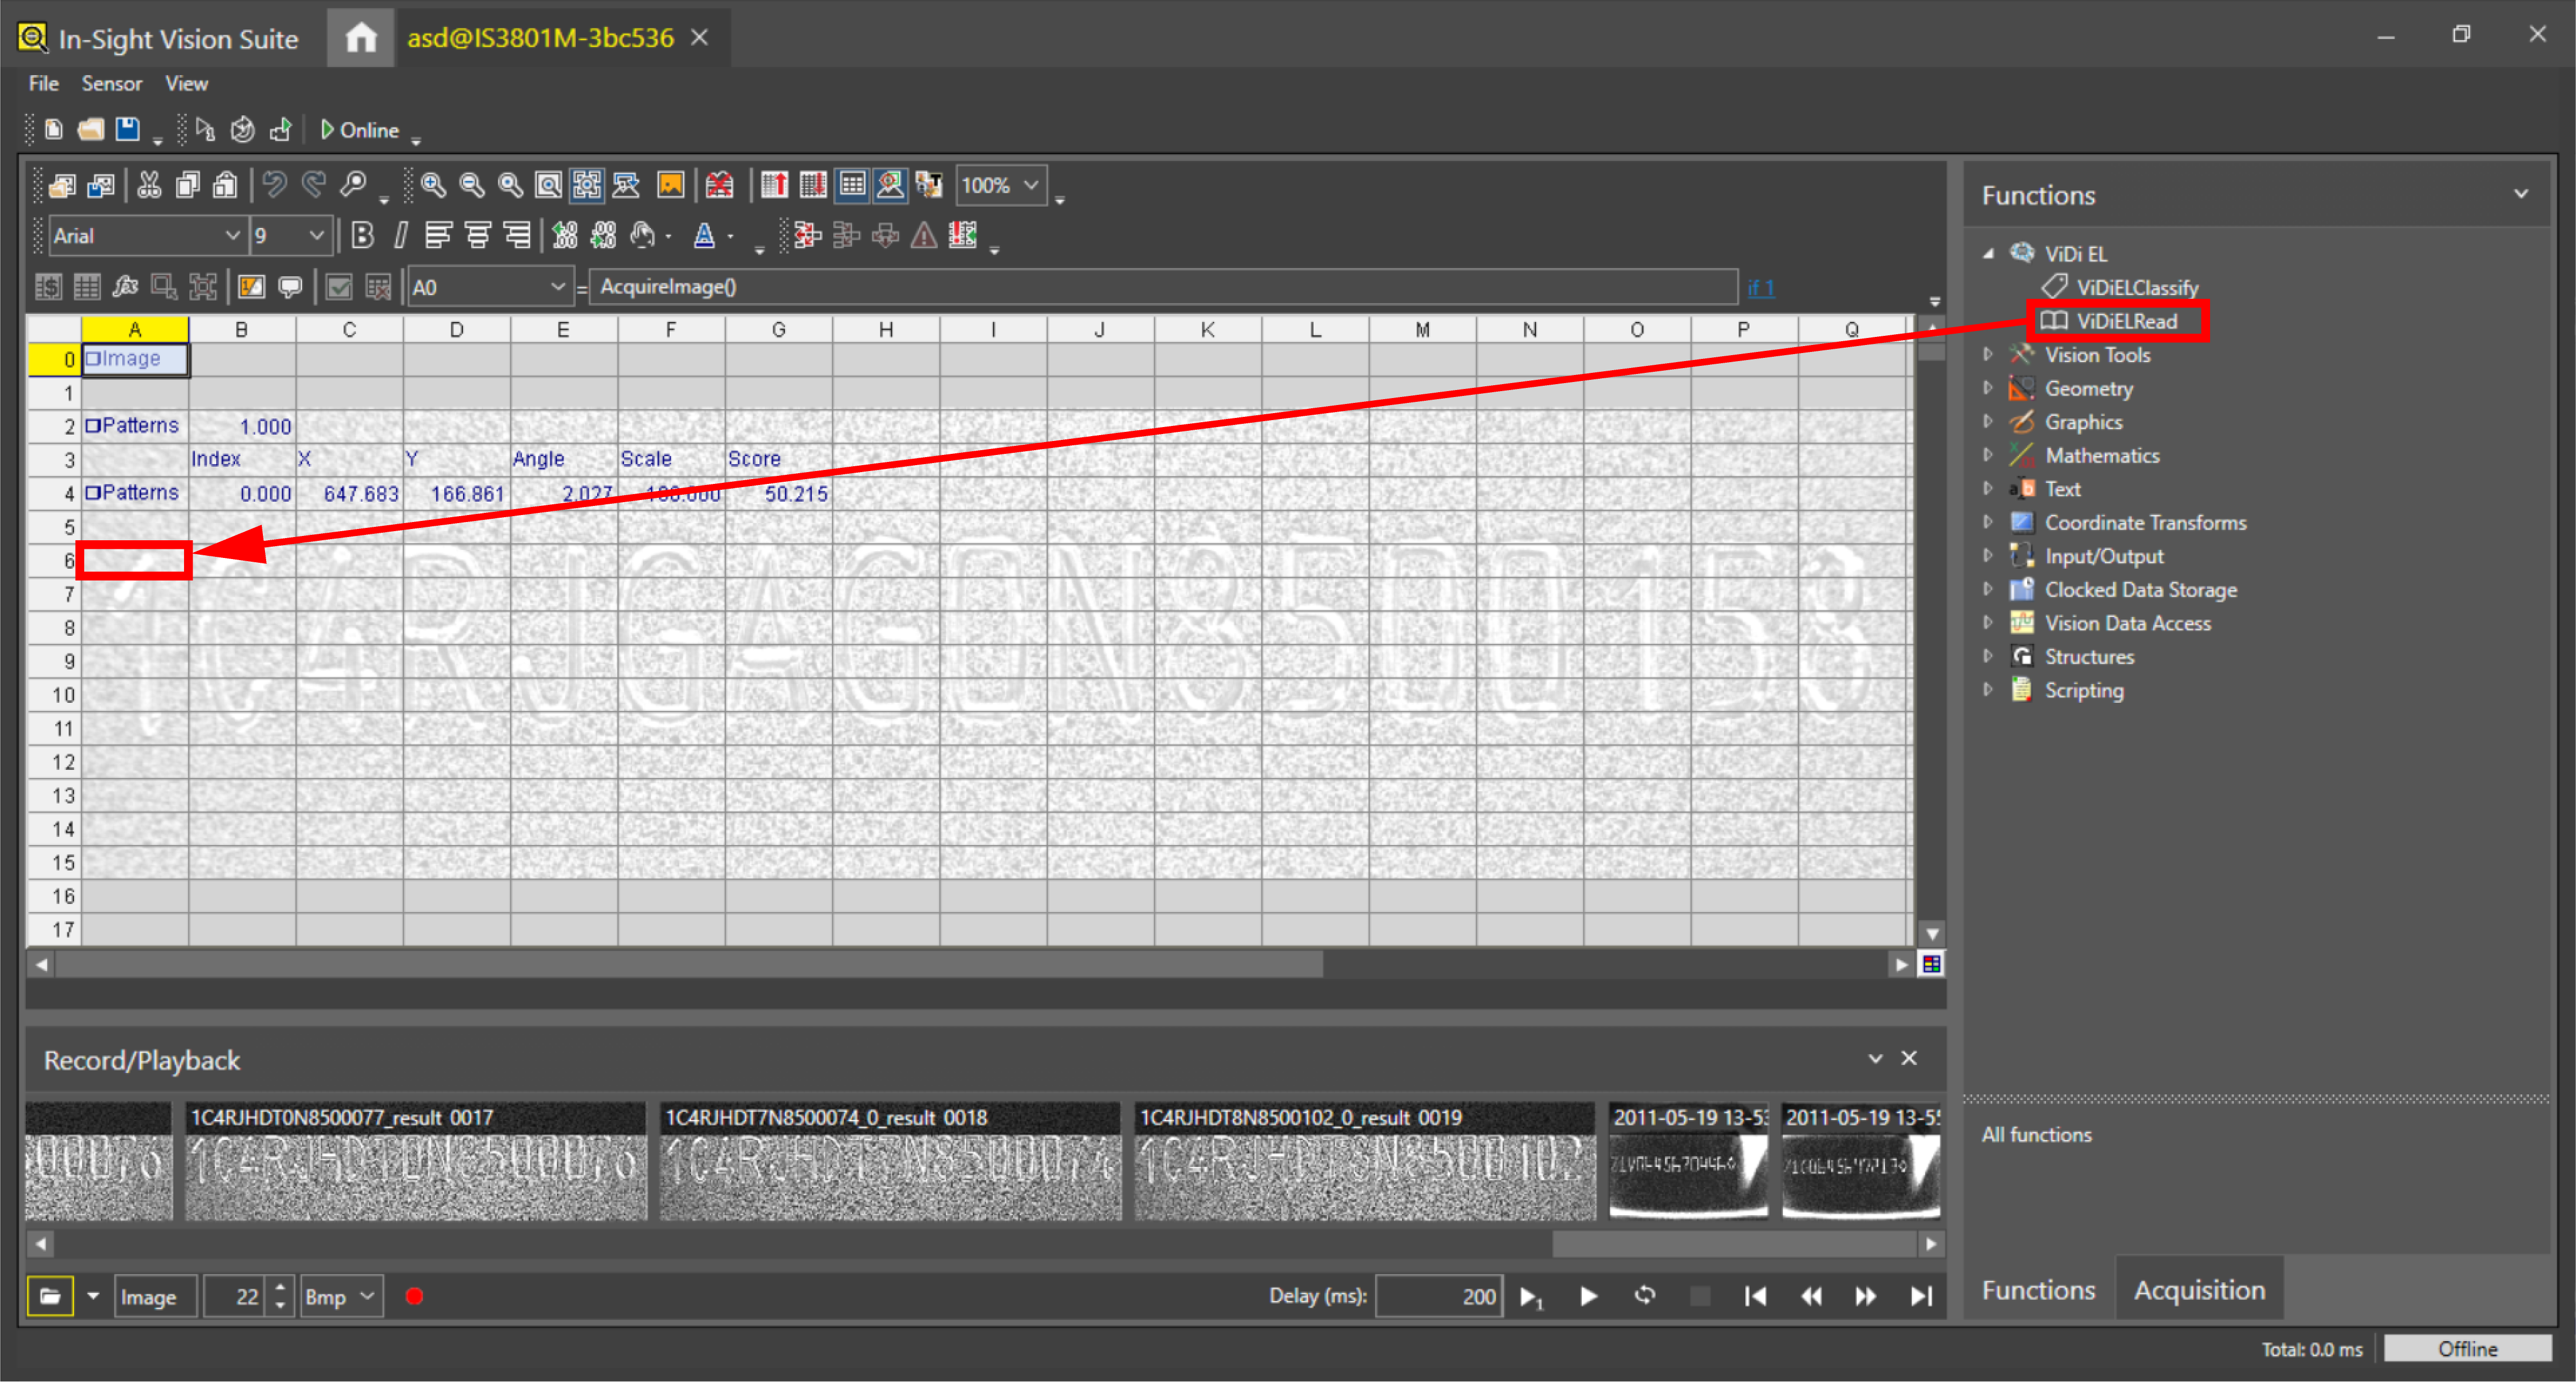
Drag and drop ViDiELRead to your Spreadsheet.
- To specify the fixture region, either:
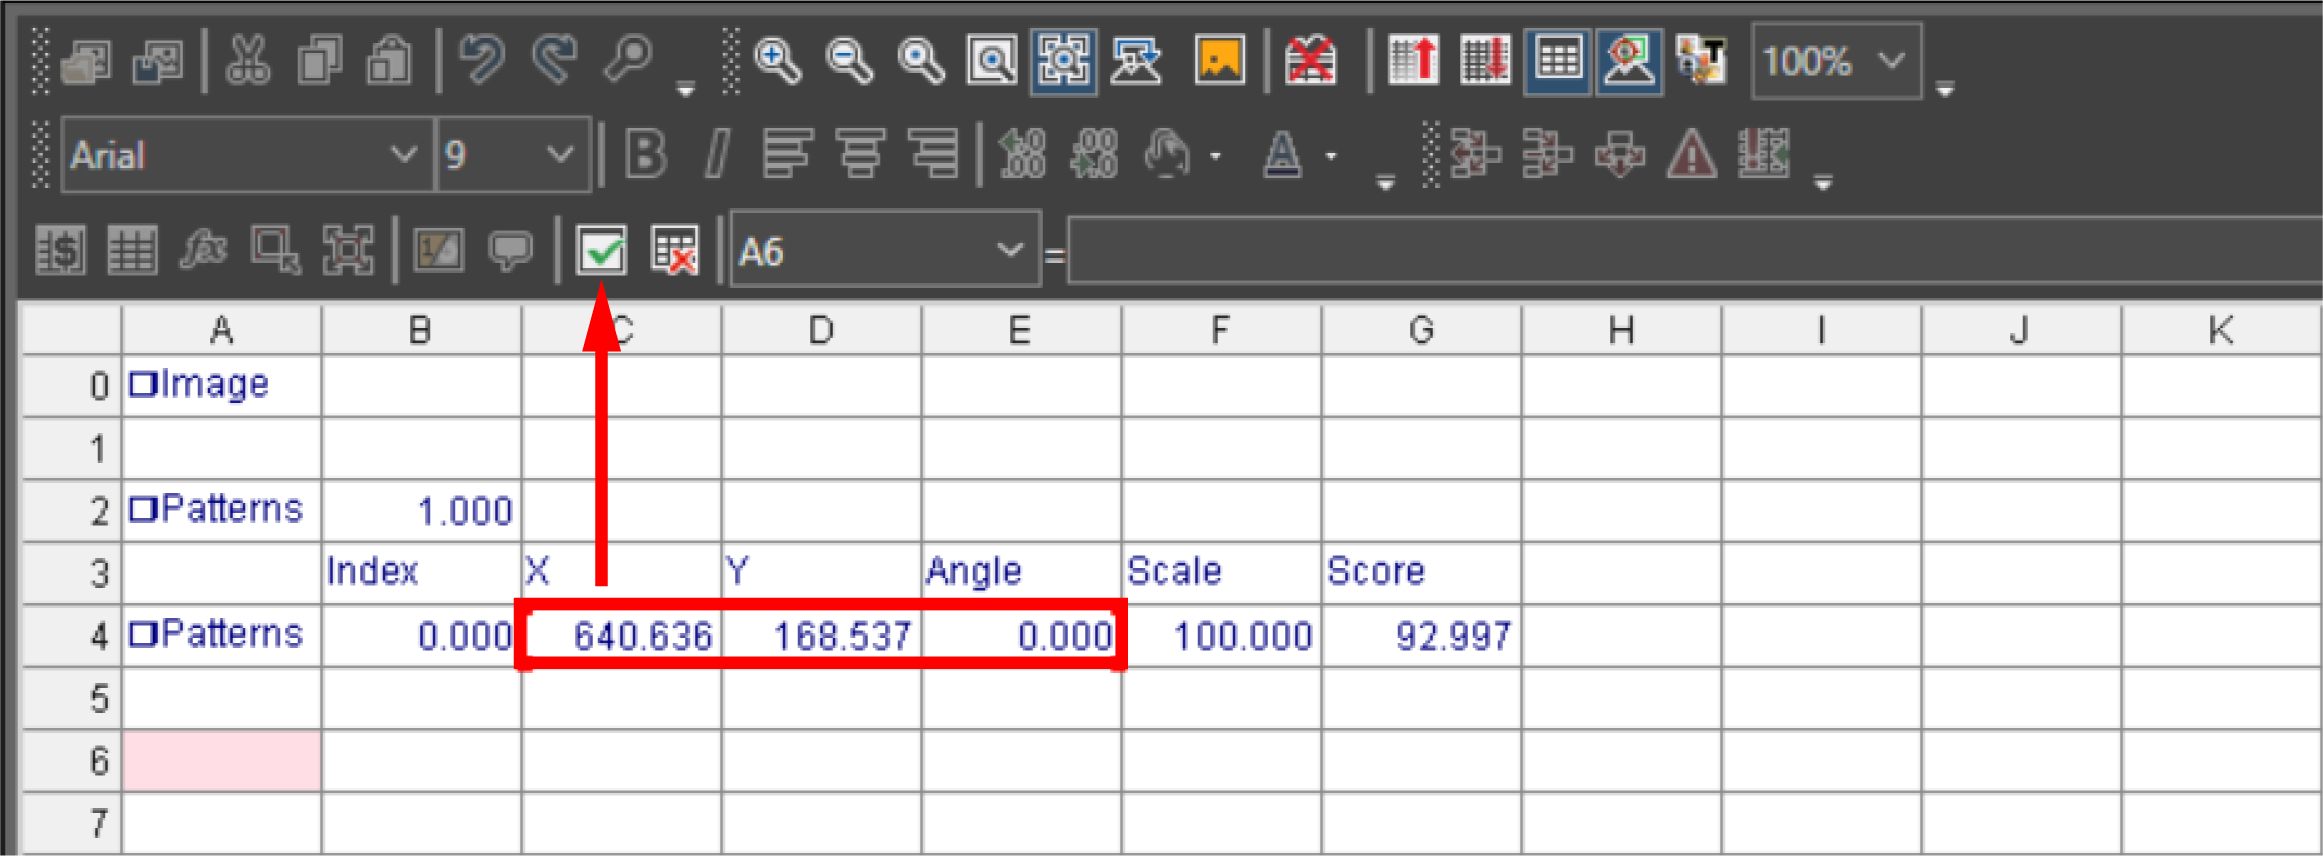
- Click on Insert Absolute Reference in the upper left corner of the pane.
Double click on Fixture.

-
Select the fixture coordinates from the Spreadsheet and click Accept changes.
-
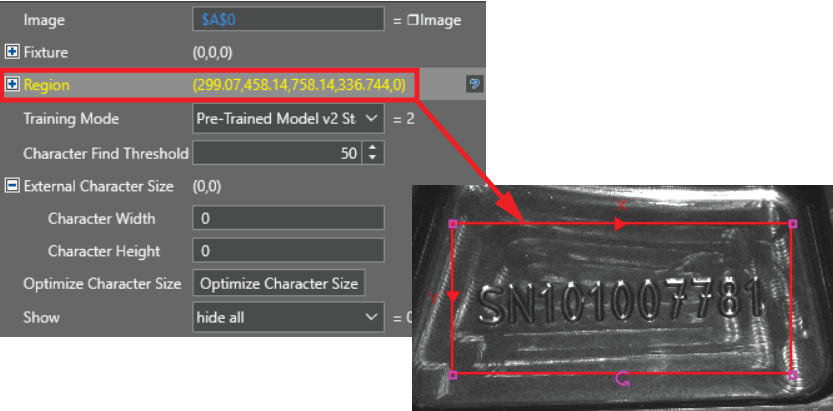
Double click on Region and position the Search Region. To resize the search box, click and drag the corners. To rotate the search box, click and drag the rotate button.
 Note:
Note:-
The search region cannot exceed the image boundary. Otherwise, the tool returns #ERR.
-
Modifying the search region width and height parameters from the Spreadsheet during run-time can take up significant processing time, which can result in missed triggers or timeouts. When possible, modify the search region width and height parameters only when the vision system is Offline.
-
-
Open the Training Mode dropdown and select the training mode you want to use:
-
User-Trained: allows you to manually train the ViDiELRead function by individually labeling the characters in each training image. Use this setting for higher accuracy reads on user-specific characters and fonts. For automatic character recognition, select one of the pre-trained models instead.
-
Pre-Trained v1 Standard: this model requires a tight bounding box for character size, and is best for monospace fonts. Supports uppercase characters, numerical digits, and the following special characters: ‘:’, ‘/’, ‘-‘, ‘+’, ‘&’
-
Pre-Trained v2 Standard: this model can recognize fonts with variable character size, and requires an input character size that fits the average character size. Supports uppercase characters, numerical digits, and the following special characters: ‘:’, ‘/’, ‘-‘, ‘+’, ‘&’
-
Pre-Trained v2 Complete: this model provides additional character support on top of the V2 Standard model. Supports uppercase and lowercase characters, numerical digits, all printable ASCII symbols and the € character.
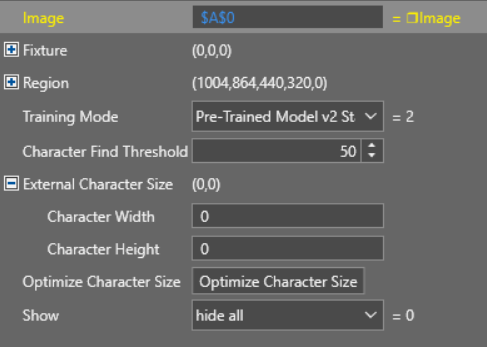
By default, Training Mode is set to Pre-Trained Model v2 Standard.
-
-
Define the character size:
-
Click on the edit button next to Character Size and position the character size box so that it surrounds one of the characters you want to find. To resize the character size box, click and drag the corners. Place the character size box around the character. To accept the changes, click on the check mark icon.

-
Alternatively, if you have selected a pre-trained model for Training Mode, you can define the character size with the External Character Size property in the property list by using a cell reference in Spreadsheet with one of the following methods:
Note: If you are using the External Character Size property to define the character size, make sure that both Character Height and Character Width are defined, otherwise the function returns an #ERR.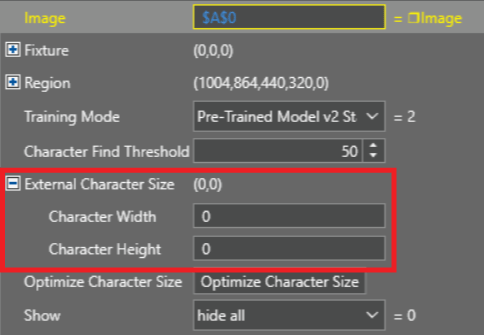
-
 Define cell reference for External Character Size property:
-
Double-click the External Character Size property to open Cell Selection Mode.
-
Select a cell range containing two cells with numeric values.
-
Press Enter.
-
The ViDiELRead function uses the values in the referenced cells for the Character Width and Character Height properties.
-
-
Define cell references for Character Width and Character Height properties:
-
Expand the External Character Size property.
-
Double-click the Character Width property to open Cell Selection Mode.
-
Select a cell containing the numeric value you want to use for character width.
-
Press Enter.
-
Double-click the Character Height property to open Cell Selection Mode.
-
Select a cell containing the numeric value you want to use for character height.
-
Press Enter.
-
The ViDiELRead function uses the values in the referenced cells for the Character Width and Character Height properties.
-
Alternatively, if you are using one of the v2 pre-trained models, you can click Optimize Character Size to automatically get the optimal character size for the selected ROI.
Note:-
If you define the Character Width and Character Height properties, the Optimize Character Size option is disabled.
-
Modifying the Character Width and Character Height properties from the Spreadsheet during run-time can take up significant processing time, which can result in missed triggers or timeouts. When possible, modify the Character Width and Character Height properties only when the vision system is Offline.
-
-
-
If you have selected the User-Trained setting for Training Mode, click on the edit button next to Train. Type in the corresponding characters for the selected letters and numbers on each image. Label and train all expected characters (A-Z, 0-9) for your application. To jump to a new image, click on Next Image. You need to train at least 3 images. The more images and characters you train, the higher the quality of your output is.
-
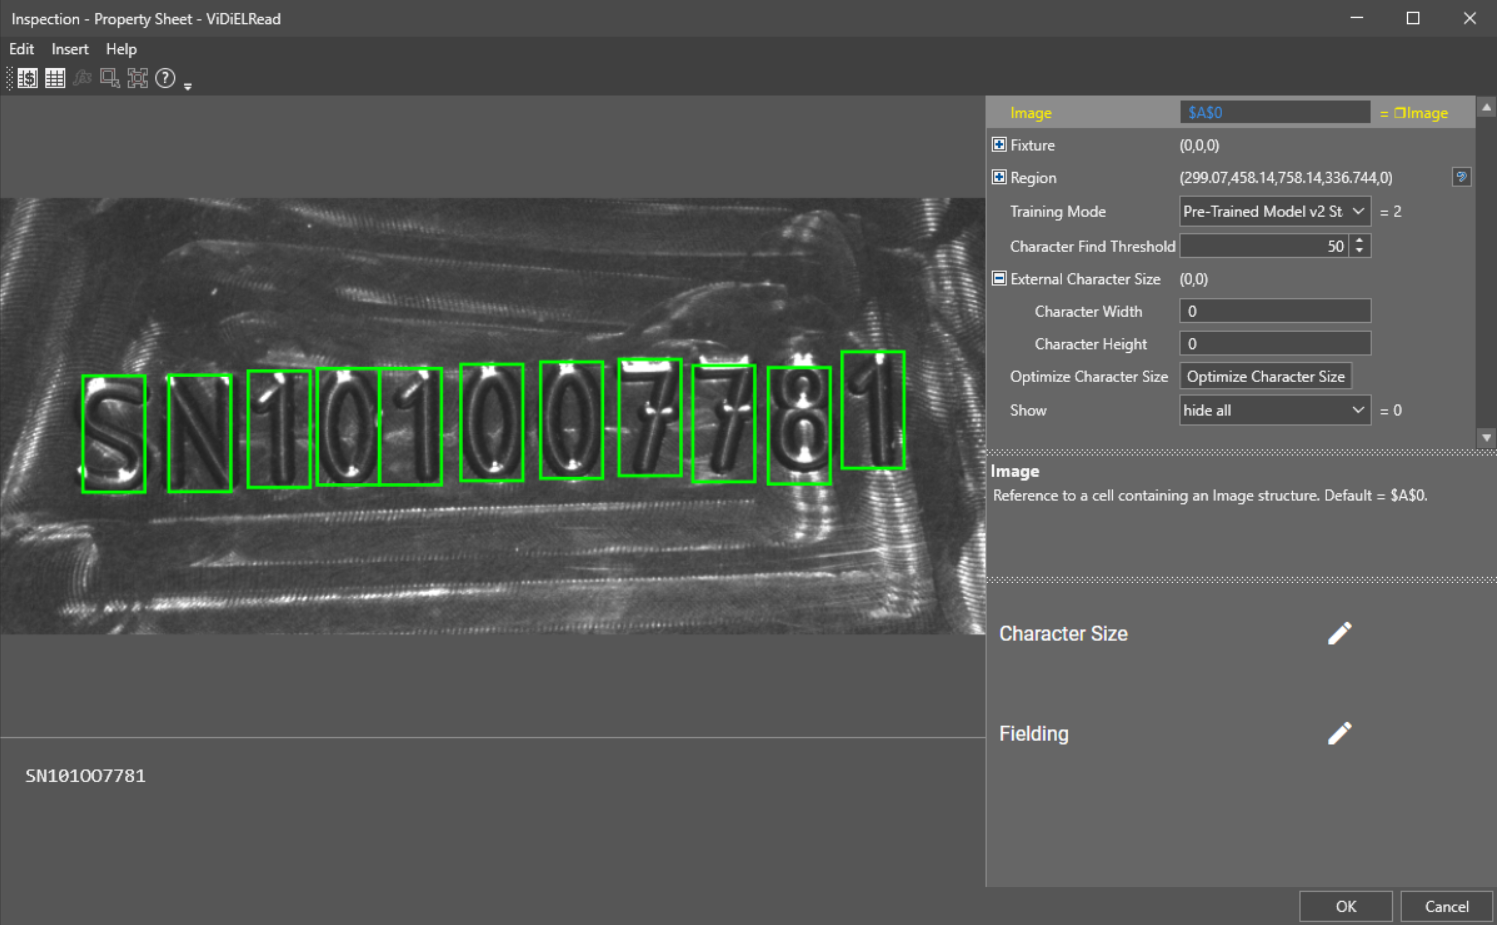
Select OK. The output of the function appears on the Spreadsheet.
The Property Sheet pops up.
To learn more about ViDiELRead functions and settings, see the expandable sections below.
|
|
|---|---|
| Setting | Description |
| Image | Reference to a cell containing an image structure. Default value: |
| Fixture |
Fixture origin (X, Y, Theta). Offsets from the image origin. Note: Angles must be multiplied by -1, due to image space differences.
|
| Region | Region of interest (X, Y, Width, Height, Angle). |
| Training Mode |
Defines the training mode. The default setting is Pre-Trained Model v2 Standard mode.
Note:
The character size tolerance for the different pre-trained models are:
|
| Character Find Threshold |
Defines the minimum confidence threshold for classifying a candidate as a character. The final scores combines the likelihood of being a character and matching a specific character class. As a result, low-scoring characters can still appear as possible characters. You can set the threshold between 0 and 100, the default value is 50. Note: The Character Find Threshold is only available in the v2 Standard and v2 Complete Pre-Trained modes.
|
| External Character Size | Allows you to define an external cell reference for Character Width and Character Height. This property is only used when using a pre-trained model. |
| Show | Select the type of graphic to overlay on the image. |
Adjust the Character Size search box. The search box cannot be rotated. Place the character size around a character.

- Cognex recommends that you leave a certain amount of margin with the search region around the characters to be read. A margin of half of the character width around the text can be enough.
- Pre-trained v1: -10% — +5%
- Pre-trained v2: -15% — +30%
The character size tolerance for the different pre-trained models are:
When using User Trained mode, or the Pre-Trained v1 Standard training mode, place the search box tightly around a character. This model works best with monospace fonts.
When using one of the Pre-Trained v2 training modes, place the search box loosely around an average-sized character. The V2 models can recognize variable width fonts. For example, if the text you want to process contains a W that is significantly wider than other characters, the search box can be smaller than the W, but needs to be bigger than a V.
If you are using the Pre-Trained v2 Complete model, which also supports lowercase characters, you can set the height of the character size box between the height of uppercase characters and the height of lowercase characters.
|
|
|


You can set the tool to accept only certain characters or patterns under Fielding. There are three main settings, Variable number of characters, Fixed number of characters, and Flexible Fielding.
-
Variable number of characters
The tool reads all the characters on the image.
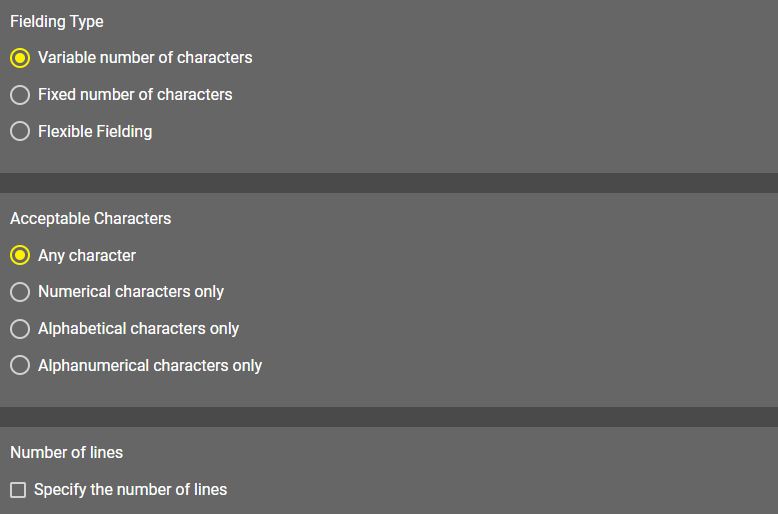
Acceptable Characters: Specify what type of characters the ViDiELRead tool recognizes.
-
Any character: The tool searches for letters, numbers, and symbols (for example <, $, ?).
-
Numerical character only: The tool searches for numbers only.
-
Alphabetical characters only: The tool searches for letters only.
-
Alphanumerical characters only: The tool searches for numbers and letters.
Number of lines: Tick the box next to Specify number of lines if the characters on your image are arranged in multiple rows. Enter the number of rows in the Number of lines input field.
-
-
Fixed number of characters
The tool reads a character pattern or character patterns on the image. The tool recognizes characters that do not fit the provided pattern, but returns an error.

The pattern uses a simple regular expression style composed of constant characters (alphanumerical and special characters) and metacharacters.
You can use the following metacharacters:
-
"\d": matches any numerical character [0-9].
-
"\l": matches any alphabetical character [a-z, A-Z].
-
"\w": matches any alphanumerical character [a-z, A-Z, 0-9].
-
"\." matches any character.
Examples of valid patterns:
-
"\d\d\d\d": matches a number composed of four digits.
-
"\l\l\l": matches a word composed of three letters.
-
"\d\d:\d\d:\d\d": matches a time in the HH:MM:SS format.
-
"N\d\d\d\l\l\l": can be used to read a serial number starting with 'N', followed by 3 digits and 3 letters.
You can apply multiple patterns to one Read tool configuration by clicking the Add Pattern button. If you provide multiple patterns, the tool returns the name of the matching pattern during reading.
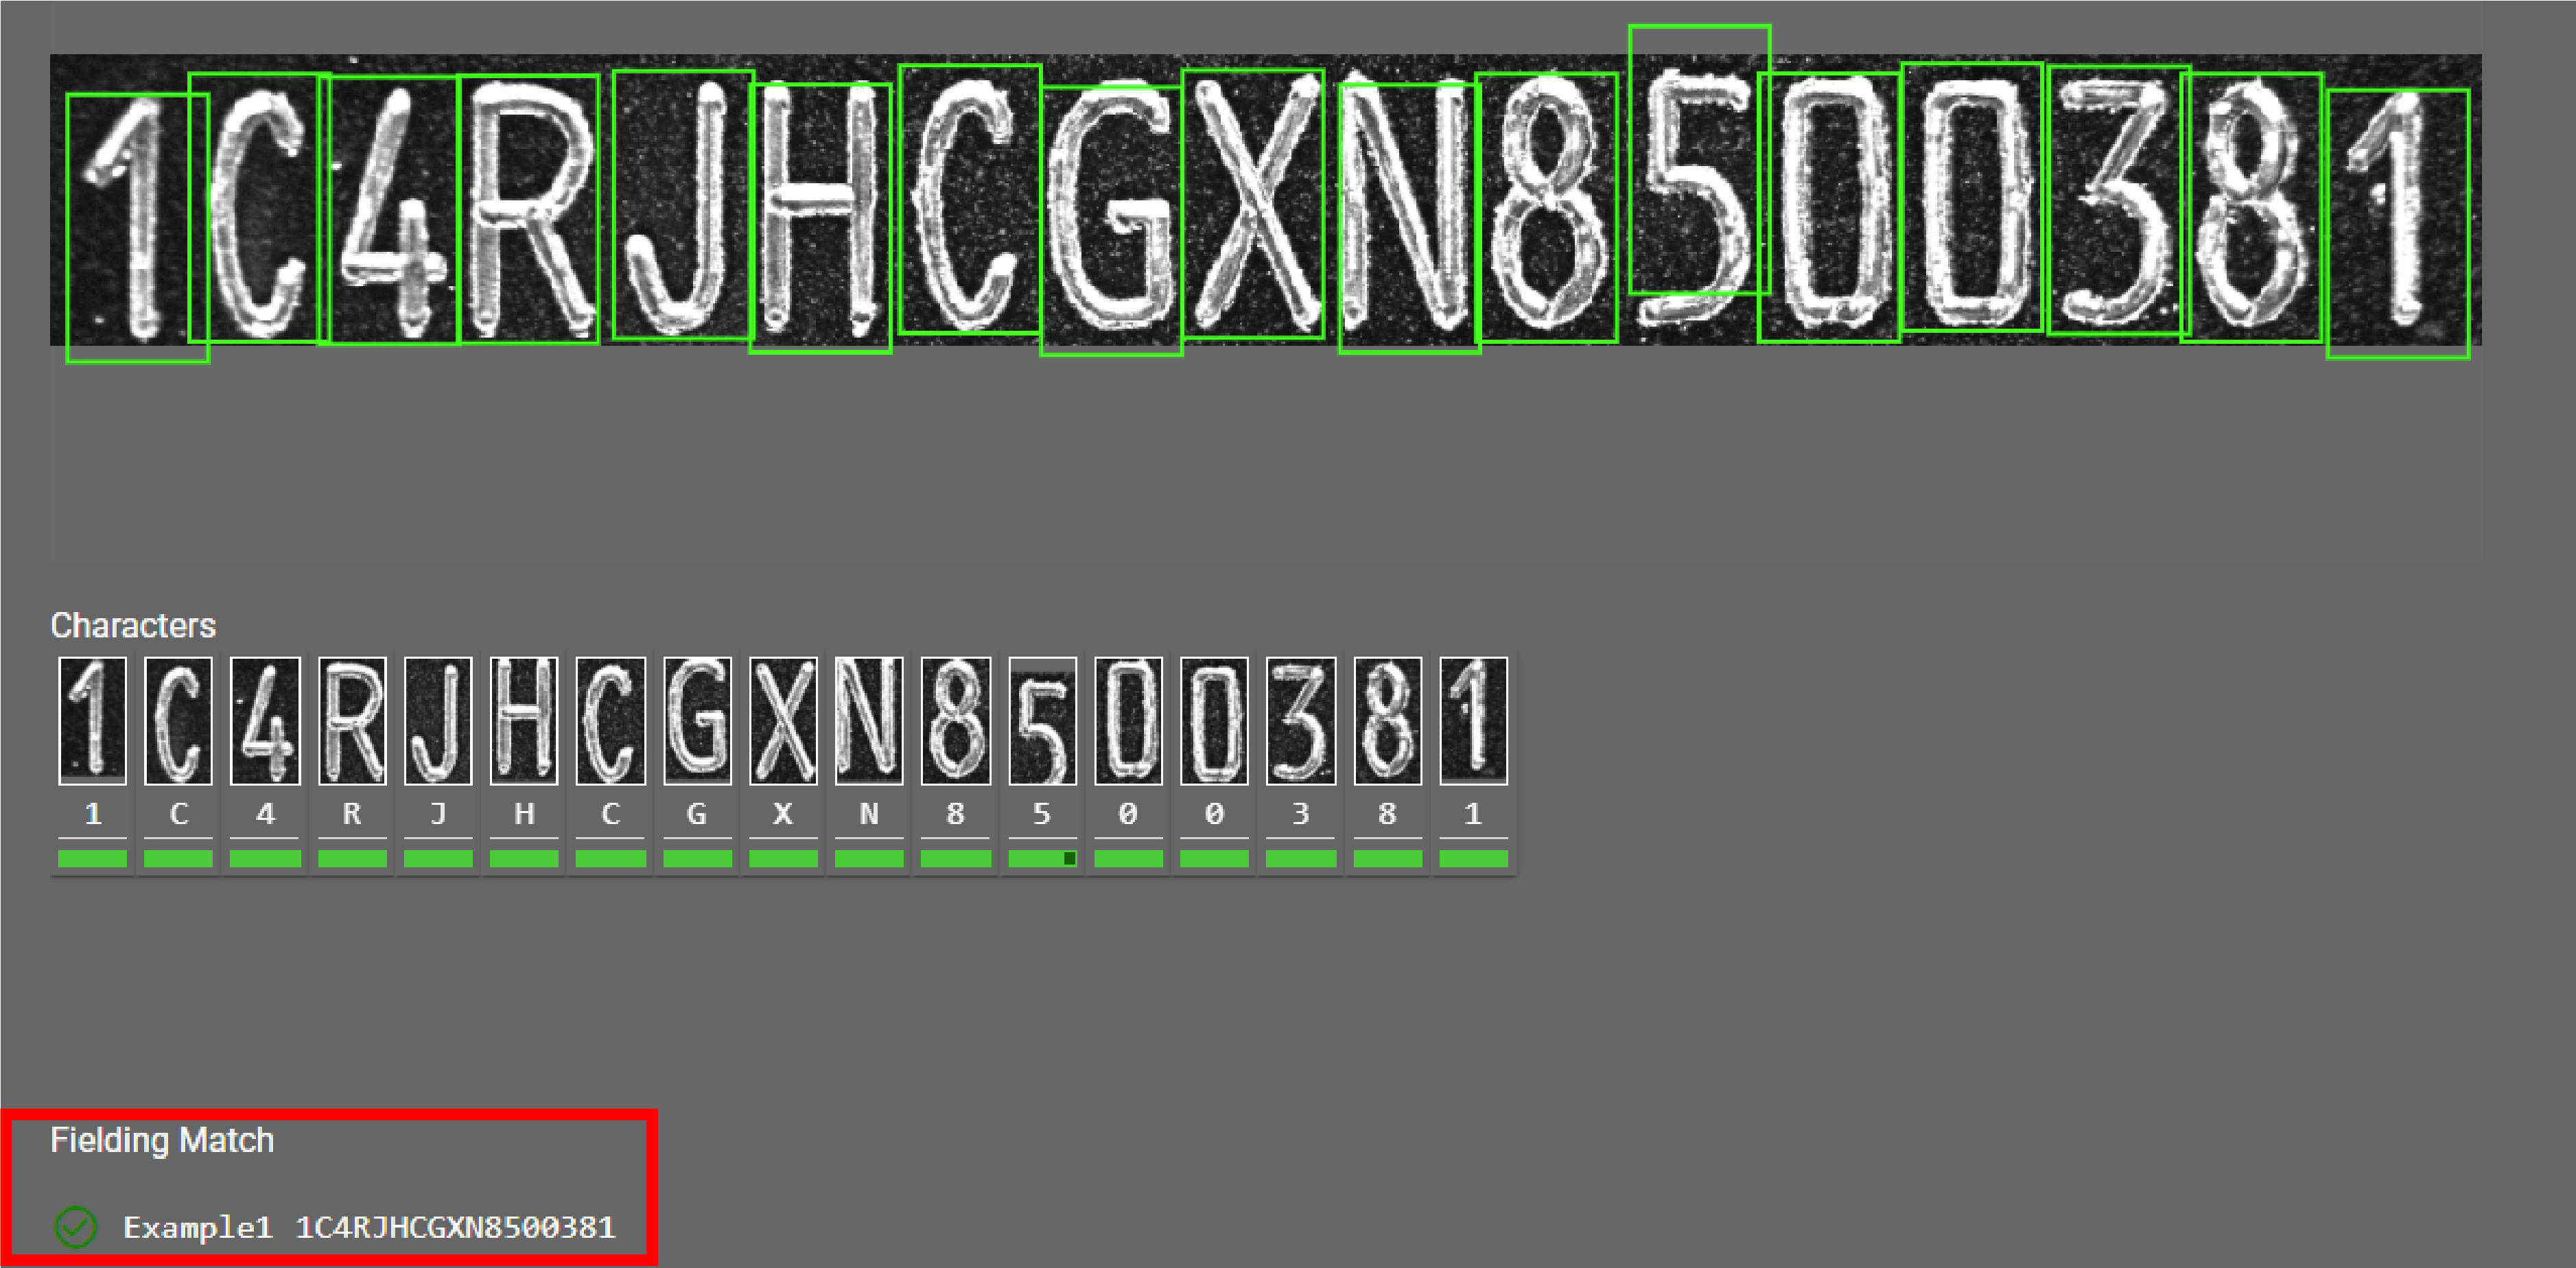
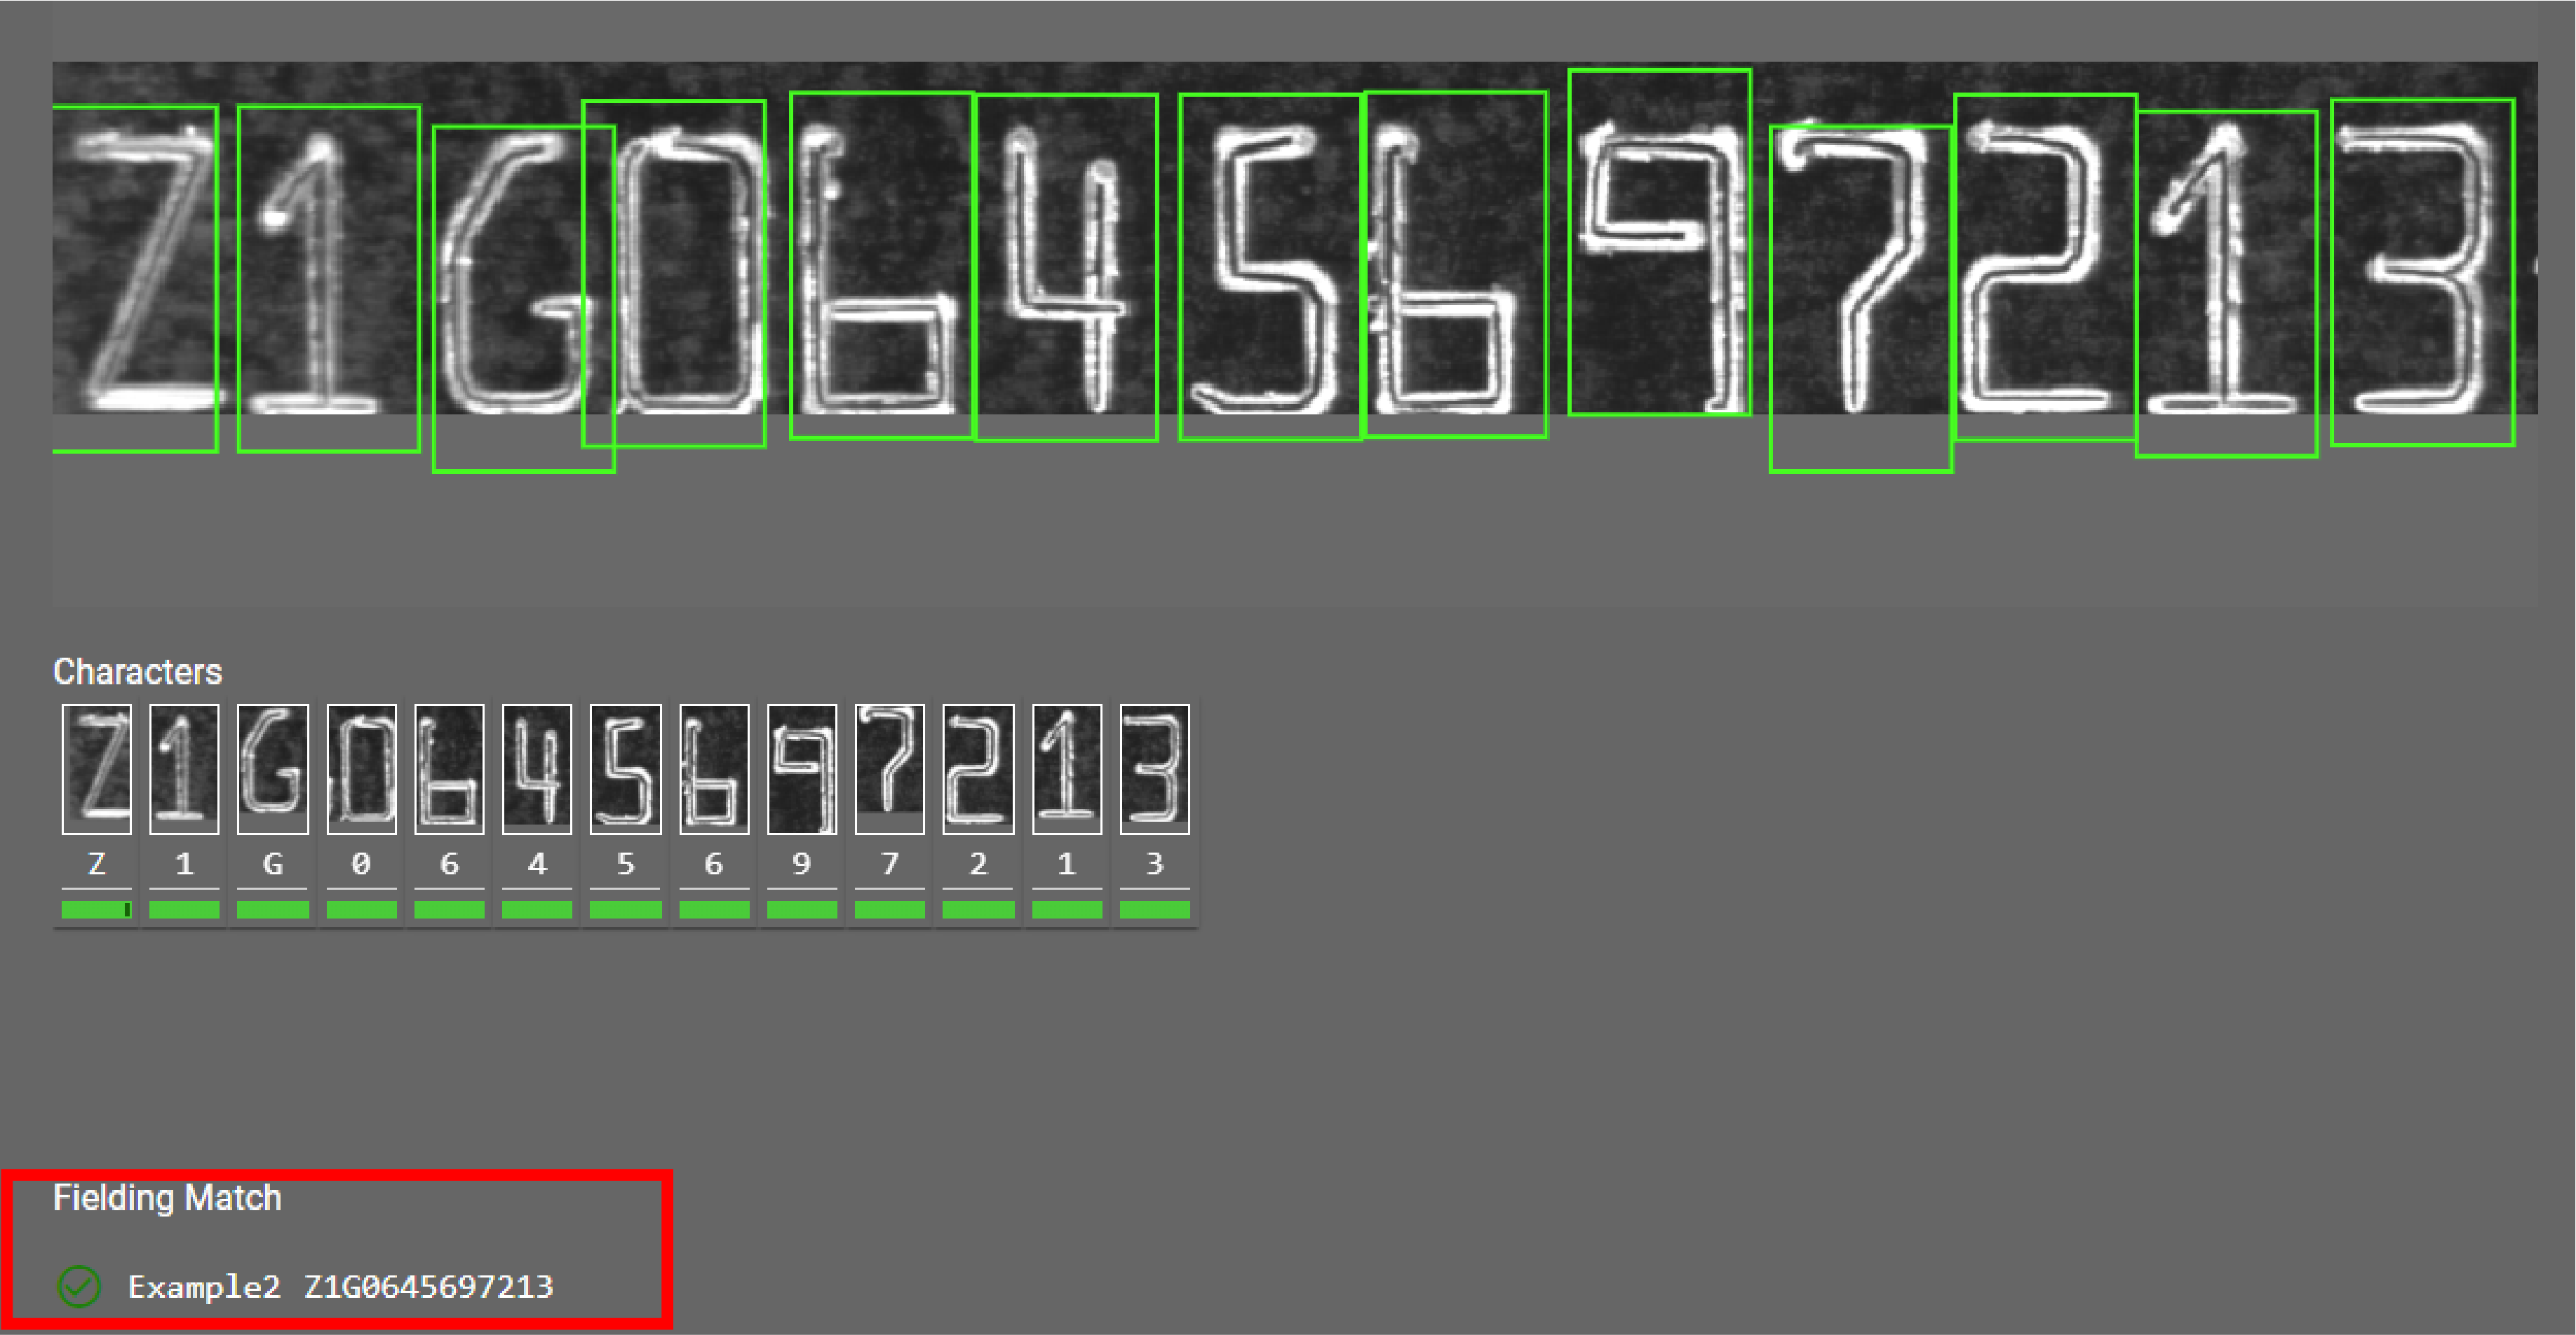
Formula used: 1C4RJH\w\w\w\w\d\d\d\d\d\d\d Formula used: Z1\w06456\d\d\d\d\d -
-
Flexible Fielding
Flexible fielding allows you to capture specific texts and filter out false detections. You can define flexible fielding by using a series of fixed anchoring patterns (for example, “BEST BY” or “SERIAL”) and flexible Regex A regular expression (shortened as regex or regexp), sometimes referred to as rational expression, is a sequence of characters that specifies a match pattern in text.-like patterns (for example, to match digits, upper case letters, a specific range of characters). The anchoring and Regex-like patterns determine the allowed character classes in the text. Flexible fielding filters out candidates for different characters based on these patterns, finding the combination that best matches the specified patterns. For example, if you are only looking for digits at a certain position, this can turn a ‘I’ into a ‘1’.
You can capture specific portions of the flexible fielding. A string output reports the detected characters that match a capture group. The string output does not report other detected characters. You can use the non-captured groups to align the text or to filter out false, or flaky detections (for example, using wildcards).
Flexible fielding computes a fielding score from the individual scores of the fielded characters. Both capturing and non-capturing groups are used to compute the fielding score, except for non-capturing wildcards. The fielding score can be used as a metric to measure how well the fielded text matches the target fielding.
Make sure that all expected characters are read correctly before applying the flexible fielding expression. If needed, adjust the character size, and the character find threshold, or both.
Flexible fielding provides the following metacharacters for creating regular expressions:
-
".": Any single character including newlines
-
"\d": Digit [0-9]
-
"\l": Lowercase letter [a-z]
-
"\u": Uppercase letter [A-Z]
-
"\w": Alphanumeric [a-zA-Z0-9]
-
"[...]": Character set, for example [0-9A-F] matches digits or uppercase A-Z
-
"*, +, ?": Zero or more, one or more, zero or one of the preceding character
-
"{n}, {n,}, {n,m}": Exact, minimum, or range of repetitions
-
"()": Captures part of the matched pattern
Always use parenthesis to capture specific parts of the result in a capture group. The fielding succeeds if there are captures, and mandatory characters, or both. It only fails if there are only optional, non-captured characters, for example ".*".
You can use the GetFlexibleFieldingScore() getter to get the result score of the Flexible Fielding.
Examples:
-
.*SERIAL(\d{5}): reads a serial number starting with "SERIAL" followed by five digits, capturing the digits and ignoring preceding text.
-
.* (LOT[A-F]\d{3,4}): reads a lot number starting with a letter between A and F, followed by 3 to 4 digits, capturing both the LOT prefix and the actual lot number, ignoring preceding text.
-
.*BEST.*BEFORE.*(\d{2}).*(\u{3}).*(\d{4}): reads an expiry date such as BEST BY 12 JAN 2025, capturing only the date and ignoring false detections in-between these character groups using wildcards.
-
.*USEBY:?(\d{8}): reads an expiry date such as USE BY 12 01 2025, capturing only the date, ignoring preceding text as well as any flaky detection of the colon (":") character in-between BY and the date.
-
LOT(.*)BATCH: reads a string starting with LOT, capturing any text between the words LOT and BATCH, and ignoring both LOT and BATCH.
Sample Image Expected Read String Flexible Fielding Expression ViDiELRead Result 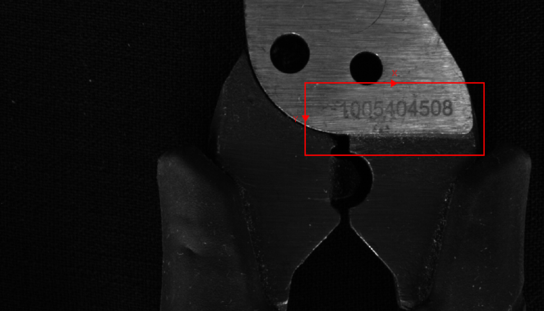
The identifier can contain any digits and can vary in length. (\d+) 1005404508 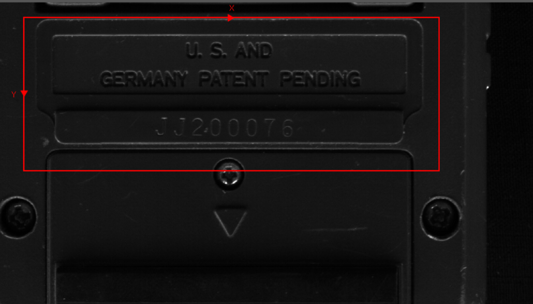
The identifier starts with JJ, followed by exactly six digits. .*(JJ\d{6}) JJ200076 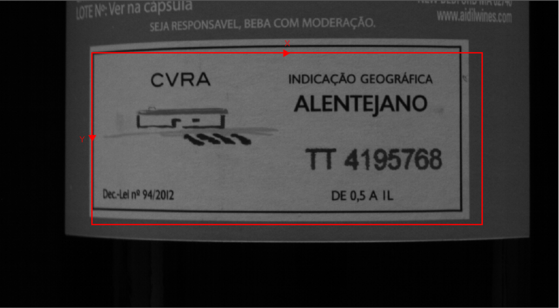
The identifier starts with TT, followed by exactly seven digits. .*(TT\d{7}) TT4195768 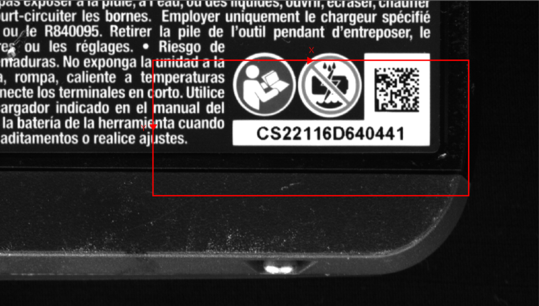
The identifier begins with the fixed prefix CS, after that there are exactly five numeric digits. After the digits, there is the fixed letter D. Finally, the text ends with exactly six numeric digits. .*(CS\d{5}D\d{6}) CS22116D640441 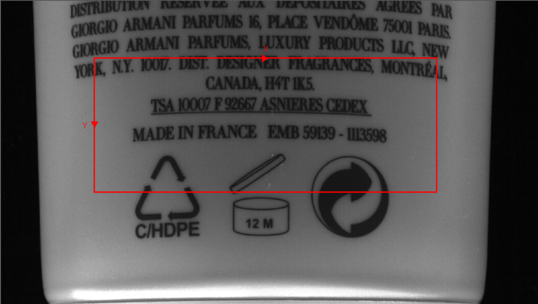
The identifier starts with EMB, followed by exactly five digits, a hyphen, and then exactly seven digits .*(EMB\d{5}-\d{7}) EMB59139-1113598 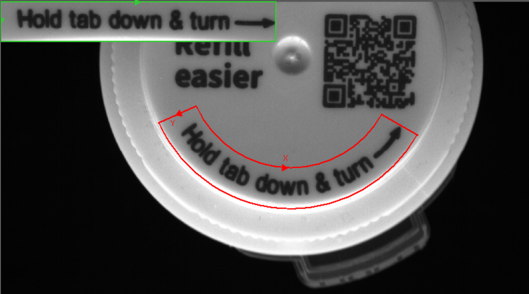
The text contains any lower and upper case characters.
Note: You can curve the region by using the ScaleImage() function.([a-zA-Z&]+) Holdtabdown&turn 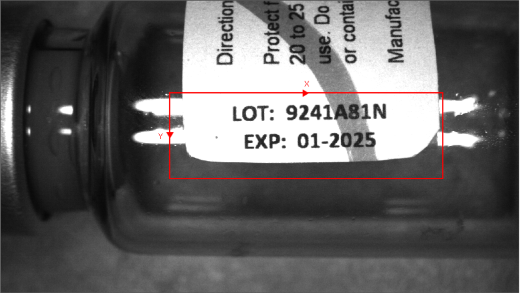
The lot number consists of alphanumeric characters (letters and digits) following the LOT: label. The expiration date is in the format MM-YYYY, following the EXP: label, with the month and year separated by a hyphen. .*LOT:(\w+).*EXP:(\d{2}-\d{4}) 9241A81N
01-2025
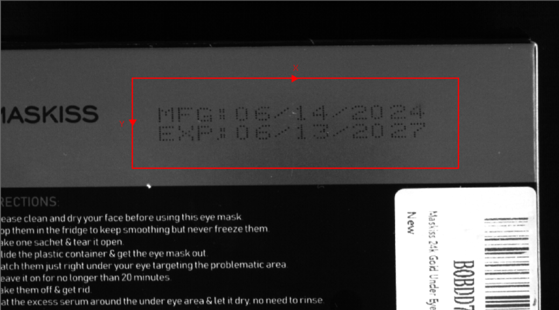
The manufacturing date follows the MFG: label and is in the format MM/DD/YYYY. The expiration date follows the EXP: label and is also in the format MM/DD/YYYY. .*MFG:(\d{2}/\d{2}/\d{4}).*EXP:(\d{2}/\d{2}/\d{4}) 6/14/2024
6/13/2027
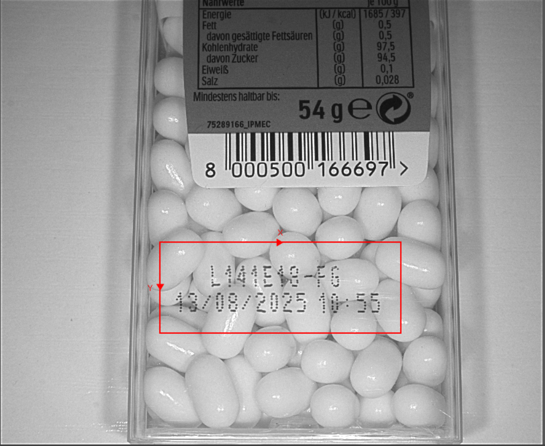
The first part is an alphanumeric identifier (letters, numbers, and hyphens) that can vary in length. In the second line, there is a timestamp in the format DD/MM/YYYY HH:MM, where the date is separated by slashes and the time by a colon. ([A-Z0-9-]+)\n(\d{2}/\d{2}/\d{4})(\d{2}:\d{2}) L141E18-FG
13/08/202510:55
-
Train letters, numbers, and symbols to the tool.
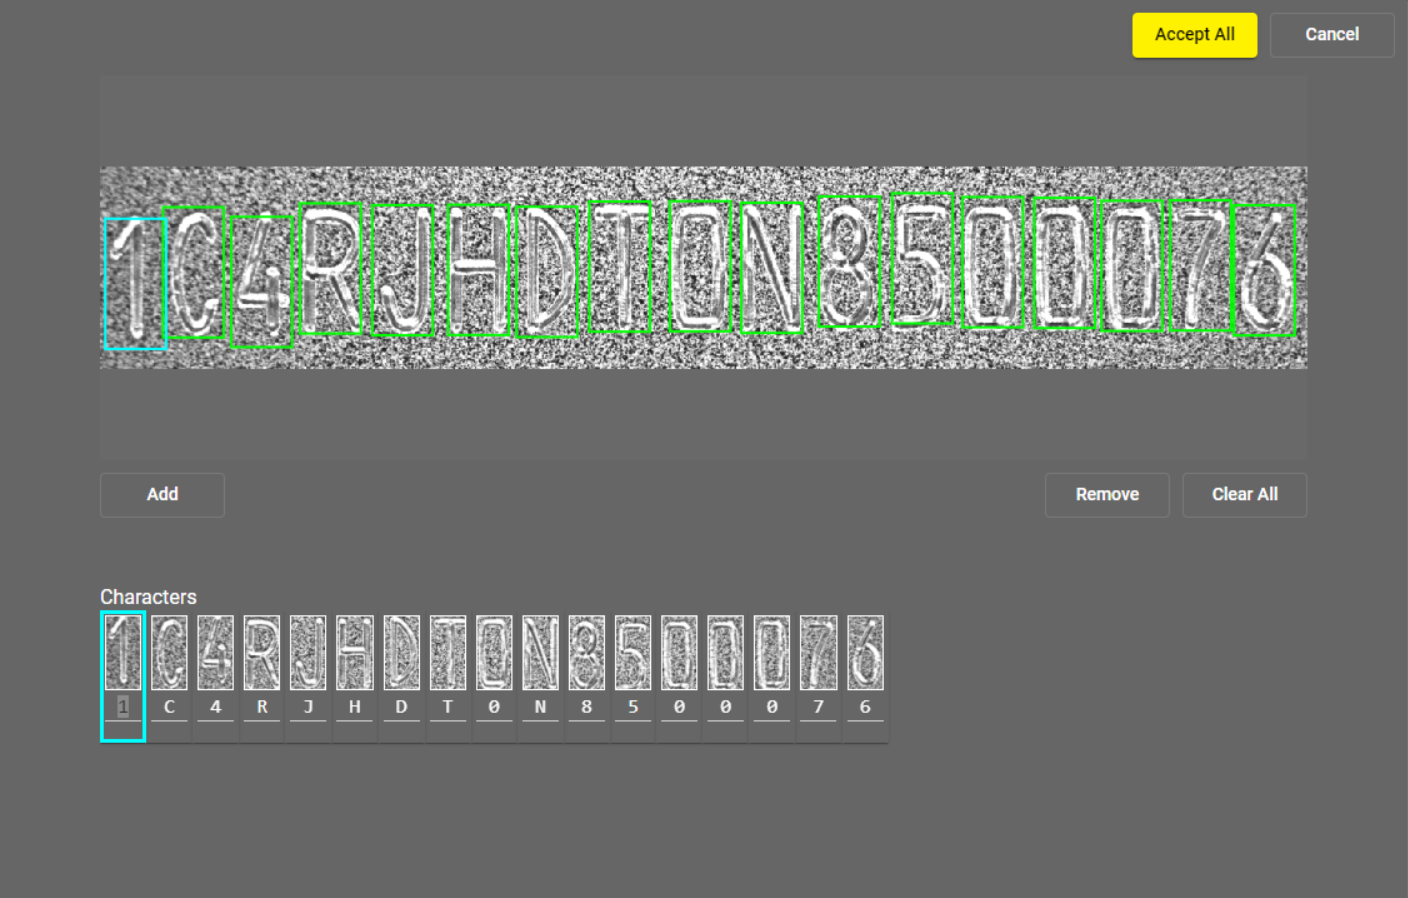
By default, the tool identifies possible characters on the image by placing a green bounding box around them. You can move the bounding boxes freely, but the size can only be modified under the Character Size setting. To add more bounding boxes, click on Label or one of the boxes, select the Add button, and click on the image. To stop adding bounding boxes, click on Done. To remove a box, select it and click on Remove. To remove all your boxes, select the Clear All option. To accept the training, click on Accept All.
Shows the number of trained characters and source images, and the confidence level of the tool in a given character. The lower the percentage is, the less likely that a result is correct.
You can see the percentage by hovering over the colored line under the character. The color also shows the confidence level:
-
Green: high certainty.
-
Yellow: medium certainty.
-
Red: low certainty.
You can sort the trained data either by character or image:
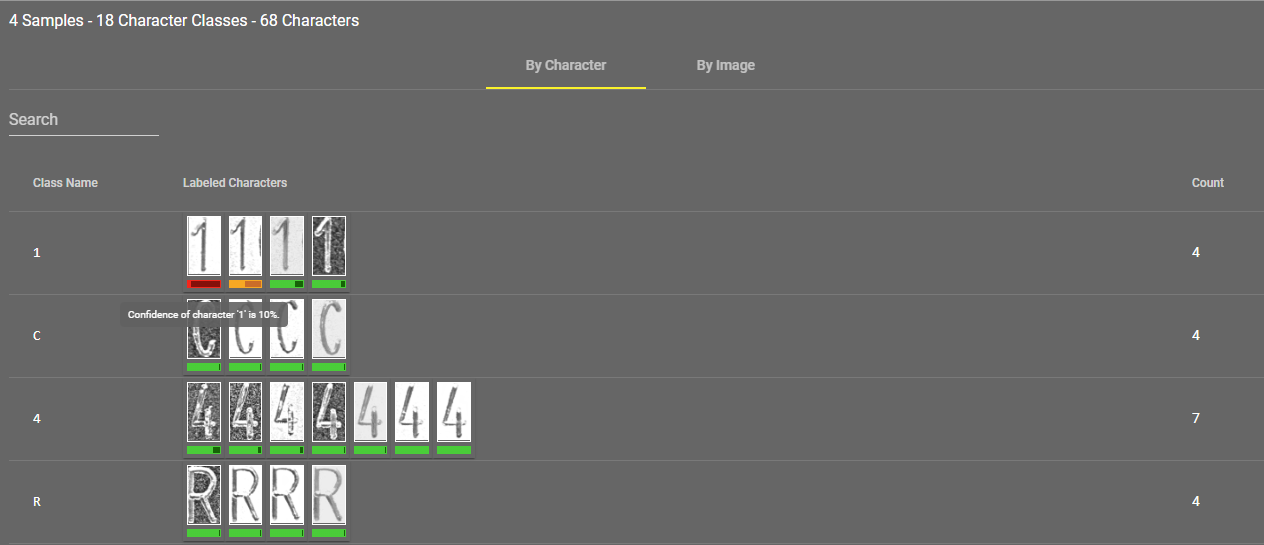
You can jump to retraining a certain character by left-clicking its image under By Character view, or you can retrain all characters on one image by clicking on the edit icon next to the appropriate row in By Image view.
You can search for a specific character by typing it in the search bar under both views. The tool differentiates between upper-case and lower-case letters.
You can also delete samples by checking the box next to the appropriate row and clicking on Delete Samples.
|
|
|
|---|---|
| Output | Description |
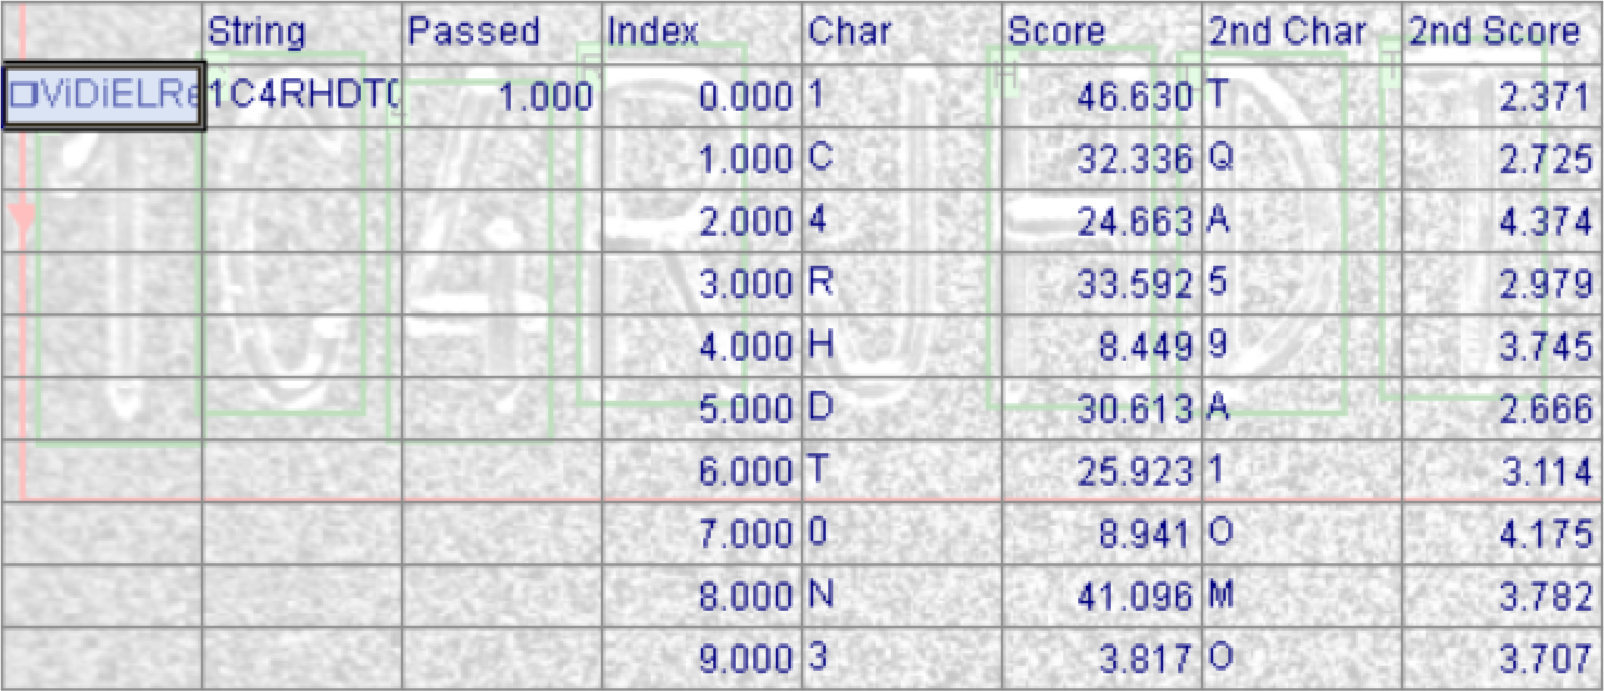
| String | All the characters the tool recognizes on the picture, shown as one string value. |
| Passed |
Shows if a read passes or fails a Fielding. Pass: 1.000 Fail: 0.000 |
| Index | The read index by character location on the image (left to right). |
| Char | Character. The best character match. |
| Score | The confidence level of the tool in the character. The lower the percentage is, the less likely that a result is correct. |
| 2nd Char | Second Character. The second best character match. |
| 2nd Score | The confidence level of the tool in the second best character match. The lower the percentage is, the less likely that a result is correct. |