Results Queue
The Results Queue is a filmstrip where you can see retained results from all inspections in four groups of images, based on the settings:
- Pass and Fail Results
- Pass Results
- Fail Results
- Separate Pass and Fail Results
To turn on and set this function Functions are tools that are available in Spreadsheet for processing and analyzing acquisitions or other results. You can add functions to your Spreadsheet job to create tool chains and produce results for specific applications., see Result Queue Settings in Menu Bar – Sensor.
After enabling, the Results Queue appears in the WebHMI The operator interface through which the operator interacts with the vision system. screen when configured correctly. In order to view the Results Queue in the WebHMI, make sure that the vision system is Online, and you are disconnected from the vision system in the In-Sight Vision Suite.
With the Results Queue, you can:
- Display spreadsheet contents and tool results or graphics for the selected Results Queue entry in the WebHMI.
- Configure Pass/Fail conditions as an Inspection sheet cell reference, where 0 means fail, any other value means pass.
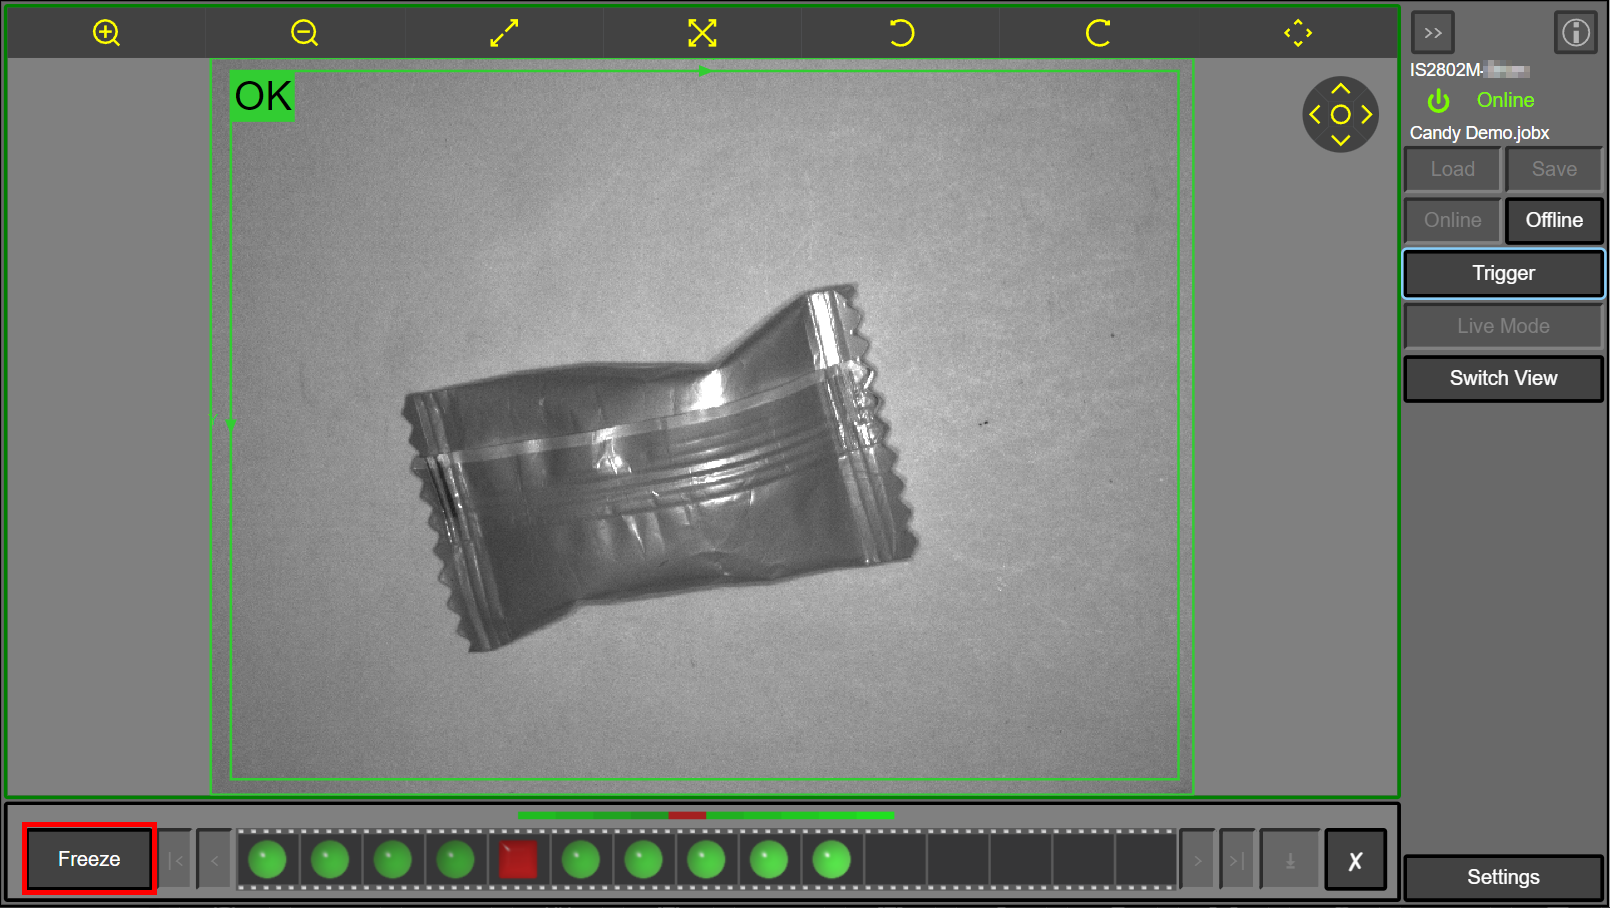
To stop the Results Queue entries from updating, but keep the job A job is a user-configured program in In-Sight 3D EasyBuilder consisting of functions and designed for specific applications. You can create and edit jobs using the In-Sight 3D EasyBuilder interface, and load them on a vision system for deployment in a live environment. running, click Freeze.
To resume updating the Results Queue entries, click on Continue.
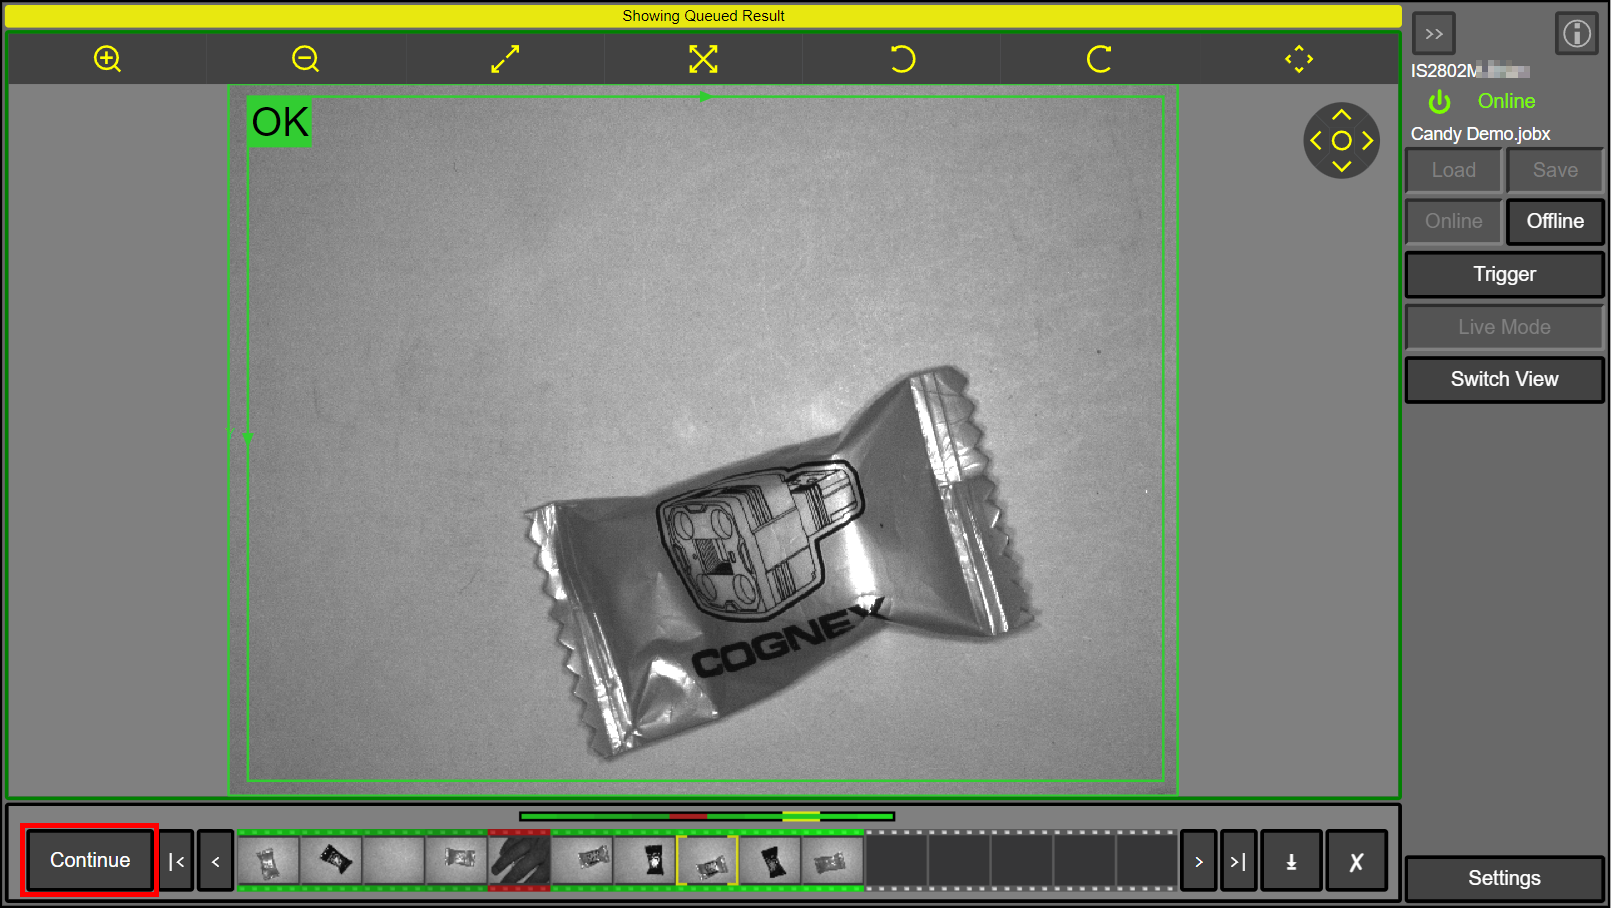
When you select an image, a yellow frame around the thumbnail picture indicates your selection. To navigate between the selected input images, save the filmstrip images, or clear the filmstrip, use the buttons in the filmstrip next to the Freeze/Continue button.
|
|
|
|---|---|
| Icon | Action |
|
|
Select First Input Image |
|
|
Select Previous Input Image |
|
|
Select Next Input Image |
|
|
Select Last Input Image |
|
|
Save Filmstrip Images |
|
|
Clear Filmstrip |


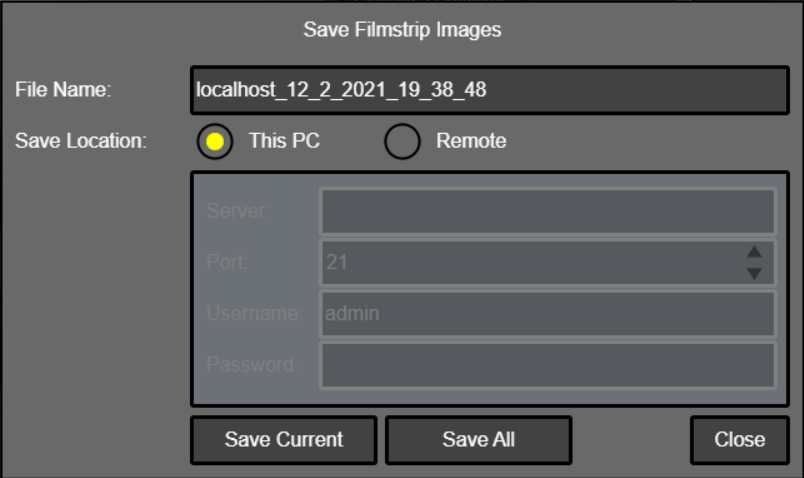
After clicking the Save Filmstrip Images button, select the location where you want to save the images in the pop-up window.
To clear the filmstrip images, click on the Clear Filmstrip button, and then click on Yes when the confirmation pop-up window appears. To cancel clearing, click on No or close the pop-up window using the X in the top right corner of the window.
![]()