Secure Connection
The Secure Connection utility allows you to encrypt HMI communications.
To use the Secure Connection utility:
-
Launch In-Sight Vision Suite if it is not already running.
-
Left-click the vision system you want to configure on the In-Sight® Device Pane on the left.
- The list of Utilities applicable to the selected vision system appears at the bottom of the window. Click Secure Connection.
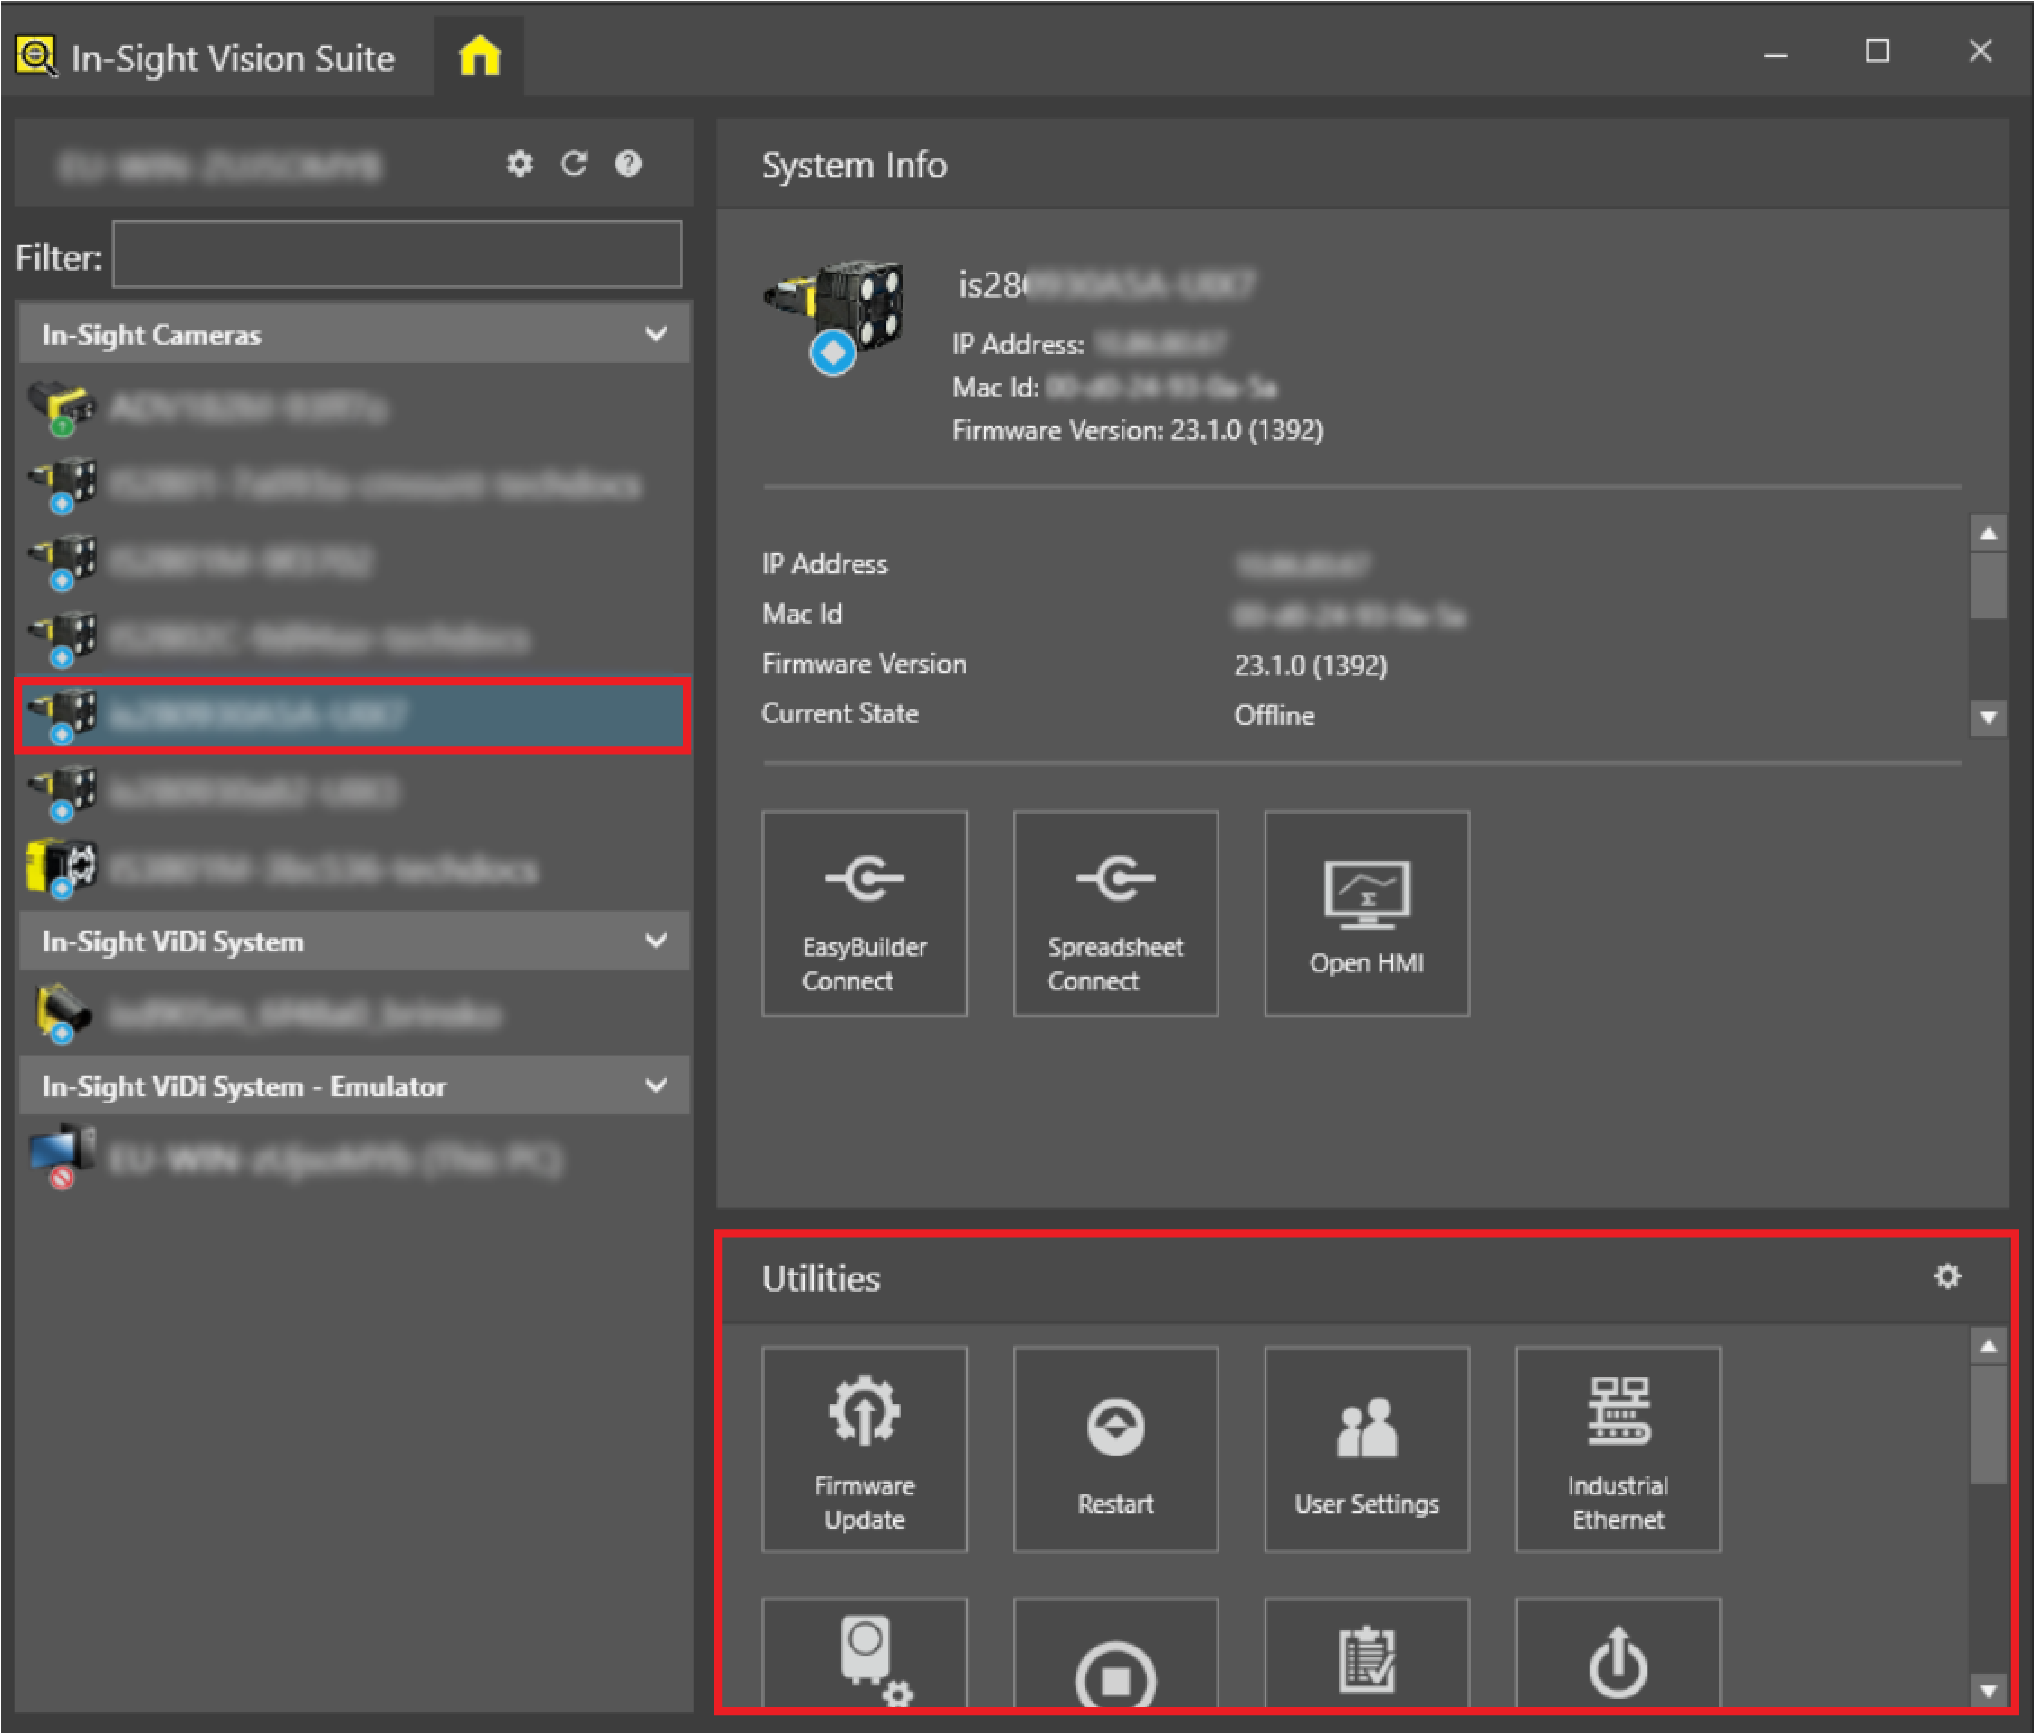
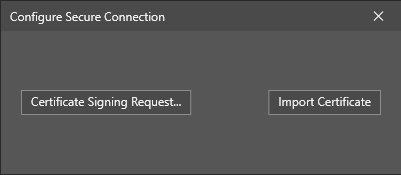
The Configure Secure Connection utility dialog opens.
-
Depending on the vision system you are using, the Secure Connection utility displays different options. Follow the procedure that corresponds to the vision system you are using.
-
Click Certificate Signing Request... to create a CSR for your vision system.
-
In the Certificate Signing Request dialog that opens, populate the fields as follows:
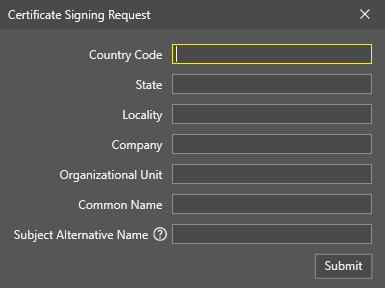
Field Description Country Code The two-letter ISO code for the country where your organization is located. State The name of the province, region, county, or state in which your organization is located. Locality The name of the town, city, village, or other administrative unit in which your organization is located. Company The legal name of your company, including any suffixes such as Ltd. or Corp. Organizational Unit The name of your department or division within the company. Common Name The main IP address of the vision system. Subject Alternative Name Any additional fully qualified domain names that you want to secure. Values must be prefixed by DNS: or IP: depending on the value.
For vision systems with multiple Ethernet interfaces, provide an entry for both IP addresses. You can provide multiple entries by separating them with either a comma or a line break.
Click Submit to create a .csr file.
-
Submit the .csr file to your Certificate Authority (CA) for signing according to the designated CA process within your organization. Once the CA validates your request, you receive a signed certificate file with a .crt, .cer, or .pem extension.
-
After you have received your certificate file, return to the main Configure Secure Connection dialog, and click Import Certificate.
-
In the file browser that opens, select the certificate file that you received from your CA, and click Open.
The Configure Secure Connection dialog now displays the details of your current certificate:
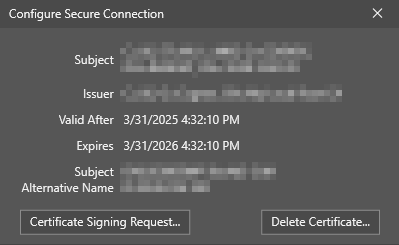
All HTTPS traffic to and from the vision system now uses the installed certificate.
-
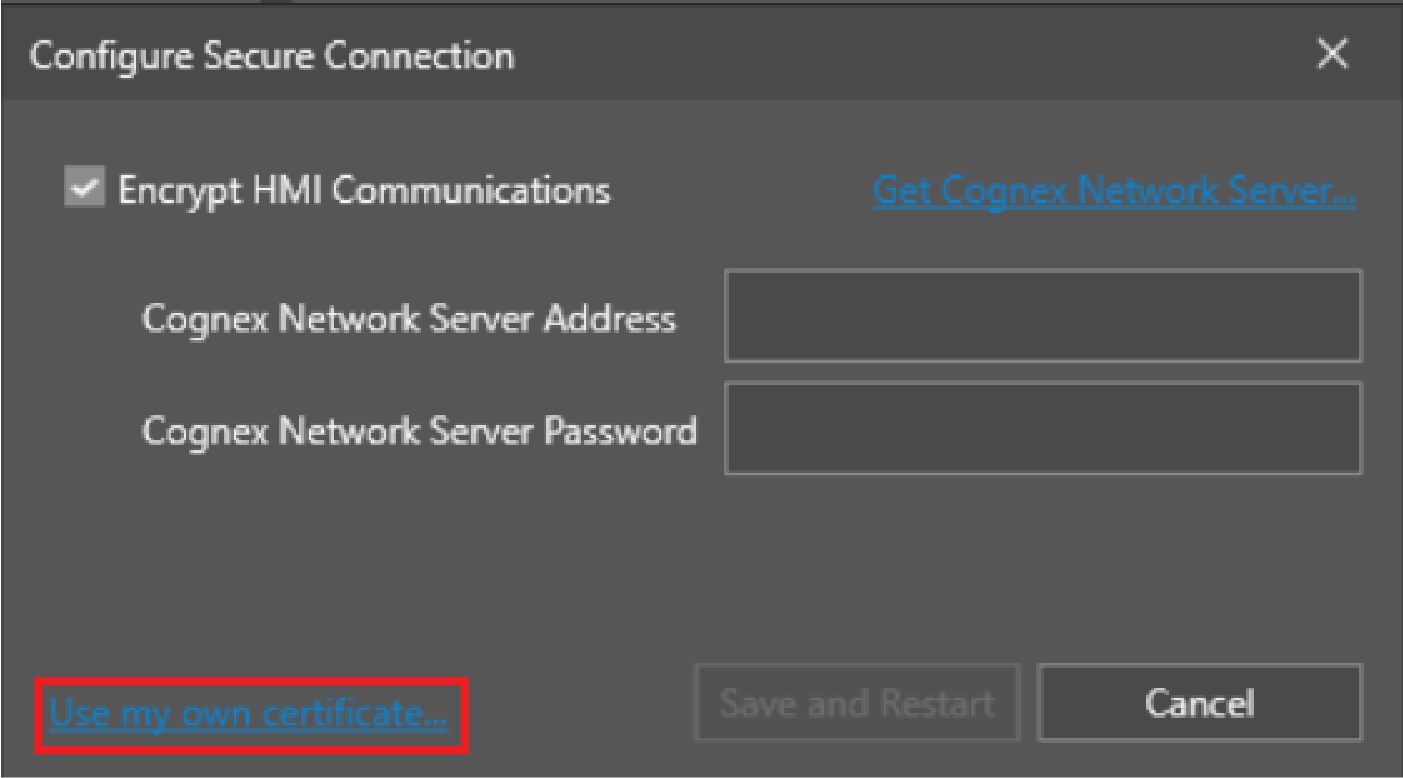
Check the Encrypt HMI Communications box.
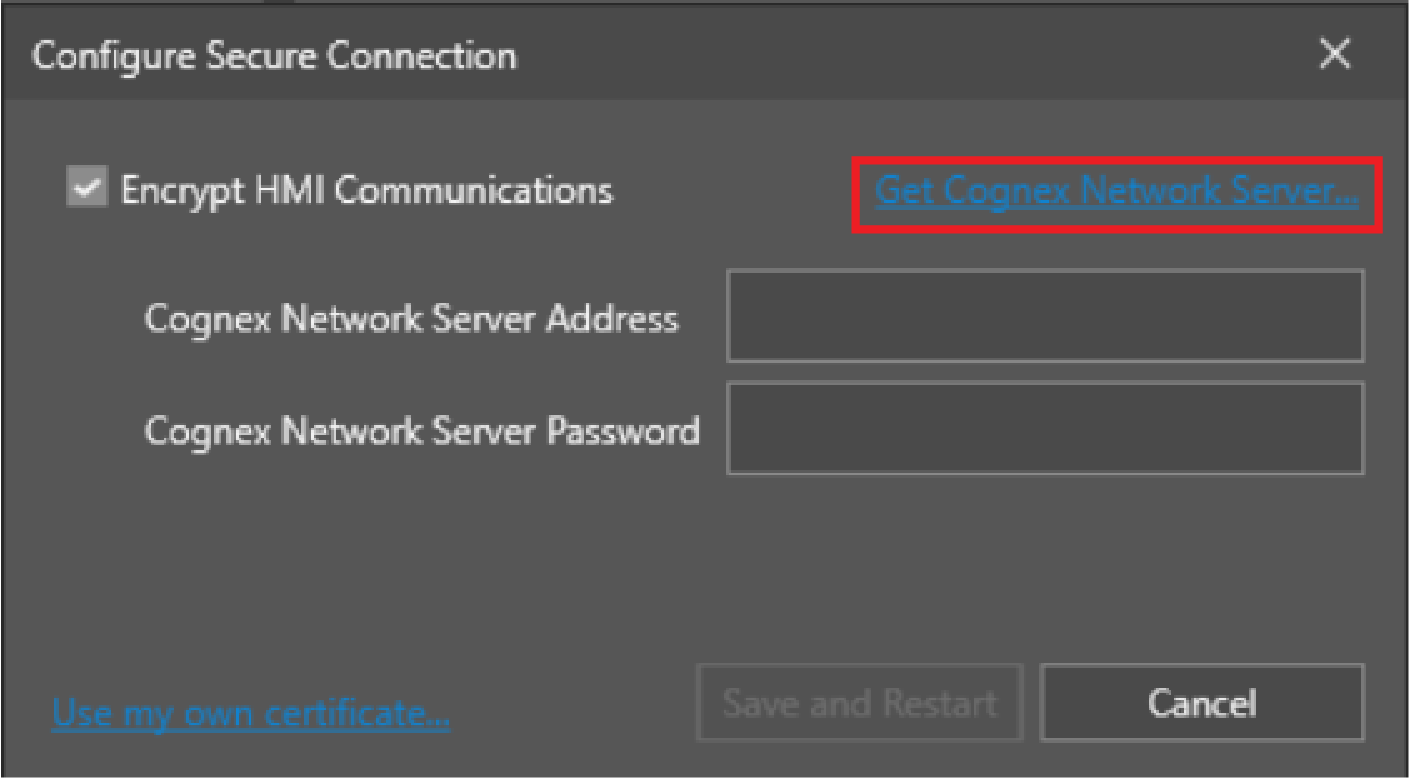
You can use the Cognex network server or your own.
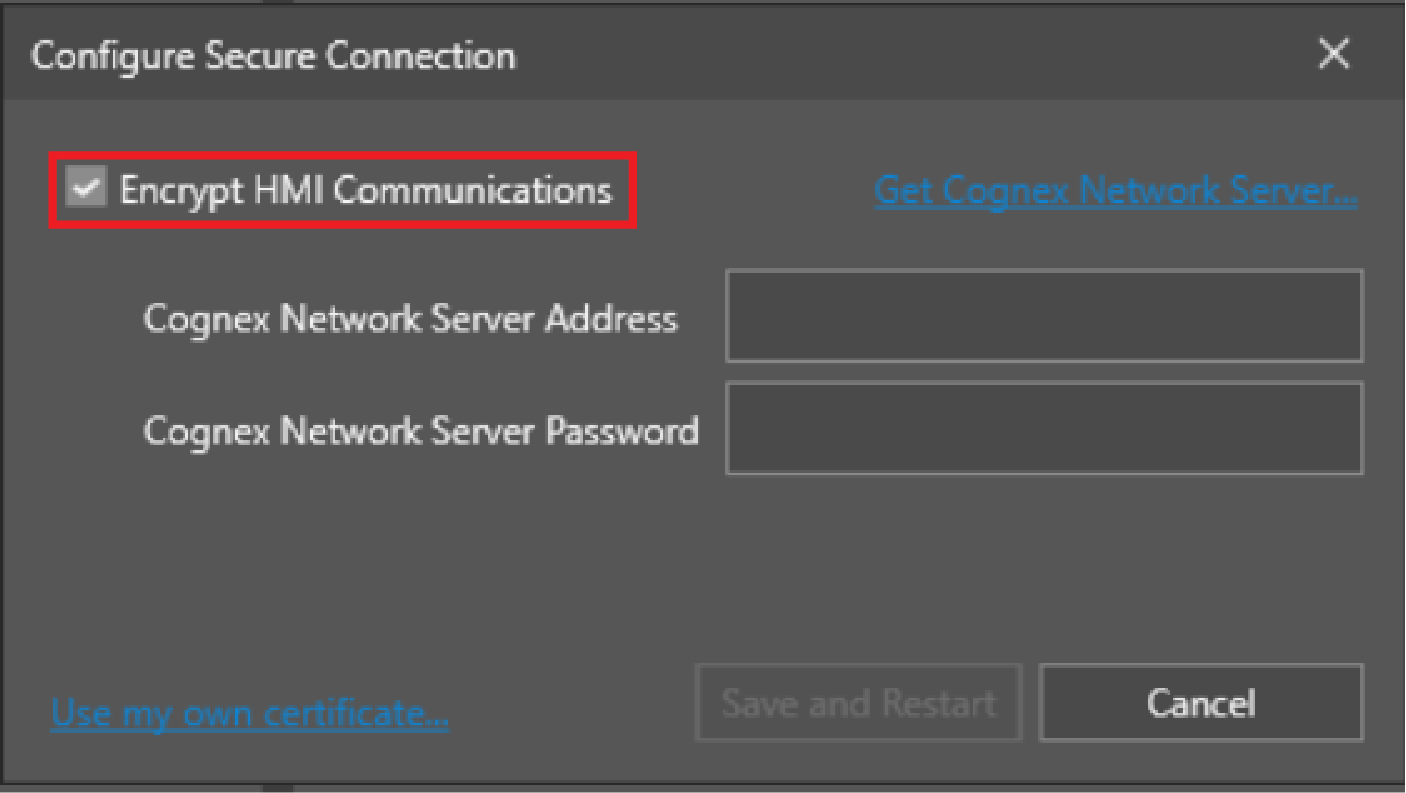
- If you want to use the Cognex network server, click Get Cognex Network Server. This opens the Cognex Network Server Installer. See Configure Secure Connection for installation instructions.
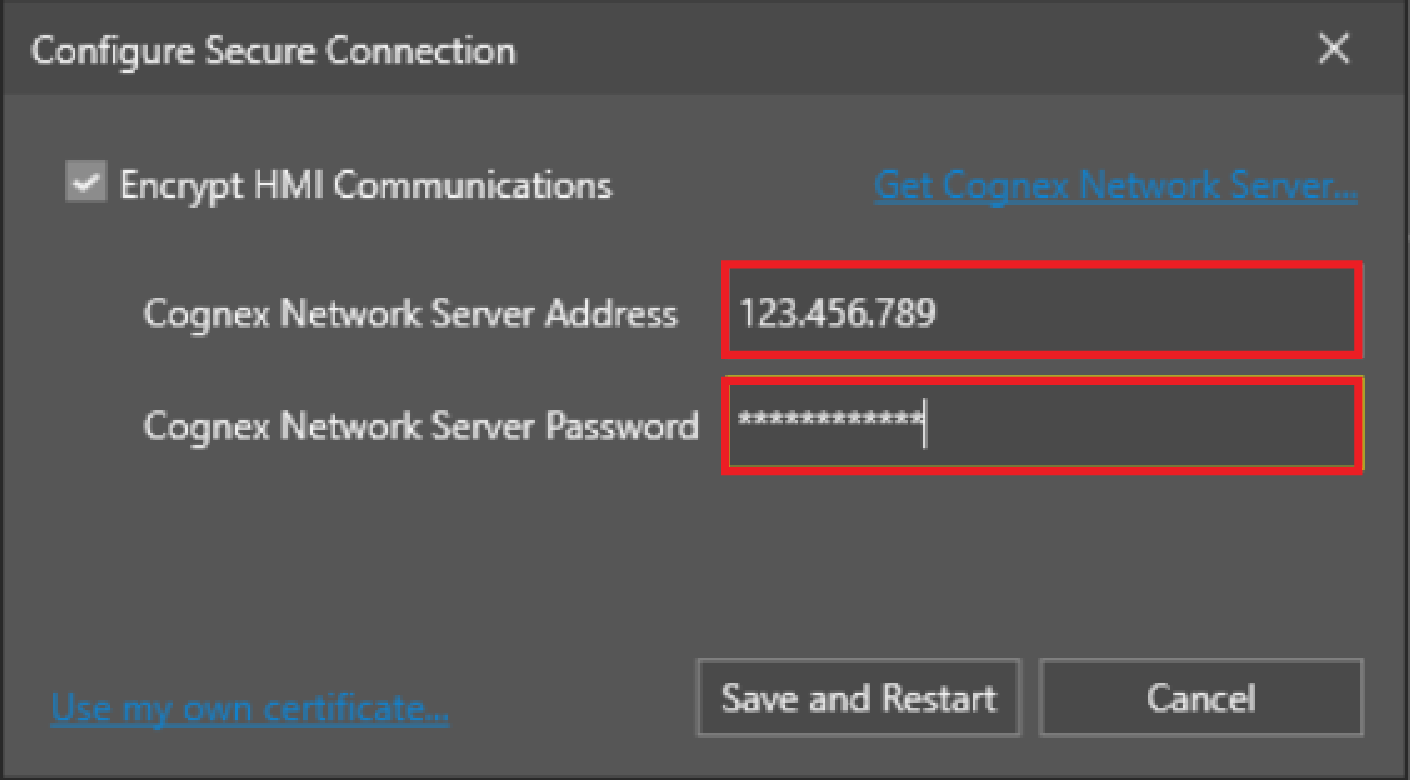
- Enter the Cognex network server address and password.
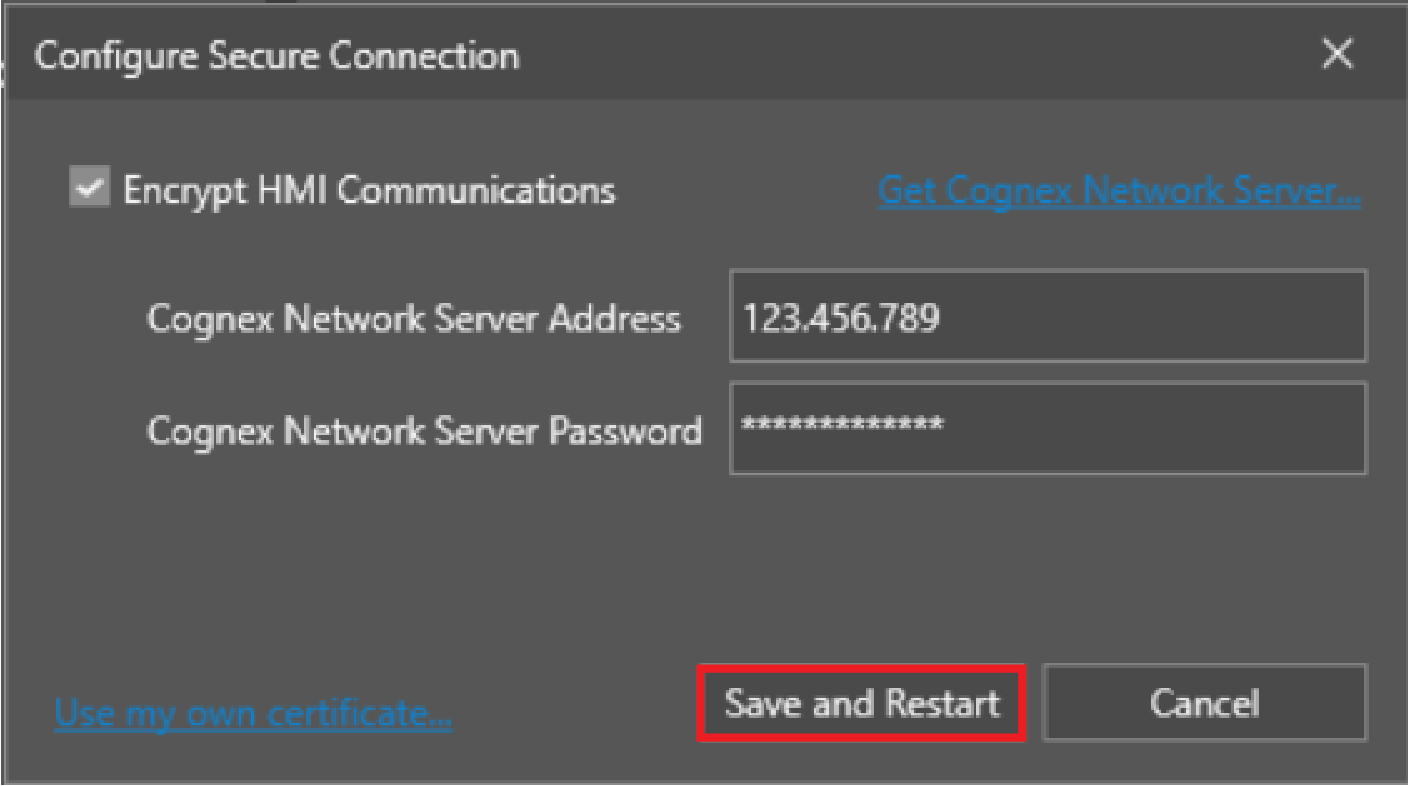
- Click Save and Restart.
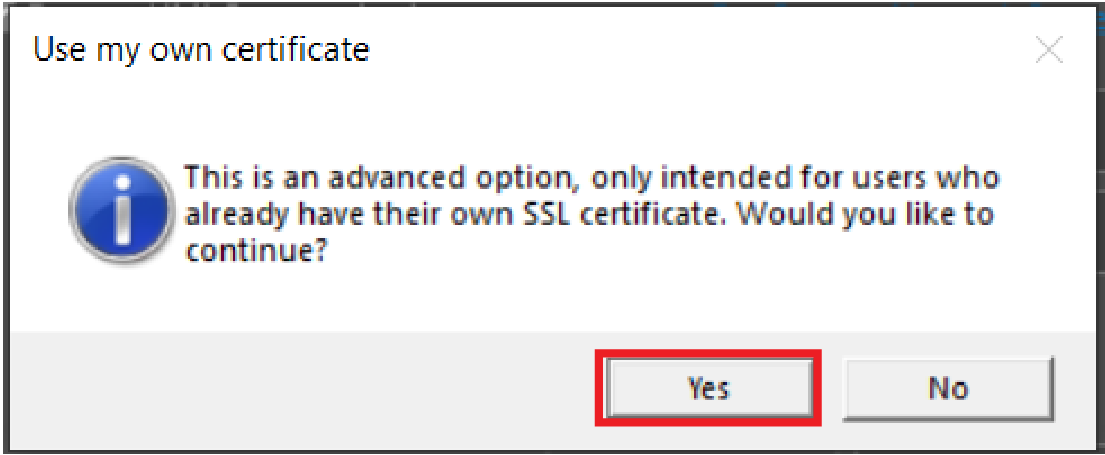
- If you want to use your own network server, click Use my own certificate.
- Click Yes in the pop-up window.
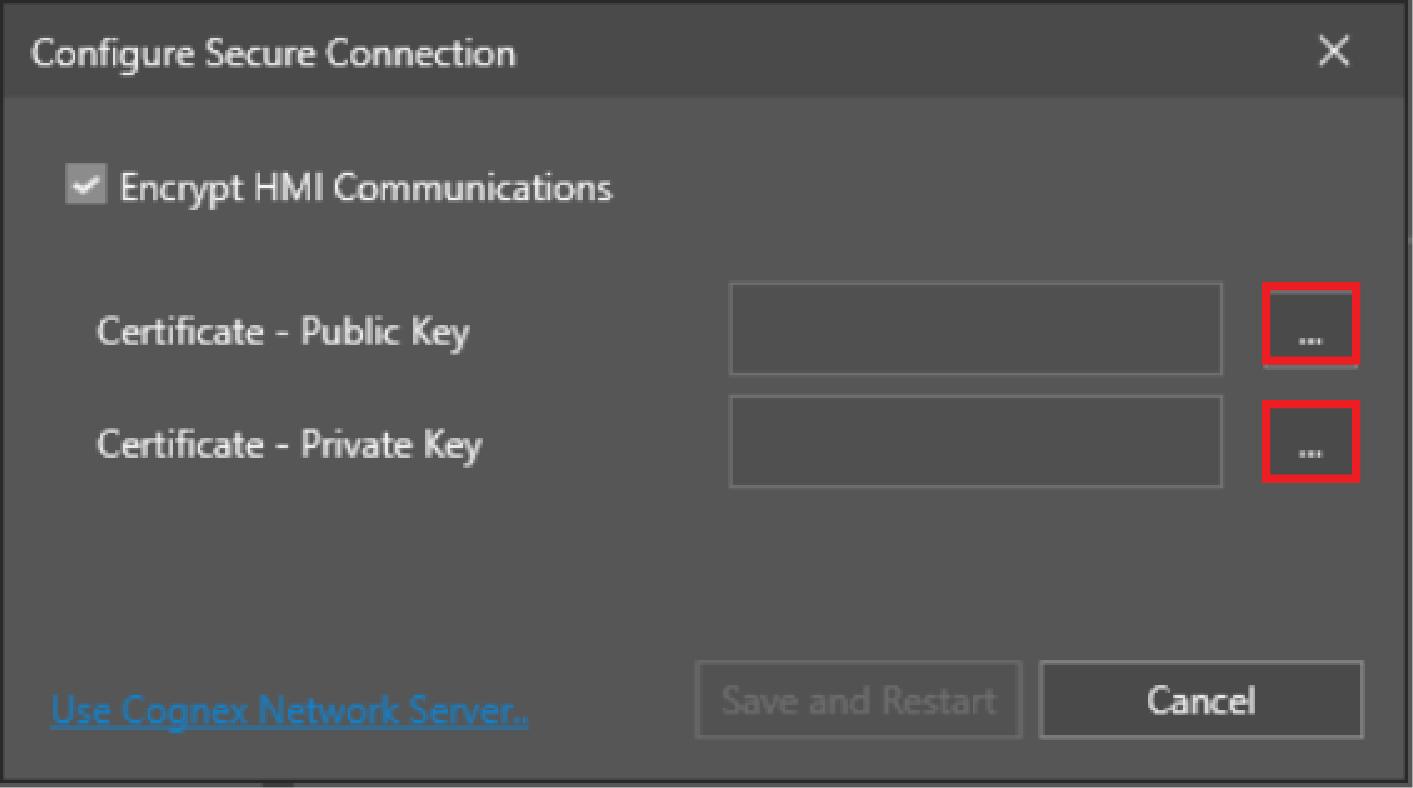
- Click the browse buttons to load the public and private key files for your network server.
-
Click Save and Restart.
All vision systems are also shipped with a self-signed certificate, which is used as a fallback after factory reset, and is regenerated every time the vision system IP address or hostname changes. The expiry date for the self-signed certificate is 50 years from the generation date for In-Sight vision systems, and 100 years from the generation date for In-Sight ViDi vision systems.