Manual Alignment
If feature finding fails, you can set up the Alignment system to do a manual alignment.
To start manual alignment you will need to enable the setting in the Advance Sensor Settings.
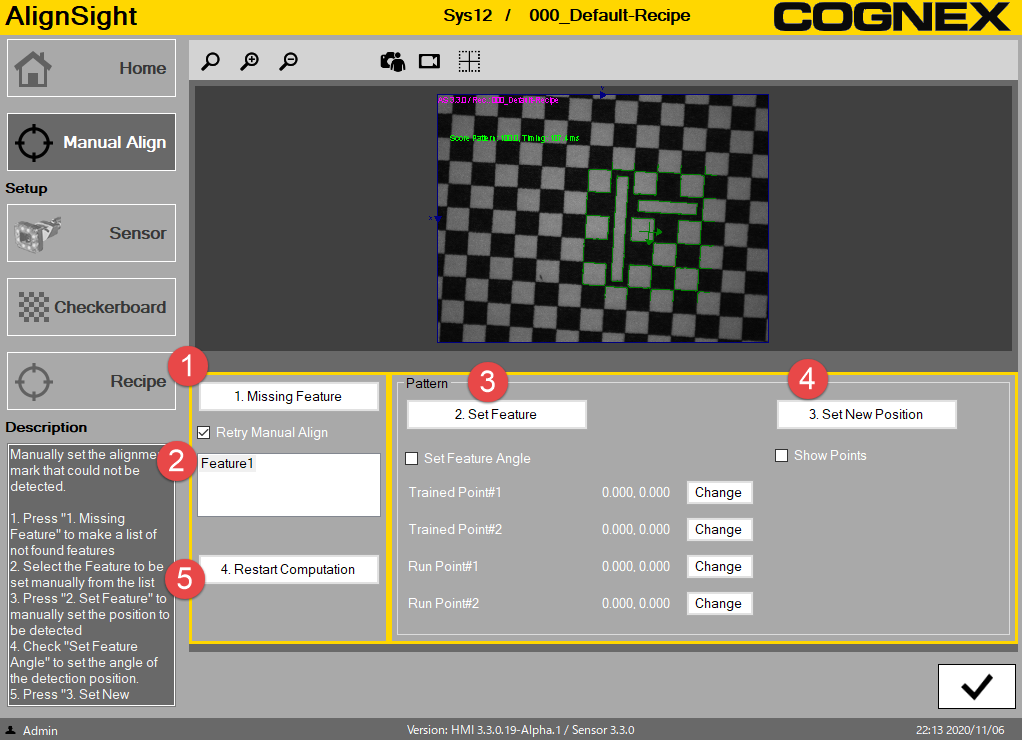
1. Missing Feature: Click "Missing Feature" to show the failed features listed in the text box below.
(Even though feature finding succeed, you can select feature manually using “Retry Manual Align” check box.)
2. Missing Feature List: Select a feature listed in the box that you want to configure
3. Set Feature: Adjust feature position in image by mouse and double-click to set the new position

- When setting the angle, check "Set Feature Angle" then the trained patten is shown on image. Click two points to indicate angle on Trained image then the trained patten disappears. Click two corresponding points on Run time image.
- (If you want to adjust the point, click the “Change” button for setting again)
4. Set New Position: Click "Set New Position" button to set new pose.
Optional: Check the Show Points to display the four points used to set angle on the image
5. Restart Computation: Click “Restart Computation” to execute the last received command again with the manually set new position, which should be an alignment command.