Control Panel
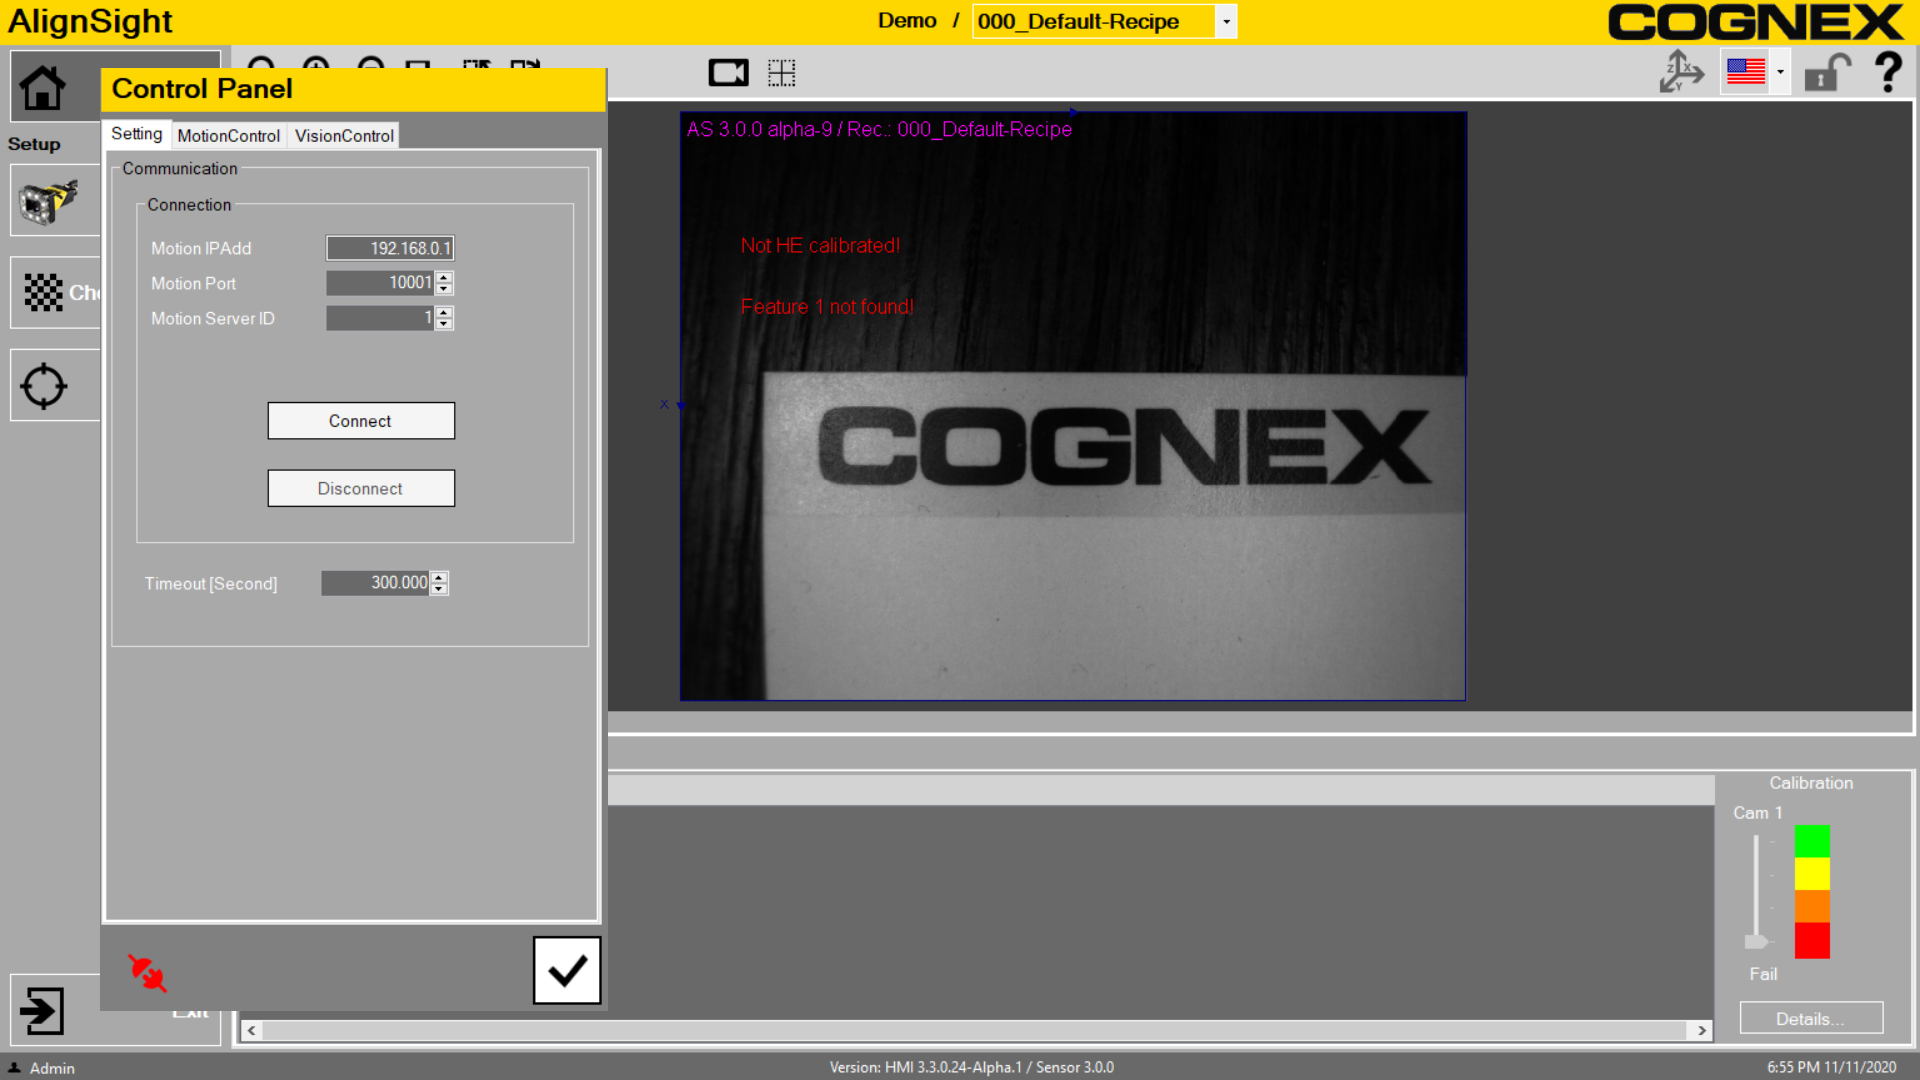
When you enable the Control Panel setting in the Advance Sensor Settings and click the Control Panel icon in the top right hand corner, you will open the Control Panel and will allow you to connect to supported robots and send commands to move them.
Using the Control Panel
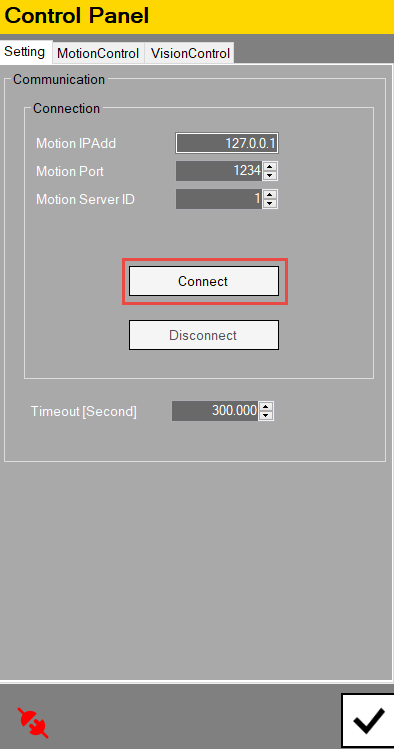
Connecting:
Connect to user application on a robot controller which receives commands from this Control Panel
MotionControl:
In the MotionControl tab, you can control the robot by the following options.
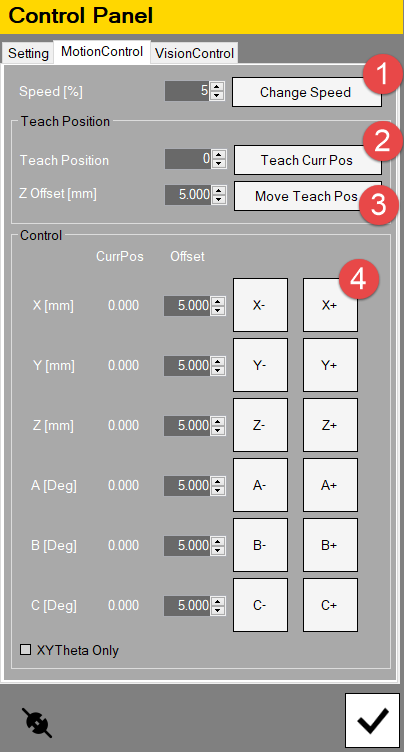
| Number | Description |
|---|---|
| 1 | Change the speed of the robot |
| 2 | Record the current position as the Teach Position for the selected Teach Position number |
| 3 | Move to the Teach Position specified by the Teach Position number |
| 4 | Shift current position by offset values |
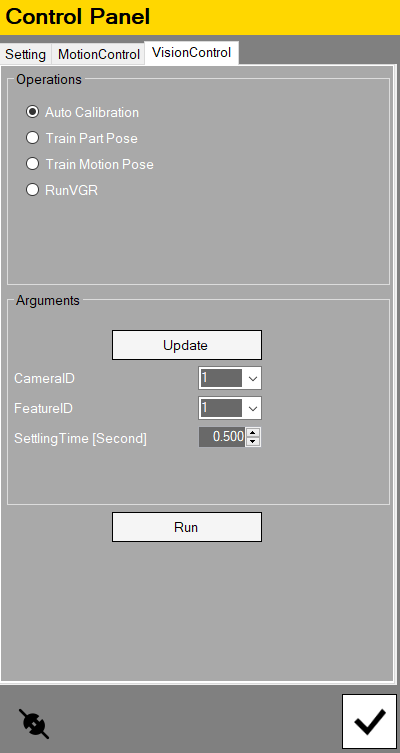
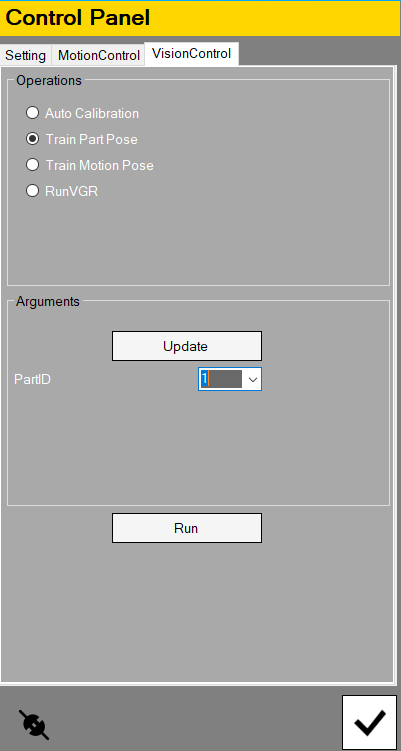
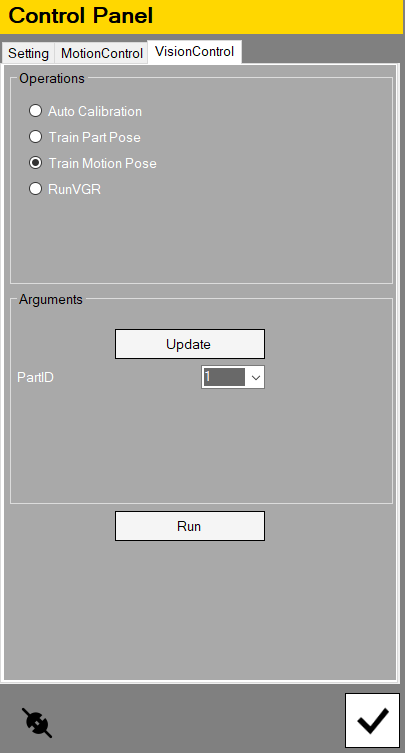
VisionControl:
In the VisionControl tab, you can set and run the different operations to calibrate and train the alignment system.
1. Auto Calibration Workflow:
- Click Update to start configuring the Auto Calibraton
- Select CameraID to be calibrated
- Select FeatureID to be calibrated
- determine the Setting Time of the robot movement
- Run Auto Calibration - this will send the vision command to the robot controller to start the auto calibration process.
2. Train Part Pose
- Click Update to start configuring the Train Part Pose
- Select the PartID
- Run Train Part Pose command - this will send the vision command to the robot controller to register the Train Part Pose
3. Train Motion Pose
- Click Update to start configuring the Train Motion Pose
- Select the PartID
- Run Train Motion Pose command - this will send the vision command to the robot controller to register the Train Motion Pose
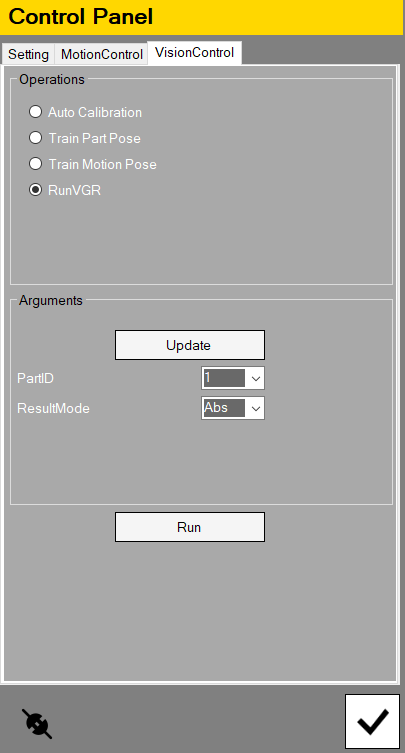
4. RunVGR
- Click Update to start configuring RunVGR
- Select the PartID
- Select ResultMode
- Run RunVGR command - this will send the vision command to the robot controller to start the RunVGR process.