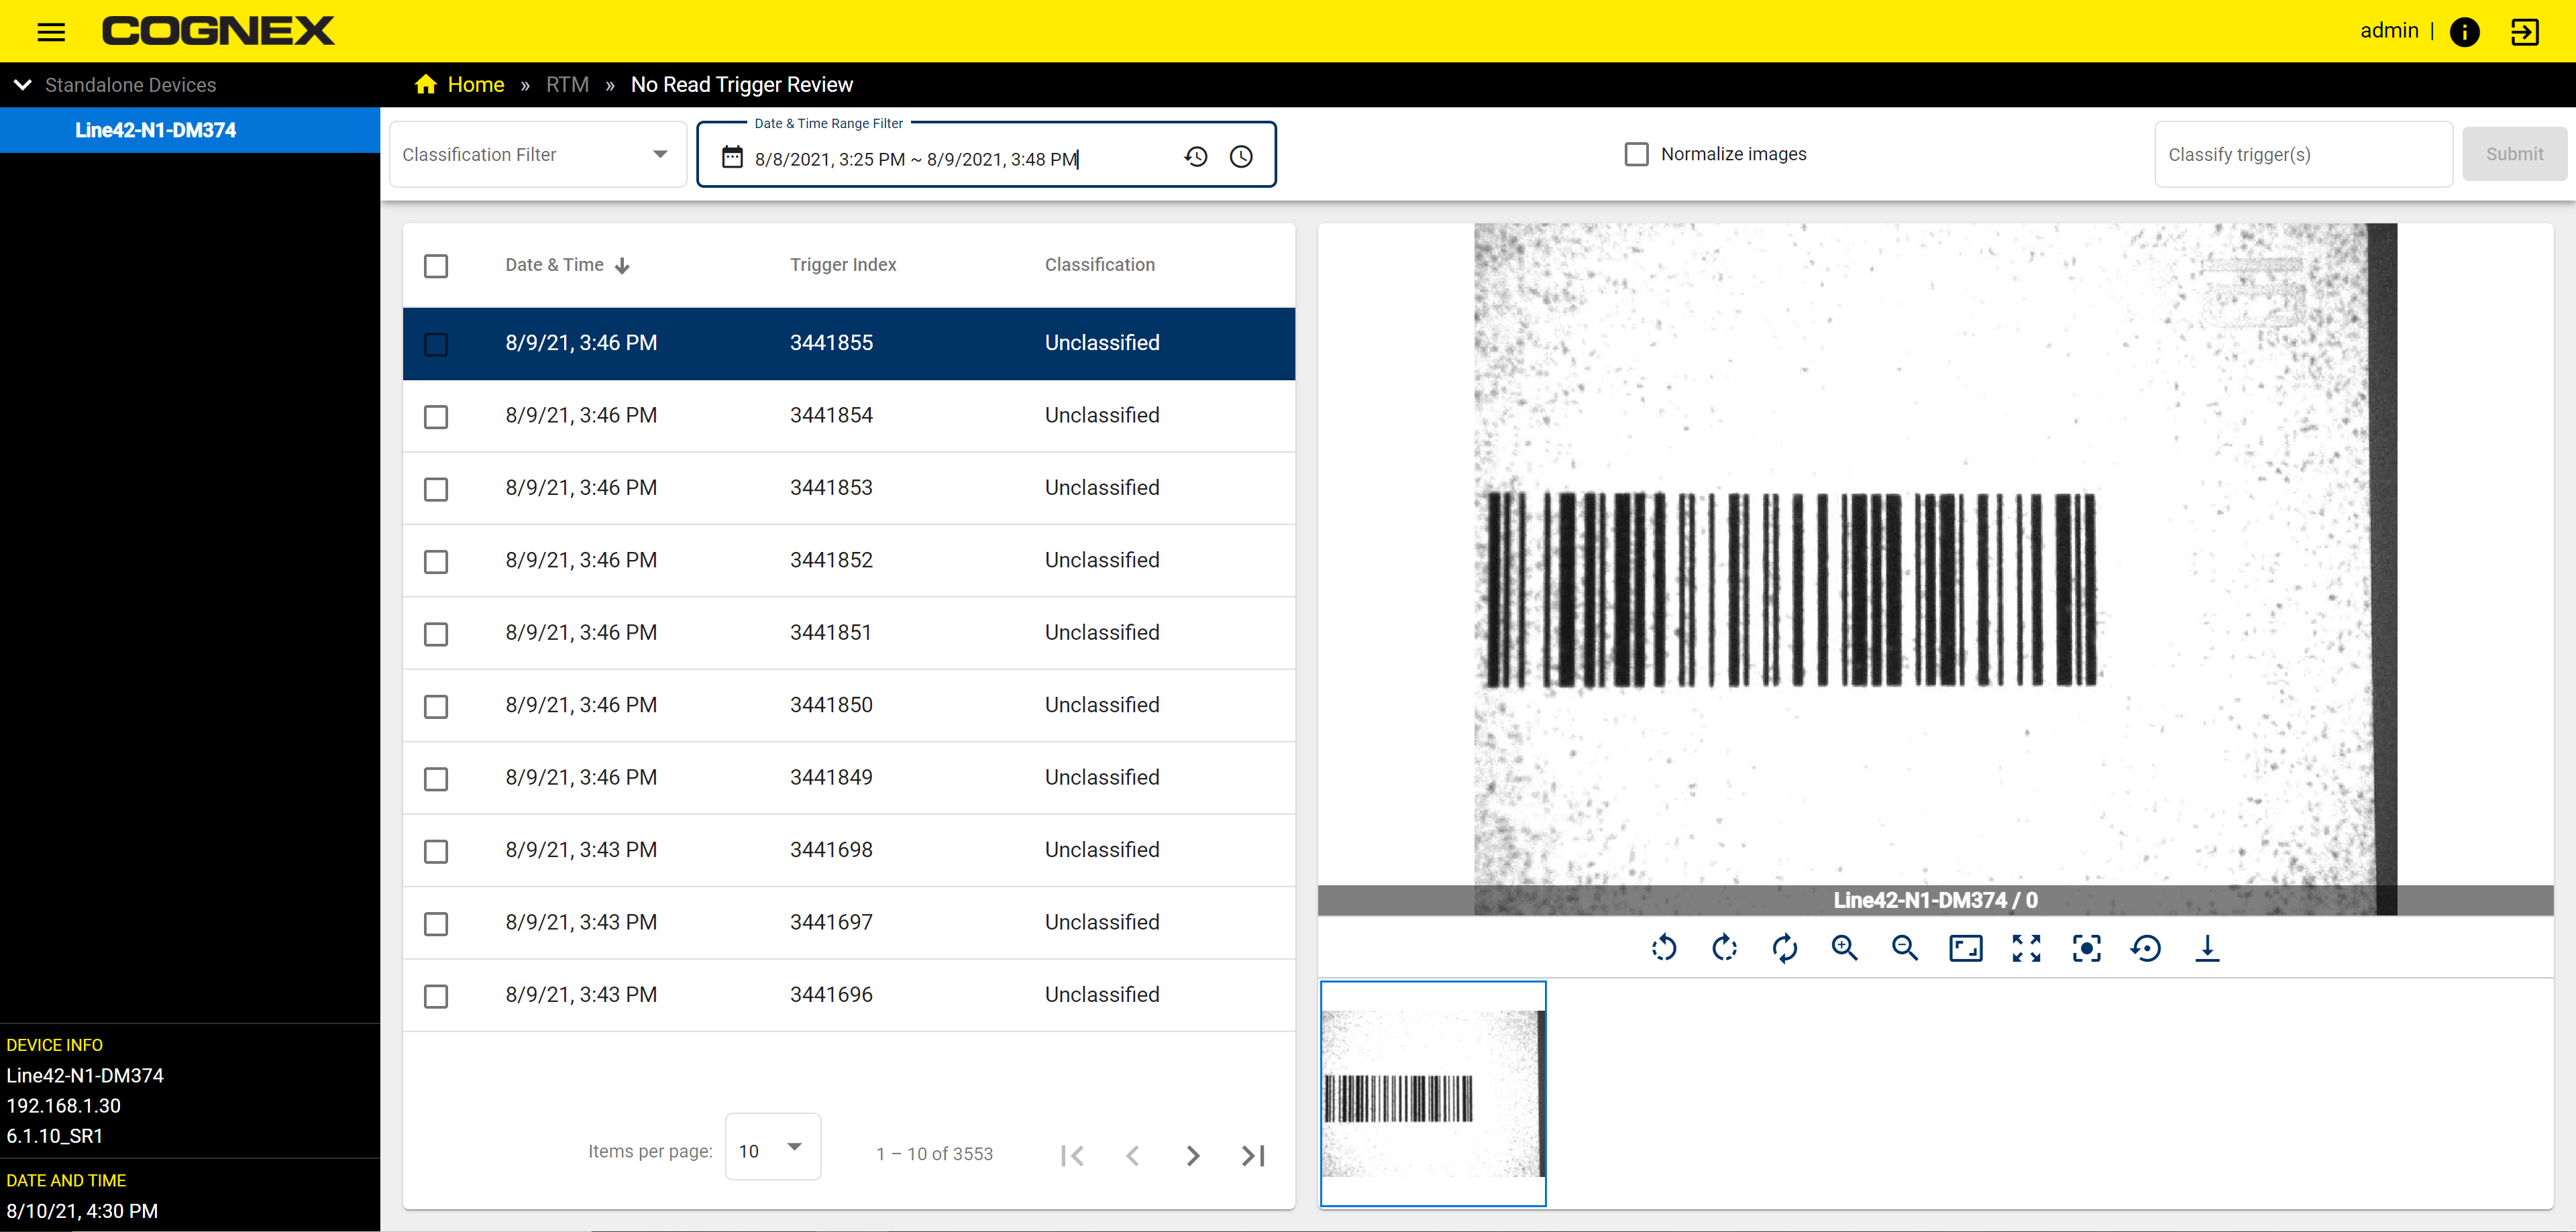
No Read Trigger Review
The No Read Trigger Review page gives an overview of images and events when no reads occurred during collection. To set a time frame for overview use classification type to classify the No Read images manually. The maximum number of the No Read events is 100 on a single page.
To view images from a secondary reader (from MRS group), first enable trigger collection on the primary reader on the Settings page.
| Dashboard Item | Description |
|
Classification Filter |
To chose the classification types select from a dropdown menu that the table below will filter for:
|
|
Date and Time Range Filter |
To define a period of time from which performance data is collected for the charts use the time range app. For more information visit Date & Time Range Filter Note: The selected range filter stays the same between Performance Overview, Configuration Change History, and No Read Trigger Review pages.
|
|
Normalize Image check box |
To enhance the quality of images check the Normalize Image checkbox. Normalizing improves the contrast by stretching the intensity values of an image. |
|
Classify trigger(s) field |
To manually classify No read images enter their own classification or choose from a dropdown menu:
|
|
Submit |
The Submit button saves the new classifications you assign in the Classify trigger(s) text field. |
|
No Read Image table |
The table shows No Read data in three columns:
Each entry in the table represents 1 No read trigger event. To view the No Read image, click on the row of the trigger event and the image is displayed on the right side of the table. To arrange the data click on the headers of the three columns. |
|
Image Display window |
This window displays the No read image of the selected row of the No read trigger Image table. To control the image in the display window use the Device Display Controls. For more information see Device Display Controls. |