The DLRuntime tool edit control provides a graphical user interface to the CogDLRuntimeTool API, which you use to integrate a saved VisionPro Deep Learning (VPDL) runtime workspace into your VisionPro application. See the topic Integrating a VPDL Runtime Workspace for more information.
For example, the following figure shows a DLRuntime tool after executing the Blue Read tool of an integrated VPDL workspace:
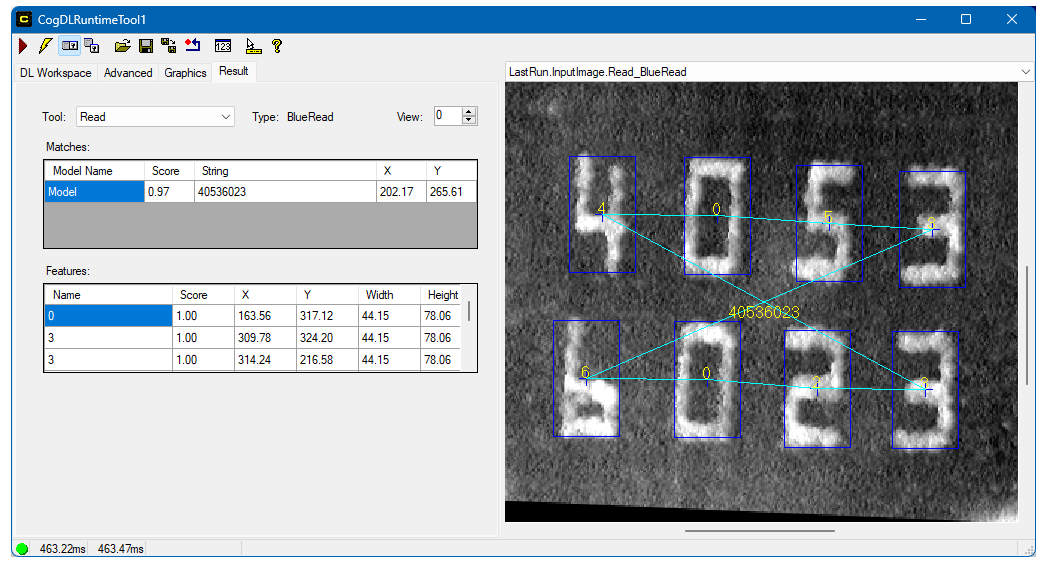
The edit control offers the following features:
- A row of control buttons at the top provide access to the most common operations.
- A set of function tabs allow you specify the VPDL workspace you want to import and view results from the tools contained in the workspace.
- An image display window displays the images you acquire and the results of processing the image with the various VPDL tools configured in the runtime workspace.
To include the edit control in your custom vision application, you must first add it to your Visual Studio .NET development environment. See the topic Adding Edit Controls to Visual Studio for more information.
See the following sections for more information:

The following table describes the function of each button:
| Button | Description | Function |
 | Run | Run the tools contained in the VPDL runtime workspace on the image stored in the Current.InputImage record. |
 | Electric mode | Toggle electric mode, where the DLRuntime tool executes automatically when particular configuration parameters change. In electric mode, a lightning bolt appears next to every electric property. |
 | Local image display | Open or close the local image display window. A DLRuntime tool supports the following image buffers:
|
 | Floating image display | Open one or more floating image windows, which support the same image buffers as the local image display window. |
 | Open | Open a VisionPro persistence (.vpp) file that contains a set of saved properties for this vision tool object type. VisionPro reports an error if you try to open a .vpp file for another object type. |
 | Save | Save the current properties of the vision tool to a VisionPro persistence (.vpp) file. The edit control allows you to choose between saving the vision tool with or without its image buffers and tool results. |
 | Save As | Save the current properties of the vision tool to a new VisionPro persistence (.vpp) file. |
 | Reset | Reset the vision tool to its default state. The tool gives you a choice between resetting to the default-constructed state, which is appropriate when you are using it in a Visual Studio.NET application, or its template-initialized state, which is appropriate for QuickBuild applications. |
 | Show Floating Results | Open a separate results window with the same contents as seen in the Results tab. |
 | Show ToolTips | Enable or disable the display of tooltips for individual items in the edit control. |
 | Help | Open this VisionPro online help file. |
Use the DL Worksapce tab to select the VisionPro Deep Learning (VPDL) runtime workspace you want to integrate into QuickBuild. Use the following element to toggle between simple and advanced mode:
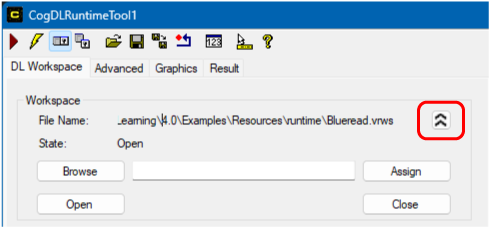
The tab offers the following parameters in simple mode:
| File Name | The VPDL runtime workspace to integrate with your VisionPro application |
| State | Indicates whether the workspace file is currently open and usable |
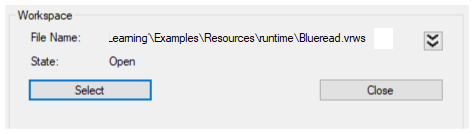
| Select | Launch a file selection dialog box, assign the selected filename, and attempt to open it. |
| Close | Close any open VPDL runtime workspace. |
The tab offers the following parameters in advanced mode:
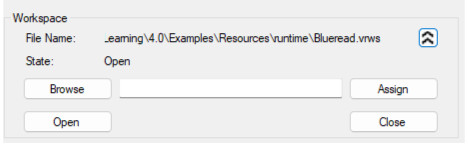
| File Name | The runtime workspace to be integrated |
| State | Indicates whether the workspace file is currently open and usable |
| Browse | Launch a file selection dialog box and store the filename you select. |
| Assign | Apply the contents of the text box to the File Name property of the tool. |
| Open | Open the specified runtime workspace file. |
| Close | Close any open VPDL runtime workspace. |
Use Selected Stream Name to select the stream you want to process:

Every VPDL workspace supports a collection of streams, where each stream supports its own database of training images and deep learning tools. Refer to your VisionPro Deep Learning technical documentation for details on streams.
Use Parameters to modify certain runtime parameters for the various VPDL tools:
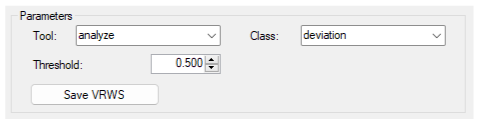
Depending on the VPDL tools in your integrated workspace, you can modify the following parameters:
- The Threshold parameter of the Blue Read, Blue Locate, and the Legacy type of the Green Classify tools.
- The Probability Threshold parameter of the Standard type of the Green Classify tool.
The Region Threshold of the Red Analyze tool, in all types.
In addition, the edit control allows you to select a Red Analyze tool class by name.
Refer to your VisionPro Deep Learning technical documentation for details on these threshold parameters.
Click Save VRWS to save any changes to the original VPDL workspace.
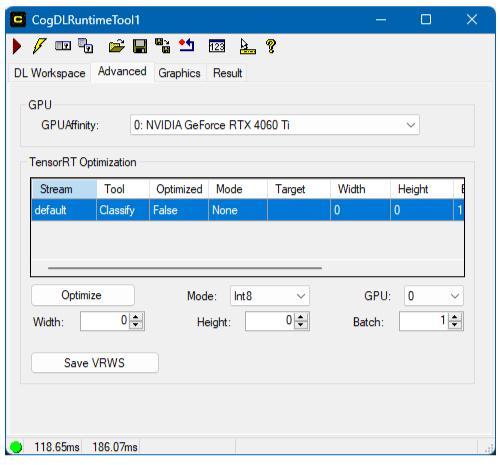
Use the Advanced tab to optimize the performance of this DLRuntime tool with the installed NVIDIA GPU:
Use GPU Affinity to specify a particular installed GPU to use with this DLRuntime tool:
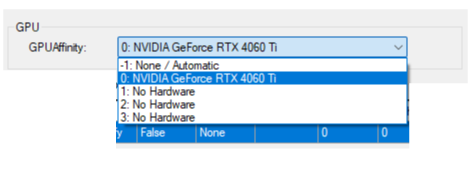
The default value of -1 configures the DLRuntime tool to choose the GPU automatically from those available.
Use TensorRT Optimization to enhance the performance of an individual tool within your VPDL runtime workspace based on your installed NVIDIA GPU. To optimize a given machine-learning vision tool allows VisionPro to use a set of techniques that compress and improve your trained model to make predictions or decisions based on new, unseen data.
The DLRuntime tool makes TensorRt optimization available for select VPDL tools. The Advanced tab displays what vision tools are available for optimization with your selected GPU:
Cognex recommends TensorRT Optimization for applications that you deploy on hosts with a supported NVIDIA GPU. If you do not know what GPU will be available for a deployed application, Cognex recommends you do not perform any TensorRt optimization. An optimized vision tool might completely fail to function in a deployment PC with an unsupported GPU.
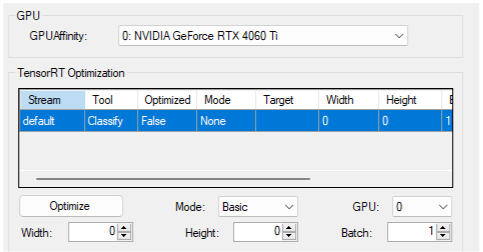
The optimization option offers the following parameters:
| Mode | Choose a speed-optimization method from the following options:
|
| GPU | The setting for GPU Affinity |
| Width and Height | By default, the tool performs TensorRT optimization for the trained image size, but you can specify a custom image size. |
| Batch | The batch size to use in optimizing this VPDL tool. See your VisionPro Deep Learning documentation for details on using batches. |
Click Save VRWS to save any changes to the original VPDL workspace.
Use the Graphics tab to enable or disable various graphics over the LastRun records associated with any VPDL tool in the runtime workspace:
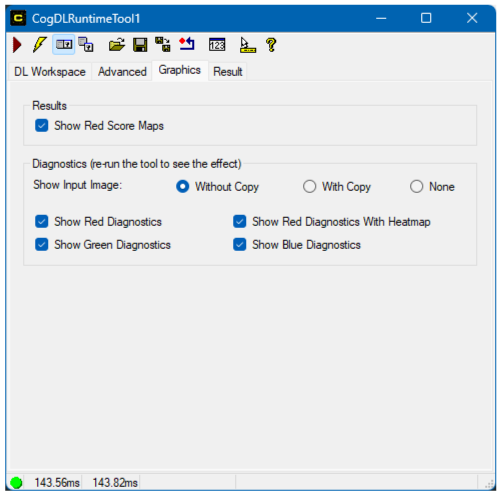
Enable Show Red Score Maps to show the ScoreMap image for any Red tool.
Enable or disable any of the following diagnostic graphics:
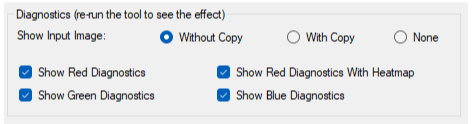
| Show Input Image | The Without Copy, With Copy, and None options determine whether or not the input image is recorded as part of the diagnostic record; and whether the image is copied to the record or saved in the record as a reference. |
| Show Red Diagnostics | Show limited diagnostic graphics for any Red tool in the processed stream. |
| Show Red Diagnostics with Heatmap | Show diagnostic graphics with heat map for any Red tool in the processed stream. |
| Show Green Diagnostics | Show diagnostic graphics for any Green tool in the processed stream. |
| Show Blue Diagnostics | Show diagnostic graphics for any Blue tool in the processed stream |
Use the Result tab to view the Results from any VisionPro Deep Learning tool in the runtime workspace:
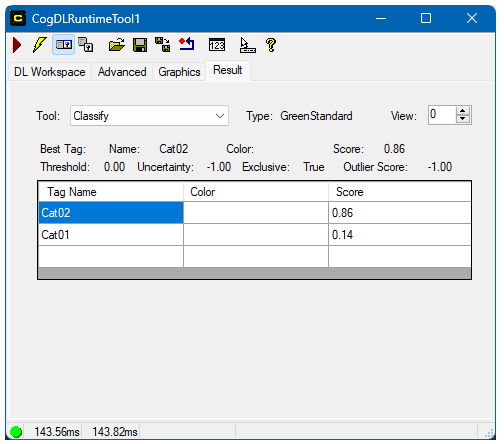
Use Tool to choose which VPDL tool result to display. Refer to your VisionPro Deep Learning documentation for details on the results for any tool.