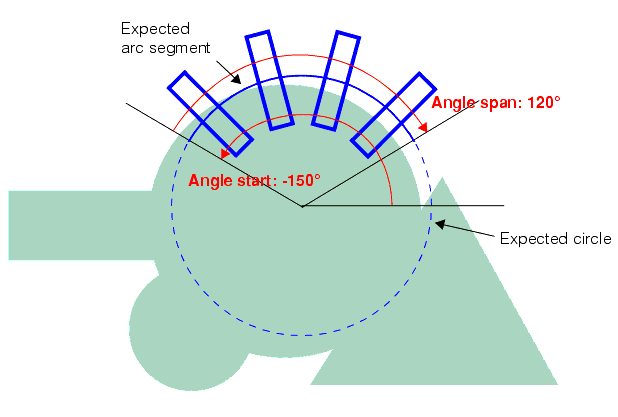
To use a Find Circle tool you must know the approximate location of the circle you wish to find in the image. Supply this information to the tool as an expected circular arc. In addition, you specify the number of calipers to use to generate edge points, the geometry used for all of the calipers, and the angle range across which the calipers are to be placed. The tool evenly spaces the calipers along the angle range of the circle.
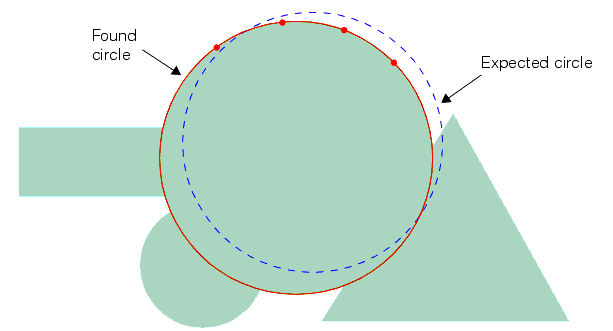
Although the expected circle is not exactly coincident with the image circle, it is close enough so that the calipers all see an image circle edge. This is the important consideration.
In addition to specifying the expected circle and arc segment, you also provide the geometry used for each of the caliper regions. The following figure shows how you specify the caliper geometry.
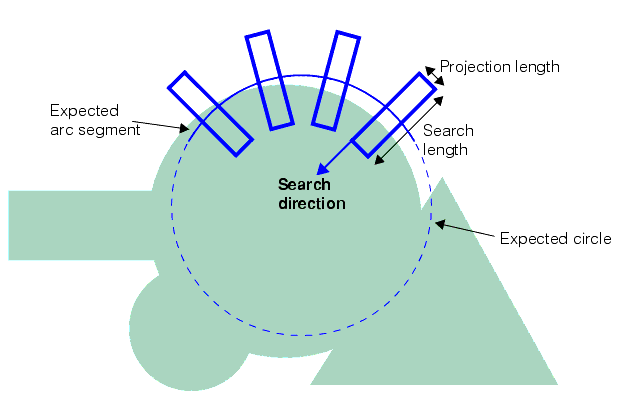
Unlike the Find Line tool, you cannot specify a skew angle for the calipers. You can specify that the search direction be toward or away from the center of the expected circle. After placing the calipers, the Find Circle tool calls the Caliper tool once for each caliper, using the same run-time parameters for each call. The following figure show the edge points found by the Caliper tools:
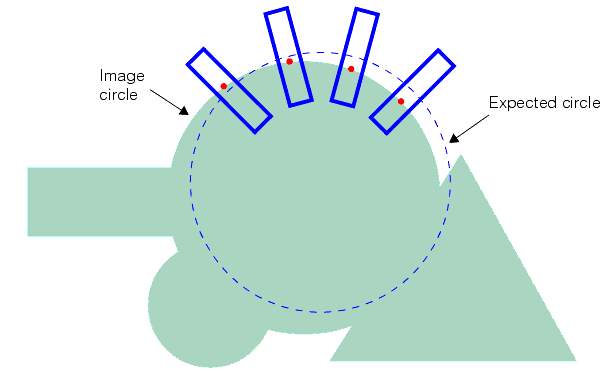
The found circle edges are applied to the Find Circle tool which fits a circle to the points. The following figure shows the final fitted circle which is included in the tool result.
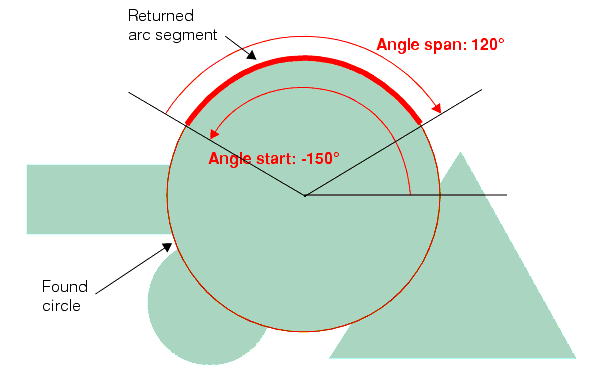
The circle shown in this figure is shortened to an arc segment by applying the angle start and angle span you specified for the expected arc segment. The following figure shows how the expected angle start and angle span are used to construct the returned arc segment: