This topic contains the following sections.
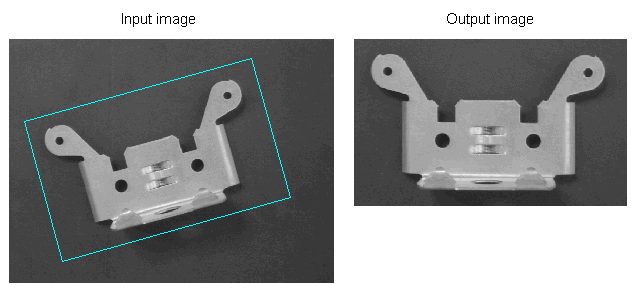
The Affine Transform tool transforms the area of an image contained within a CogRectangleAffine object and generates a new rectangular output image. The tool removes the effect of any rotation and skew present in the dimensions of the affine rectangle. For example, the following figure shows an affine rectangle around an object under inspection and the output image the Affine Transform tool generates:
In addition, the tool allows you to specify an additional scaling factor if you want to reduce or enlarge those features the rectangle contains. The tool can also be used to create a mirror image of an input image, where the output image switches coordinate systems.
You might use an Affine Transform tool to adjust a region of an input image when the object of interest can appear rotated from one image to the next, and you want to analyze the image with a vision tool that does not tolerate much rotation, such as the CNLSearch tool.
In many vision applications, the position of the object under inspection can shift from one inspection to the next. If the Affine Transform tool does not automatically adjust its position and rotation to compensate, then it can easily generate an output image that does not contain the desired features. Applications that use an Affine Transform tool typically use a Fixture tool to allow the application to compensate for the positional, rotational, and scale changes of the objects to be inspected from one acquired image to the next.
The following procedure creates a QuickBuild application that uses a Fixture tool to control the orientation of the Affine Transform tool on the input image:
- Configure the Job's Image Source to use the images in the file Cognex\VisionPro\Images\bracket_std.idb.
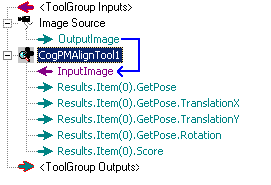
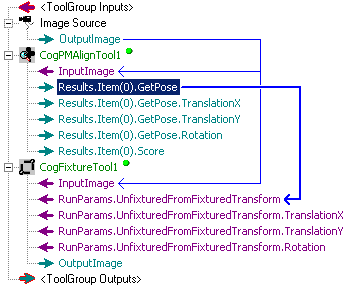
Create a CogPMAlign tool and give it the OutputImage from the Image Source, as shown in the following figure:
- Run the Image File tool once to give the PMAlign tool an input image.
Configure the PMAlign tool to locate the upper-right corner of the bracket, as shown in the following figure:
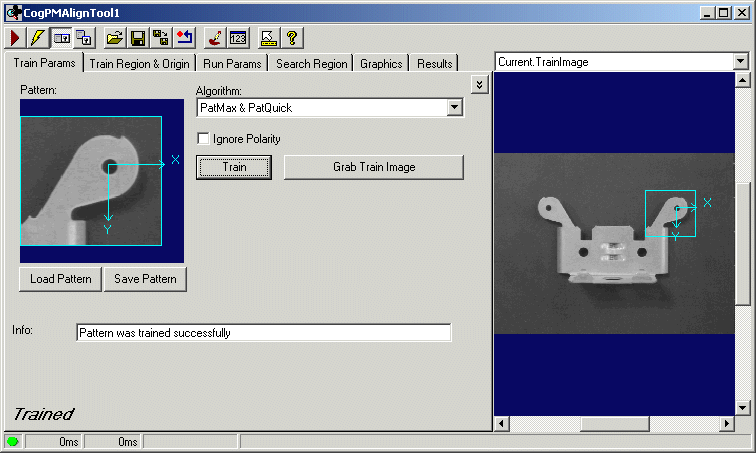
- On the Run Params tab of the PM Align edit control, enable the Angle parameter and use the default -45 to 45 degrees of rotation.
- Add a Fixture tool to the application and give it the same OutputImage from the Image File tool.
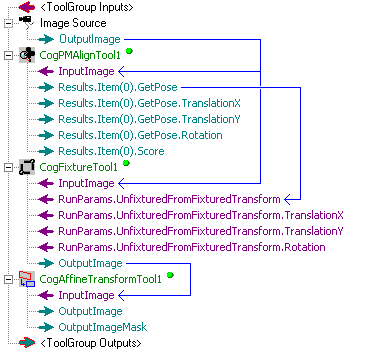
Link the GetPose output terminal from the PM Align tool to the RunParams.UnfixturedFromFixturedTransform input terminal of the Fixture tool, as shown in the following figure:
Add a CogAffineTransform tool and give it the OutputImage from the Fixture tool, as shown in the following figure:
Open the Affine Transform tool edit control. The local image window should show a bracket and the default affine rectangle, as shown in the following figure:

For convenience, you might want to run the application until the local image window displays the bracket with no rotation, as shown in the following figure:
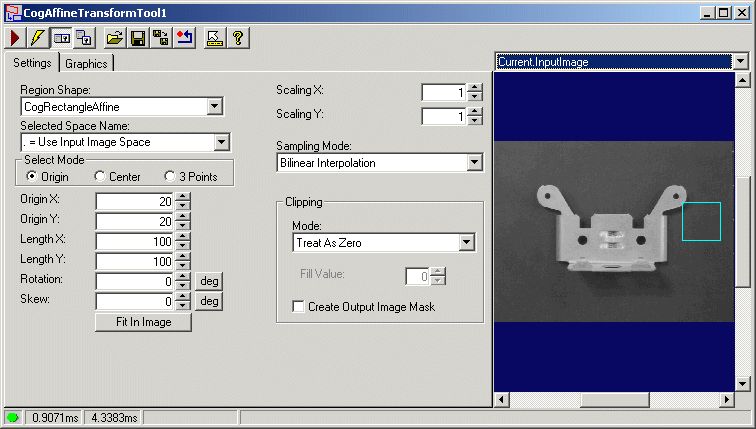
Adjust the graphic for the affine transform until it tightly encloses the bracket, as shown in the following figure:
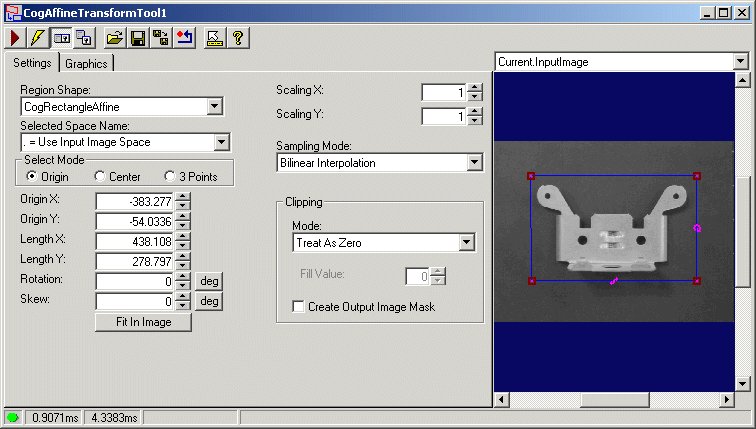
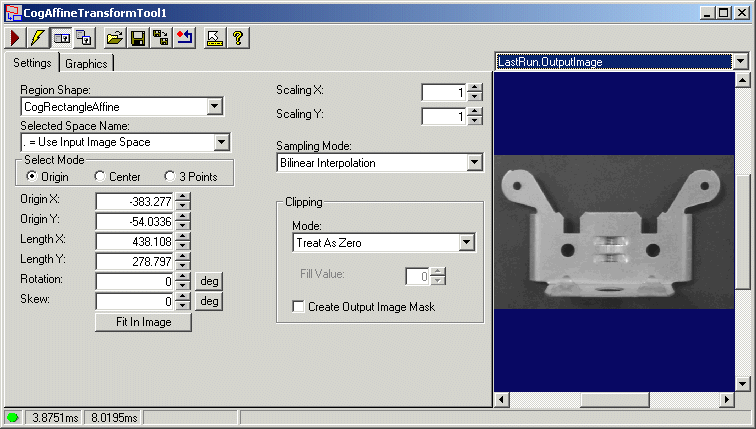
Run the application several times. The position and rotation of the affine rectangle should change based on the position and rotation of the bracket. If you switch to the OutputImage buffer, however, the bracket should appear unrotated as shown in the following figure:
The OutputImage from the Affine Transform tool can now be analyzed without regard for any rotation that might be present in each acquired image.
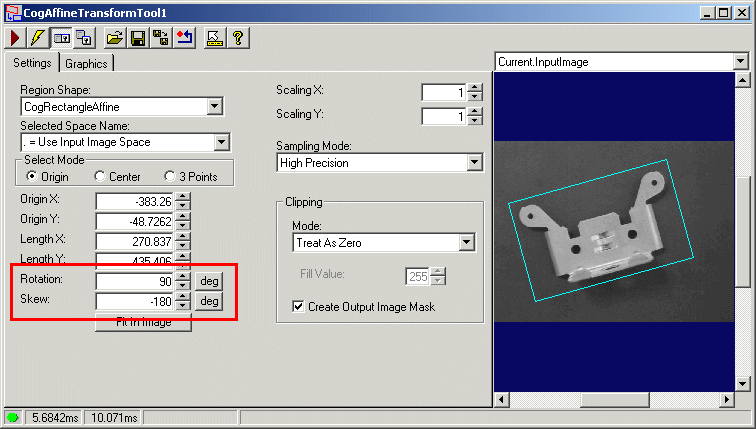
By default, the affine rectangle generates an output image that uses a left-handed coordinate system, where positive rotation occurs as you move in a clockwise direction. By specifying a rotation value of 90 degrees (positive or negative) and a skew value of 180 degrees (positive or negative), the output image the tool generates will use a right-handed coordinate system, where positive rotation occurs as you move in a counter-clockwise direction.
Set the rotation and skew values on the Settings tab of the Affine Transform tool edit control, as shown in the following figure: