This topic contains the following sections.
- Find Line Graphics
- Adjusting the Expected Line Segment
- Changing Caliper Search Length and Projection Length
- Changing the Search Direction
- Find Circle Graphics
- Adjusting the Expected Arc Segment
- Changing the Caliper Search Length and Projection Length
- Changing the Arc Radius
- Find Ellipse Graphics
- Adjusting the Expected Elliptical Arc Segment
- Changing the Caliper Search Length and Projection Length
- Changing the Elliptical Arc Shape
- Easy Placement and Adjustment of the Elliptical Arc
The ActiveX edit controls for the Shape Finding tools each support a set of graphics that allow you to determine the location and size of the expected line segment and expected arc segment used by the Find Line and Find Circle tools, respectively. In addition, the graphics allow you to adjust the length and angle of the Calipers each tool uses to detect edge points.
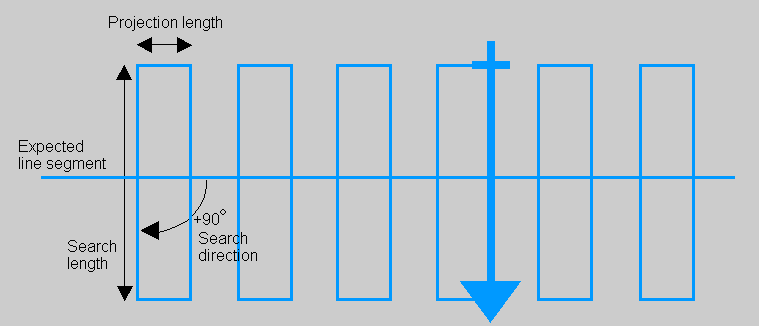
The following figure shows the default graphics for the Find Line vision tool, and highlights the various parameters you can use the graphics to configure:
Click on the expected line segment to highlight it and expose a pair of endpoint handles on either end, as shown in the following figure:
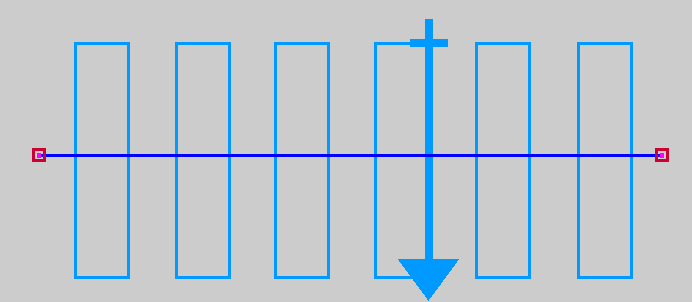
You can select and drag the segment to any position inside the image window, or use the endpoint handles to rotate and resize it. For best results you should place the line segment over the actual edge in the image. To provide precise values for the location of the endpoints, use the Settings tab of the edit control.
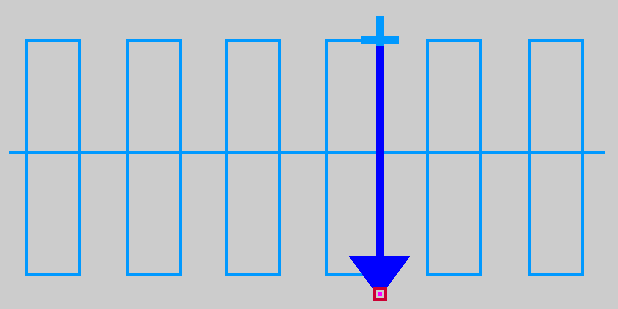
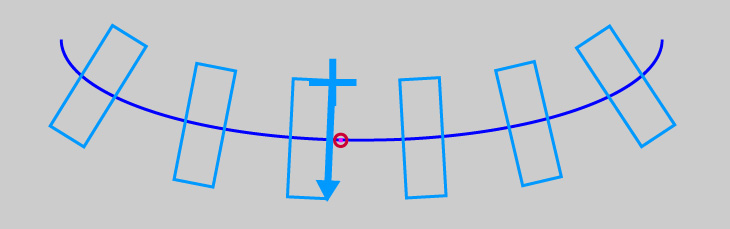
To change the search length and projection length of all the Calipers, select the caliper handle along the top of the center-most Caliper, as shown in the following figure:
You can drag the caliper handle in any direction to adjust the search length and projection length. To provide precise values, use the Settings tab of the edit control.
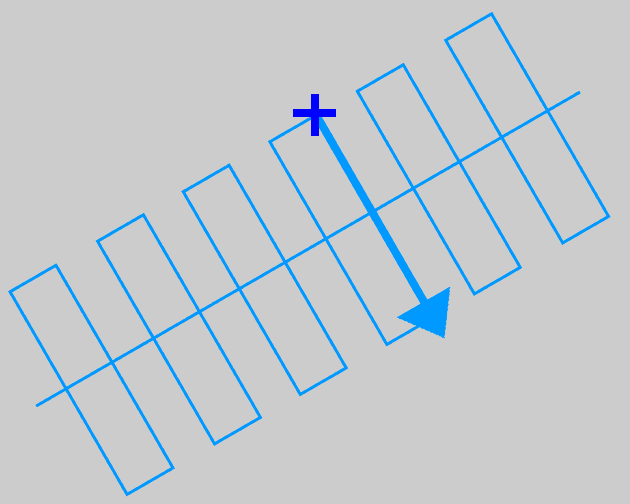
To change the search direction of all the Calipers, select the rotation handle along the middle of the center-most Caliper, as shown in the following figure:
You can drag the rotation handle in any direction to modify the search direction of all the Calipers. To provide a precise value, use the Settings tab of the edit control. The Settings tab also allows you to swap the search direction 180 degrees.
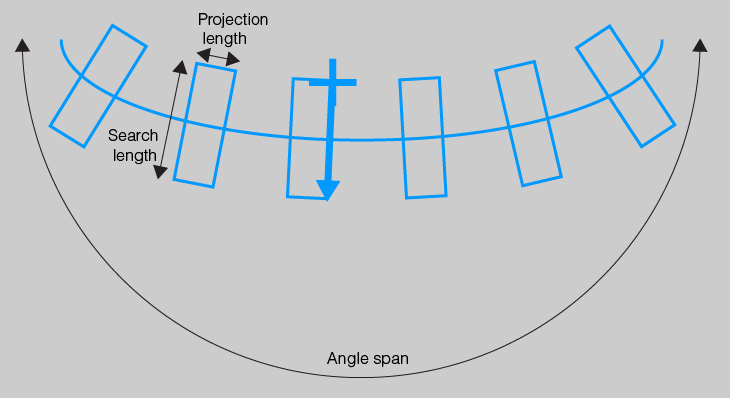
The following figure shows the default graphics for the Find Circle vision tool, and highlights the various parameters you can use the graphics to configure:
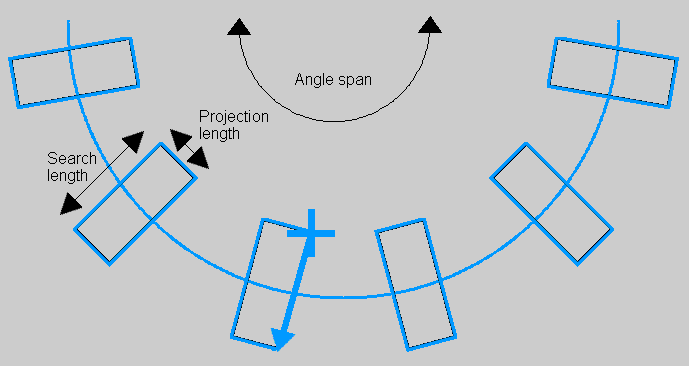
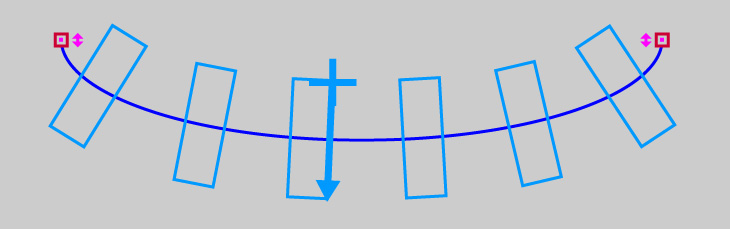
Click on the expected arc segment to highlight it and expose a pair of endpoint handles and arc handles, as shown in the following figure:
You can select and drag the arc segment to any position inside the image window, or use the endpoint handles to rotate and resize it. For best results you should place the arc segment over the actual circular feature in the image. To provide precise values for the location of the endpoints, use the Settings tab of the edit control. Use the arc handles to modify the angle space of the arc segment.
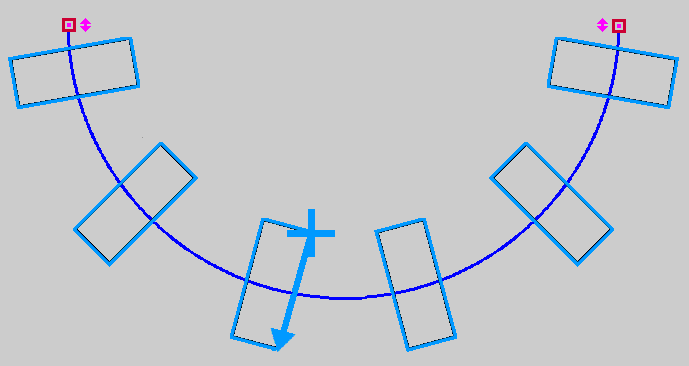
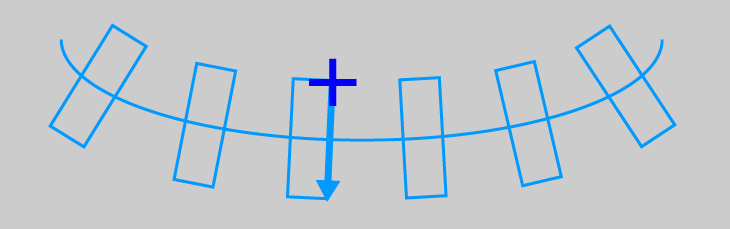
To change the search length and projection length of all the Calipers, select the caliper handle along the top of a center Caliper, as shown in the following figure:
You can drag the caliper handle in any direction to adjust the search length and projection length. To provide precise values, use the Settings tab of the edit control. Unlike the Find Line tool, you cannot use the Find Circle graphics to adjust the search direction. The Settings tab of the edit control allows you to swap the search direction inward or outward.
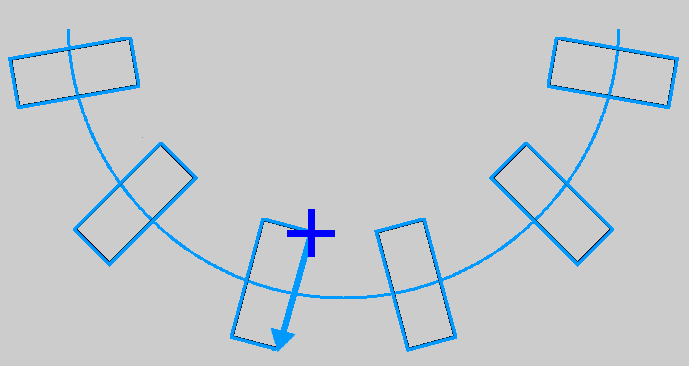
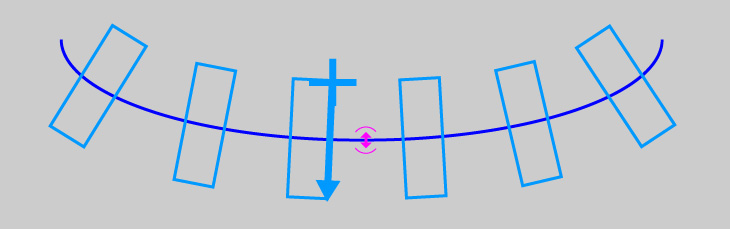
To change the radius of the arc, click on the expected arc segment to highlight it and expose a bending handle in the middle of the arc, as shown in the following figure:
You can slide the bending handle back and forth to change the radius of the arc segment. To provide precise values, use the Settings tab of the edit control.
The following figure shows the default graphics for the Find Ellipse vision tool, and highlights the various parameters you can use the graphics to configure:
Click on the expected elliptical arc segment to highlight it and expose a pair of endpoint handles and arc handles, as shown in the following figure:
You can select and drag the elliptical arc segment to any position inside the image window, or use the endpoint handles to rotate and resize it. For best results, you should place the elliptical arc segment over the actual elliptical feature in the image. To provide precise values for the location of the endpoints, use the Settings tab of the edit control. Use the elliptical arc endpoint handles to modify the angle space of the elliptical arc segment.
To change the search length and projection length of all the Calipers, select the caliper handle along the top of a center Caliper, as shown in the following figure:
You can drag the caliper handle in any direction to adjust the search length and projection length. To provide precise values, use the Settings tab of the edit control. Unlike the Find Line tool, you cannot use the Find Ellipse graphics to adjust the search direction. The Settings tab of the edit control allows you to swap the search direction inward or outward.
To change the shape of the elliptical arc by grabbing and moving the approximate middle point of its curve, click on the expected arc segment to highlight it and expose a bending handle approximately in the middle of the arc, as shown in the following figure:
You can move the bending handle to change the shape of the elliptical arc segment while the two endpoints stay at the same position.
To change the shape of the elliptical arc while keeping at the same position its bending handle (in the approximate middle point) and its two endpoints, click on the expected arc segment to highlight it and expose a constrained span handle around the middle of the arc, as shown in the following figure:
You can rotate the constrained span handle around the bending handle to change the shape of the elliptical arc segment while the bending handle and the two endpoints stay at the same position.
Adjusting the bending handle and the constrained span handle may change the center, radii, rotation, and angle start and span of the elliptical arc. To provide precise values for the shape of the elliptical arc, use the Settings tab of the edit control.
To place and adjust the expected elliptical arc in the easiest way, perform the following steps:
- Load an image that contains the ellipse that you expect to appear in further images.
- Position the two elliptical arc endpoint handles on the edge of the image ellipse.
- Position the bending handle also on the edge, about midway between the two endpoints. Adjust the position of the bending handle to best match the shape of the image ellipse.
- Adjust the constrained span handle to size the overall expected ellipse to best match the shape of the image ellipse.