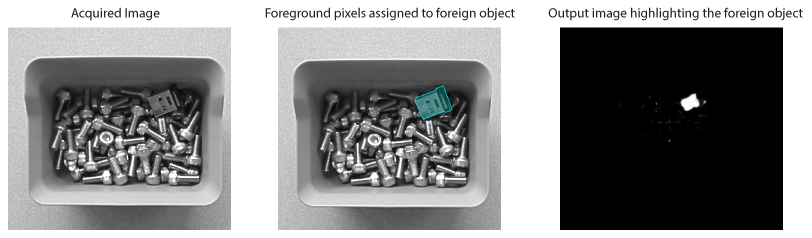
Use a Segment tool to divide an input image into foreground and background pixels. The tool generates information about foreground pixels that you can pass to other vision tools for analysis. For example, a Segment tool can discover when a box of components contains a foreign object:
Using a Segment tool involves the following steps:
Acquire a set of training images representing the type of images your deployed application can encounter.
Every training image should contain foreground and background features.
Label the foreground pixels for features you want to represent in your output images.
The QuickBuild interface to a Segment tool supports a mechanism for labelling foreground pixels.
- Train the tool using various images with labeled foreground pixels.
Add more training images until the tool indicates a good model health - an indication of accuracy for separating background pixels from foreground pixels.
The QuickBuild interface to a Segment tool supports a mechanism for indicating the model health.
- Test your trained Segment tool on a different set of test images.
Note: The QuickBuild user interface for a Segment tool supports two default pixel classes - background and foreground. The Segment tool API supports as many classes as you need to define for your images.
See the following sections for more information:
Cognex recommends you use the Segment tool edit control in QuickBuild to train a Segment tool. The edit control provides a user interface for importing training images and highlighting desired foreground pixels:
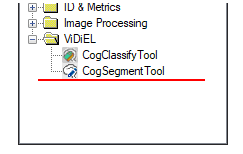
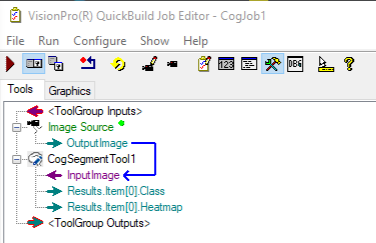
In QuickBuild, find the Segment tool edit control under the ViDiEL folder:
You must train a Segment tool with a set of images containing a comprehensive representation of the types of images your deployed application will likely encounter. More training images can improve the accuracy of the tool in your finished application, but require more time to setup a training image database. For best results, Cognex recommends your training images resemble the run-time images your application will acquire regarding lighting and optics. For example, if your deployed application will acquire images in varied lighting conditions, your training images should reflect those same lighting conditions.
See the following sections for more information:
Click Import From File(s) to import a training image with a format of .bmp, .png, or .jpeg. The tool also supports importing images from .cdb or .idb image databases.
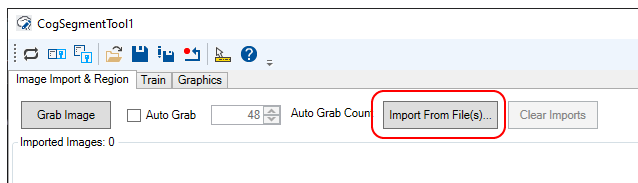
Navigate to the desired directory and import one or more image files. The Segment tool takes all the images you choose and displays them across the Image Import & Region tab:
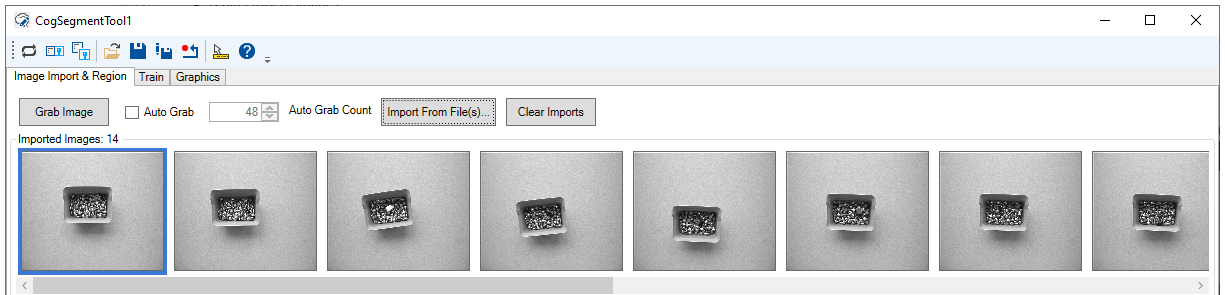
Click on any imported image to see a larger version in the region window. Click Clear Imports to delete all imported images.
A Segment tool can accept training images you acquire from a configured image source in QuickBuild:
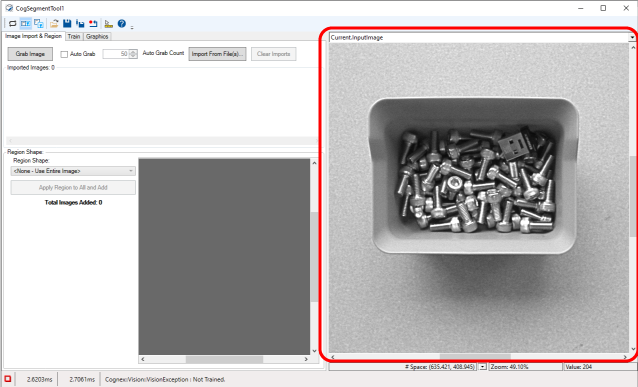
Run the CogJob once to acquire an image and pass it to the Segment tool. The acquired image appears in the Current.InputImage buffer:
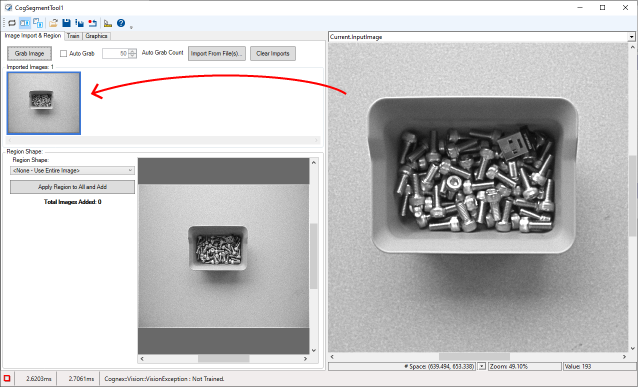
Click Grab Image to import the acquired image to the Image Import & Region tab
Check Auto Grab to import each acquired image automatically. With Auto Grab enabled, you can specify any number of images up to the maximum specified by Auto Grab Count. Cognex recommends the default value for acquiring training or test images for most applications.
Note: Be aware that with Auto Grab enabled and your CogJob in continuous run mode, QuickBuild might experience an acquisition overrun and stop importing images. To prevent acquisition overruns, open the Image Source dialog box and decrease the Acquisition rate to 1 frame per second:

Before making the images available to the training database, the Region Shape option allows you to apply an affine rectangle region of interest to every image:
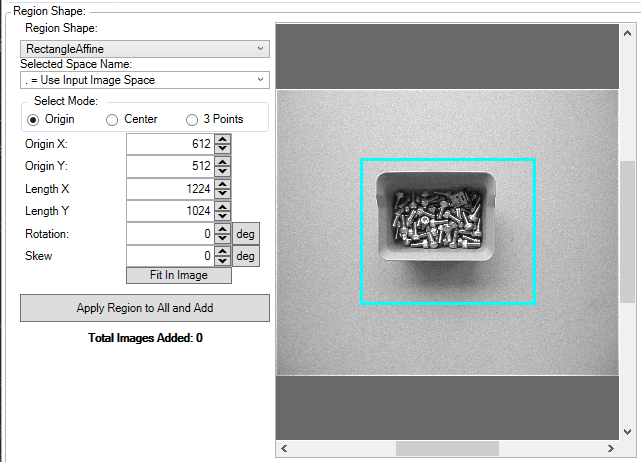
Be aware that the Segment tool edit control allows you to specify an affine rectangle that extends past the edges of the image:
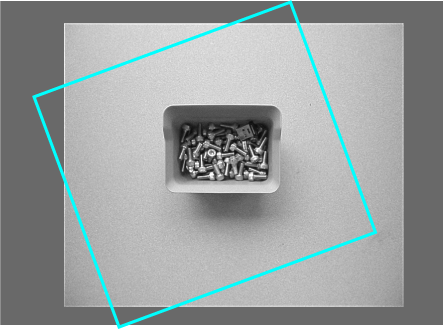
This example produces training images with pixel values of 0 (zero):
If your vision application can produce images with pixels having a value of 0, Cognex recommends you train the Segment tool using images that also have 0 values for some pixels. A Segment tool can produce unreliable results if run-time images have pixel values that were not part of the training process.
After importing a set of images suitable for training, you must make them available to the training database and begin highlighting the foreground pixels of any image you want to use to train the tool.
Click Apply Region to All and Add to apply the optional region of interest to all imported images and add them to the training database.
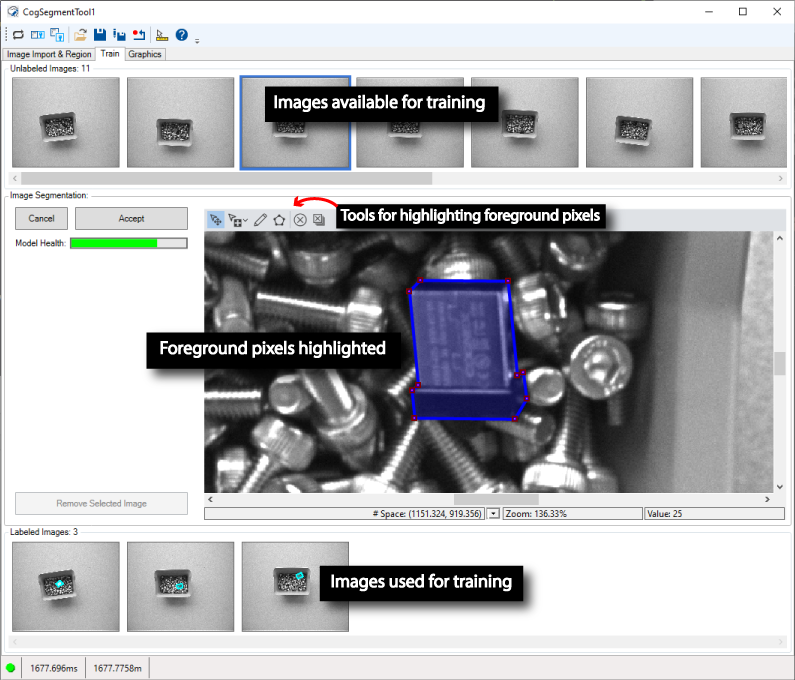
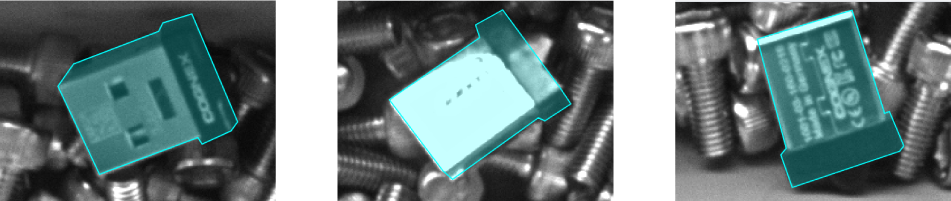
Use the Train tab to segment foreground pixels from background pixels and add them to the set of labeled images used to train the tool. The tab provides drawing tools to highlight desired features, as shown in these examples:
Perform the following steps to create labeled images:
- Select any unlabeled image at the top of the Train tab.
Zoom in on the image to clearly show the feature you want to label as foreground pixels:
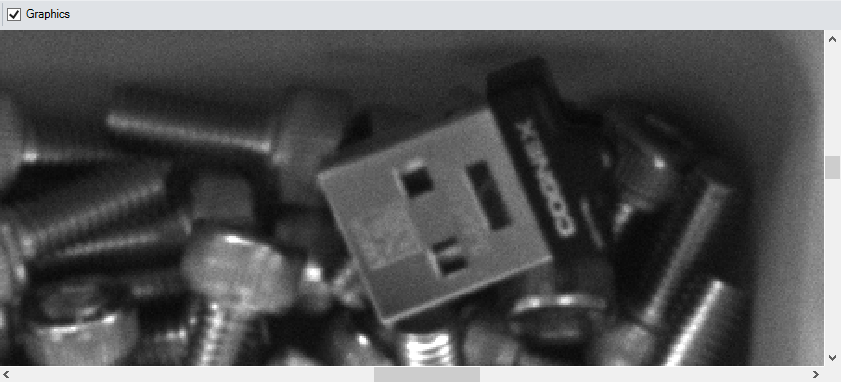
Click Label and use the provided drawing tools to create shapes around foreground pixels:
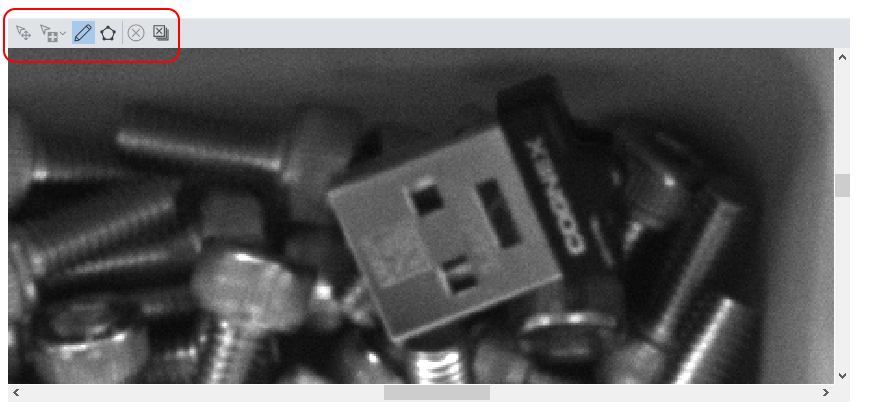

Move a selected foreground region or just a vertex on the border of the region. 
Add or remove vertices along the border of a foreground region. 
Use the pencil to outline foreground pixels freehand. 
Use a polygon to outline the shape of a foreground feature. 
Delete the selected foreground region. 
Remove all foreground regions. Click Accept when you are satisfied that the region surrounds the foreground feature.
The Segment tool automatically adds this labeled image to the training data:
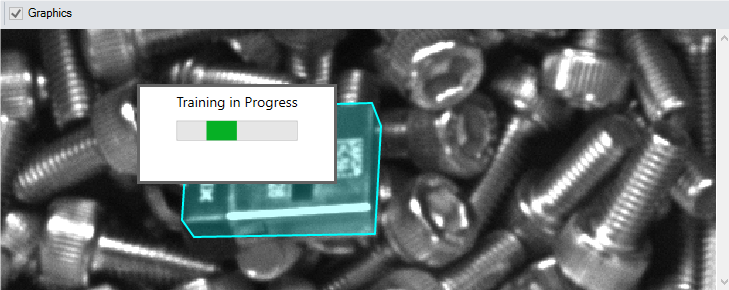
Repeated this process for other unlabeled images until the Model Health appears in green, which indicates you can test your Segment tool against other images:
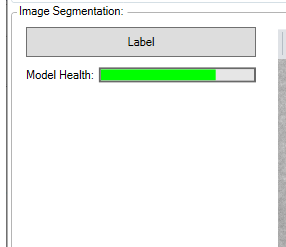
Once the Model Health on a Segment tool Train tab appears in green, you can test your trained Segment tool. Cognex recommends you test the tool with another set of candidate images, such as acquired images in your production environment or a different set of pre-saved images.
For example, you can use QuickBuild to acquire test images. Using the edit control, enable the Local Display or Floating Display window and use the LastRun.Heatmap_Foreground image buffer to verify the Segment tool correctly identifies foreground pixels in each image:
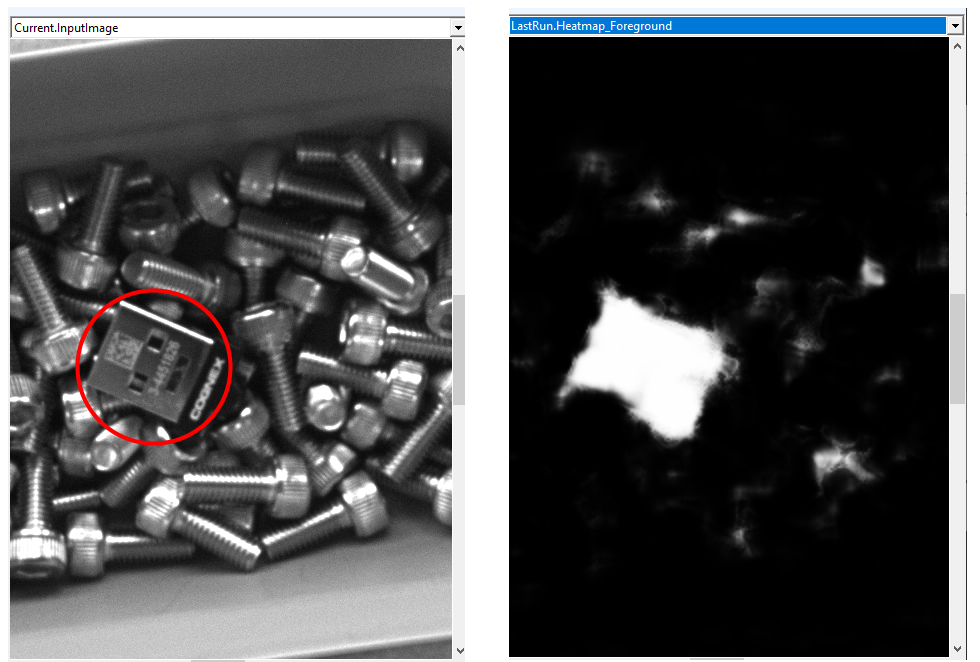
If the Segment tool fails to properly segment foreground from background pixels for any given image, use that image to perform additional training. All your test images should pass before you deploy your vision application.
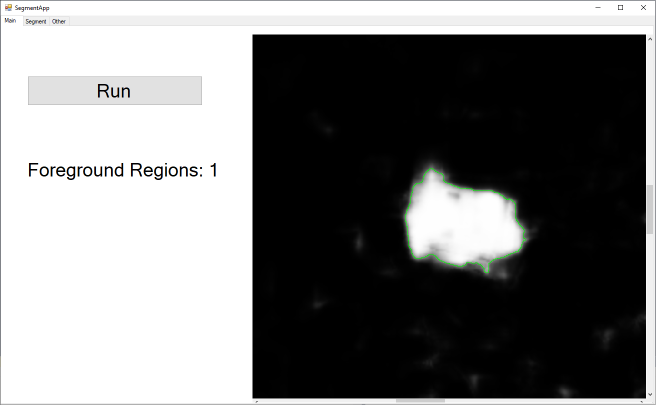
A Segment tool produces an output heatmap image highlighting the foreground pixels in your run-time images. You can pass this output image to other vision tools for processing. For example, the sample application included with your VisionPro installation counts the foreground regions in successive images:
Be aware that VisionPro implements the ViDi edge-learning tool edit controls as WPF compoments, so you cannot use them in your Visual Studio WinForms application without the System.Windows.Forms.Integration.ElementHost class in assembly WindowsFormsIntegration.dll, from Microsoft. See the following sample applications installed with VisionPro for examples:
- %VPRO_ROOT%\samples\Programming\ViDiEL\Classify\C#
- %VPRO_ROOT%\samples\Programming\ViDiEL\Segment\C#