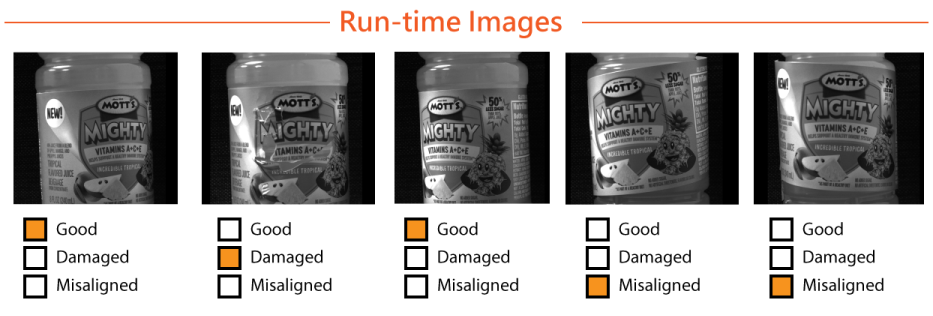
Use a Classify tool to inspect a run-time image and assign it to one of several classes that you define. For example, a Classify tool can examine the label on juice bottles and assign the image a class of Good, Damaged, or Misaligned:
Using a Classify tool involves the following steps:
Acquire a set of training images.
Some applications generate a fixtured coordinate space based on the pose of the object under inspection. For best results with a Classify tool, use the same fixturing method to acquire both your training images and the run-time images your finished application acquires. See the topic Calibration and Fixturing for more details on generating a new coordinate space based on a found feature in your acquired images.
- Define the classes you want to use.
- Assign each training image to a class.
- Generate a score for the confidence you can have that the tool will classify images correctly.
- Test your trained Classify tool on a different set of images.
Cognex recommends you use the Classify tool edit control in the QuickBuild utility to train a Classify tool. The edit control provides a user interface for importing training images and assigning them to the particular classes you define:
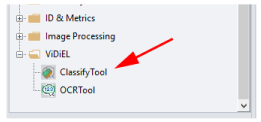
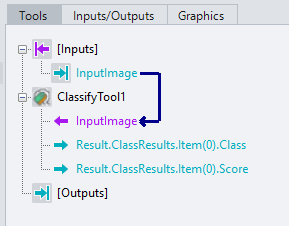
In QuickBuild, find the Classify tool edit control under the ViDiEL folder:
See the topic Using QuickBuild for details on using QuickBuild.
See the following sections for more information:
You must train each Classify tool with a set of images containing a comprehensive representation of the types of images your deployed application will likely encounter. More training images can improve the accuracy of the tool in your finished application, but require more time to setup a training image database. For best results, Cognex recommends your training images resemble the run-time images your application will acquire regarding lighting and optics. For example, if your deployed application will acquire images in varied lighting conditions, your training images should reflect those same lighting conditions.
See the following sections for more information:
The Classify tool edit control supports the import of training images from:
- A single file of format .bmp, .png, or .jpeg
- An image database file
- A directory of images

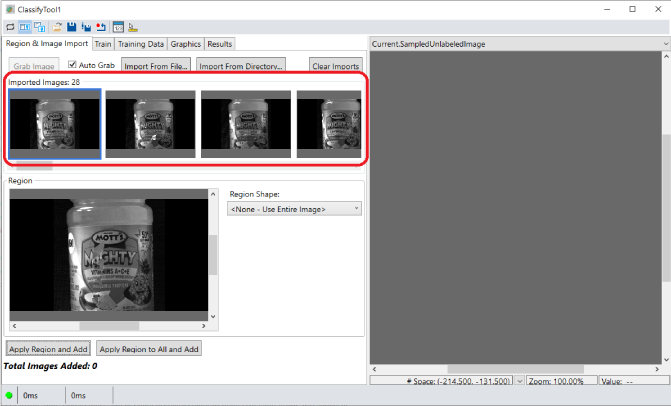
Regardless of which source you choose, the Classify tool takes all the images from that location and displays them across the top of the Region & Image Import tab:
Hover over any imported image to see a magnified version, or click on any image to see it in the Region window.
Note: Be aware the Import From File and Import From Directory options do not remove any images already imported to the tool. Click Clear Imports to delete the current set of imported images.
The Classify tool edit control supports getting training images through a configured QuickBuild acquisition source:
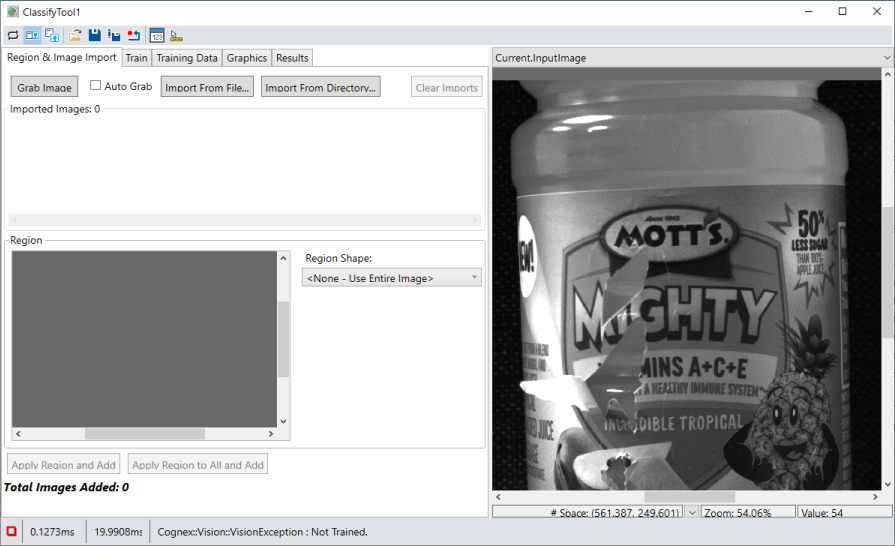
Run the ToolBlock to acquire an image and pass it to the Classify tool edit control. The acquired image appears in the Current.InputImage buffer:
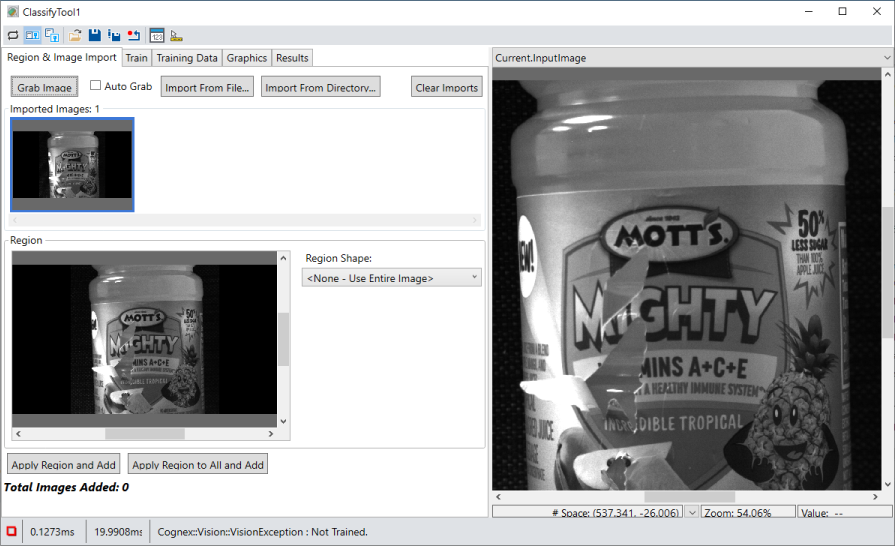
Click Grab Image to import the acquired image to the Region & Image Import tab:
Check Auto Grab to import each acquired image automatically. With Auto Grab enabled, the Classify tool allows you acquire and import any number of images before you start training the tool. Hover over any imported image to see a magnified version, or click on any image to see it in the Region window.
With Auto Grab enabled, the Segment tool will not import more images than specified by Auto Grab Count.
Note: Be aware that with Auto Grab enabled and your CogJob in continuous run mode, QuickBuild might experience an acquisition overrun and stop importing images. To prevent acquisition overruns, open the Image Source dialog box and decrease the Acquisition rate to 1 frame per second:

Click Clear Imports to delete the current set of imported images.
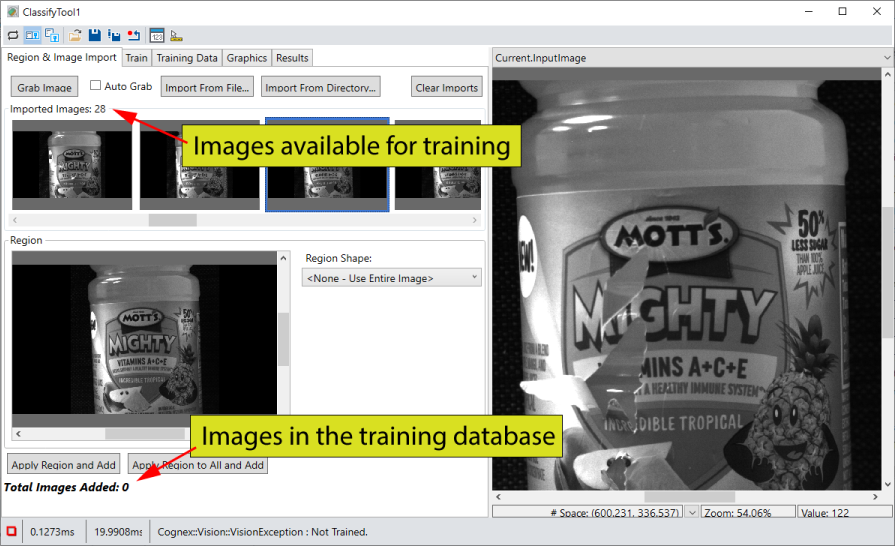
After loading a set of images suitable for training, you must add some or all of them to the training database and create the classes you want your application to use. As you begin training the tool, the Region & Image Import tab displays the number of images available to the training database and the number that have already been added, which is 0 to start:
Before you add any image to the training database, the Region Shape option allows you to apply a rectangle region of interest over the current image:
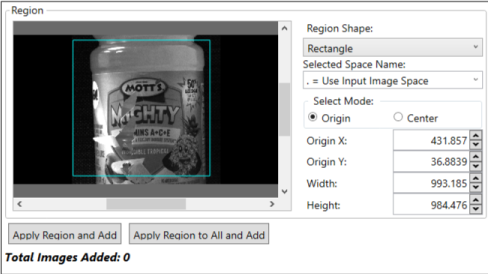
The edit control allows you to relocate the region for each image, but you must use the same region size for all images.
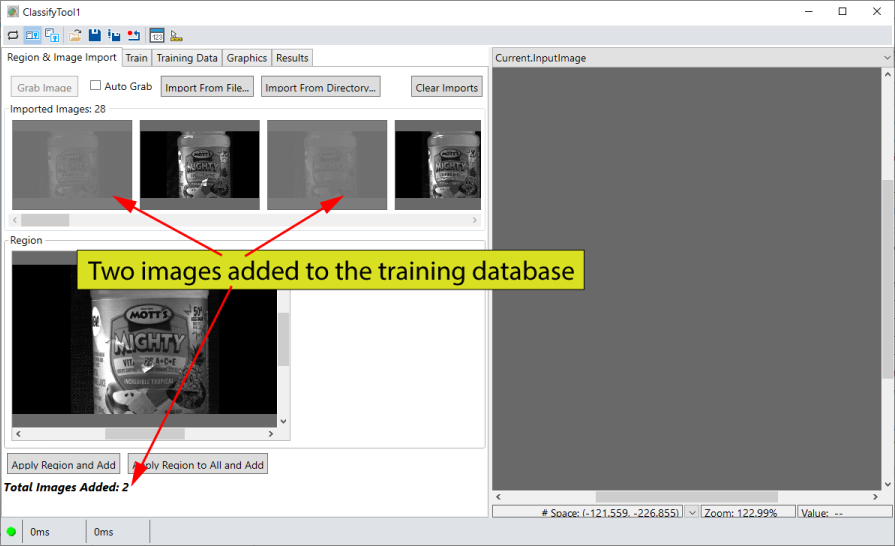
Move imported images to the training database one of two ways:
- Apply Region and Add: Add this image and any optional region of interest to the training database
- Apply Region to All and Add: Apply the current settings for the optional region of interest to all imported images and add them to the training database.
The Region & Image Import tab greys out any imported images added to the training database:
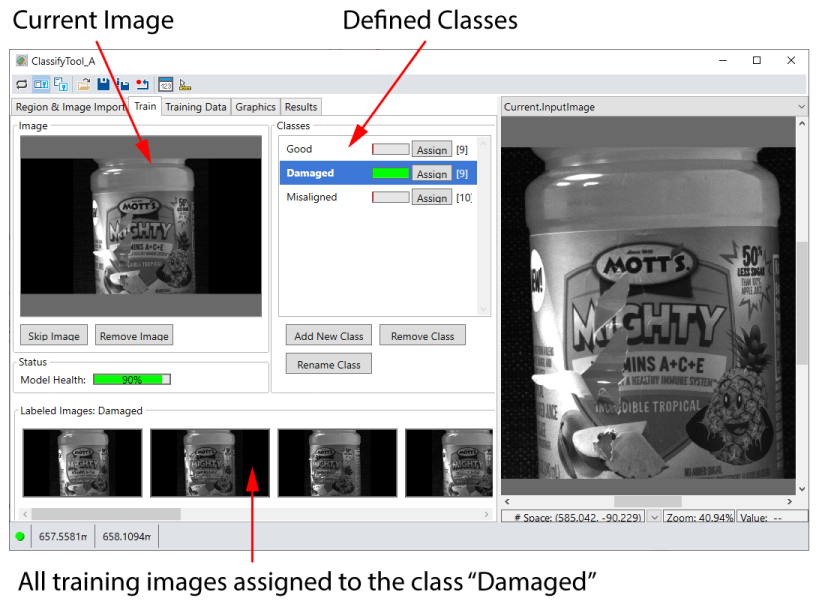
Use the Train tab to define classes and assign them to individual images in the training database. An untrained Classify tool appears with two default classes and the first training-database image:
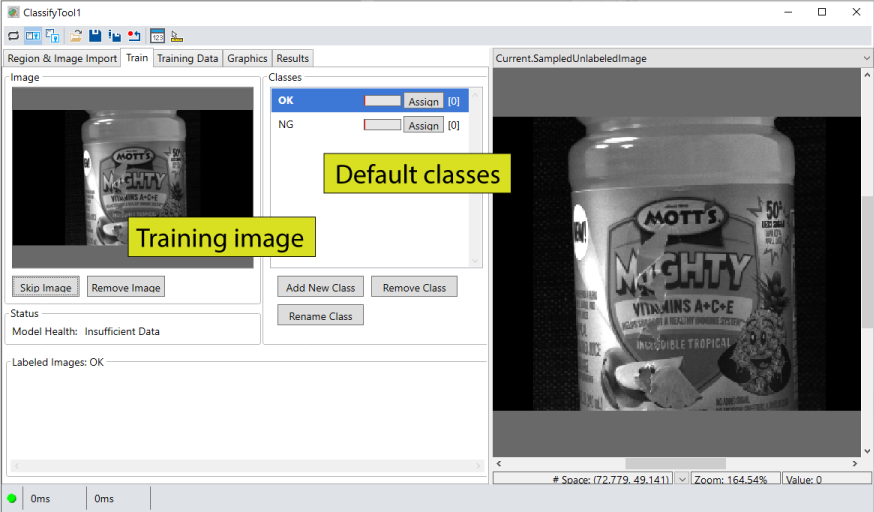
Perform the following steps to assign classes to the training images:
- Use the Add New Class, Remove Class and Rename Class buttons to define the classes you want your application to use.
Examine the training image and click Assign next to the desired class for this image.
The Classify tool assigns the image to the class and displays the next unlabeled training image.
Repeat the previous step for all the training images.
The edit control offers the Skip Image button if you want to bypass this image from training, and the Remove Image button if you want to delete this image from the set of training images.
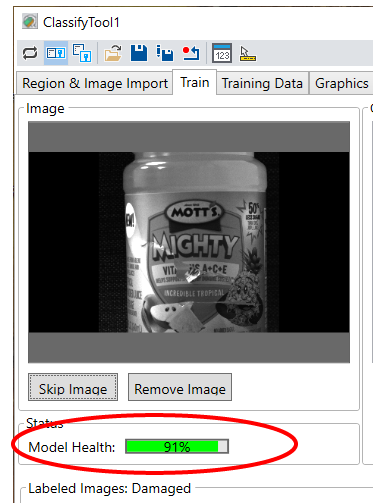
As you continue to train the Classify tool with more images, the edit control can display the next training image and predict which class the image belongs to:
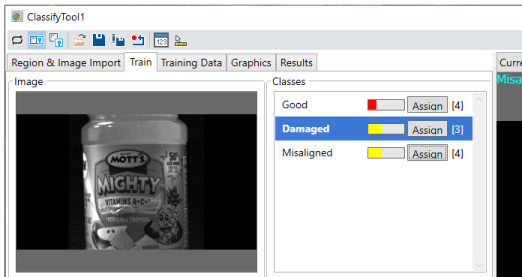
Select the predicted class or choose the correct class and continue training the image.
At some point during training the Model Health score should indicate a high percentage of accuracy in assigning the correct class to incoming images:
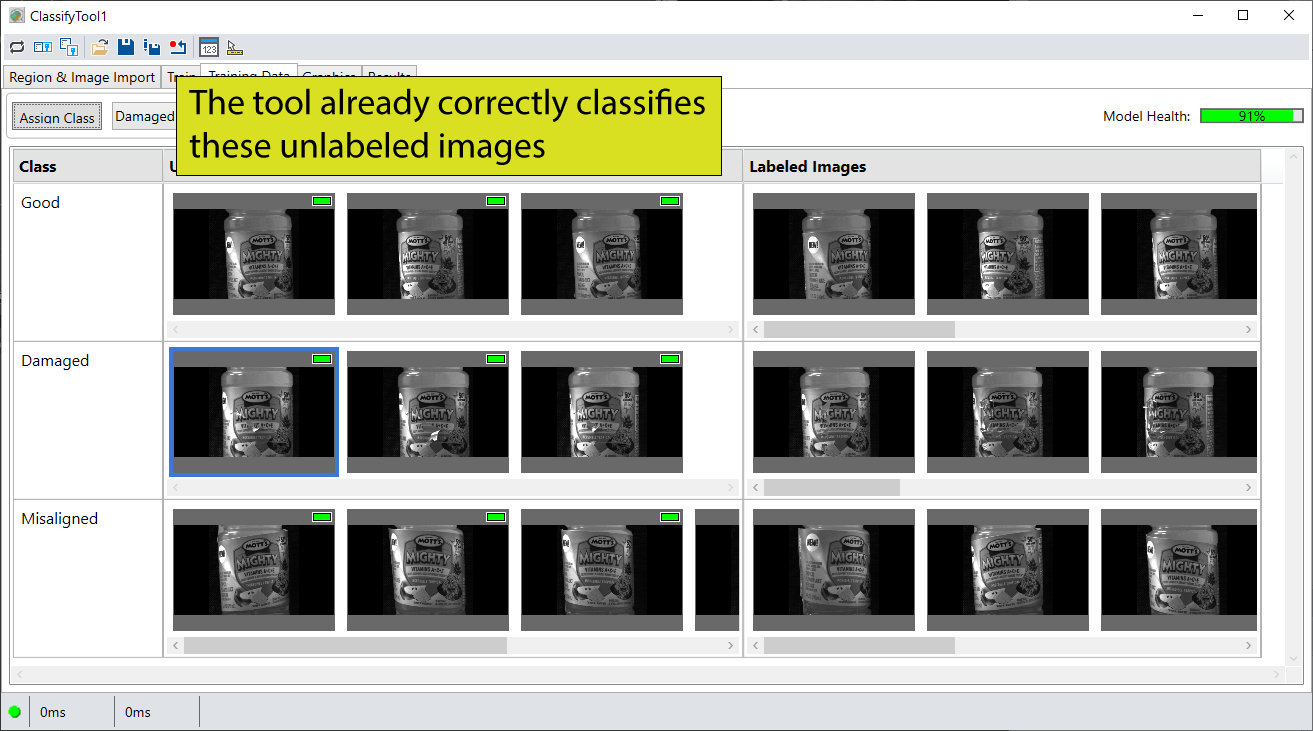
The Classify tool edit control allows you to finish training using the Training Data tab, which displays unlabeled images from your training database that have not been assigned a class label and the training images you have already used for training. The tool evaluates each unlabeled image and predicts its desired class.
Finish training a Classify tool using either of the following methods:
- Select and examine any unlabeled image and use the Assign Class button to label it with the correct class.
- If all the unlabeled images in a row correctly reflect the predicted class label, select the class label in the first column and use Assign Class to label them with the correct class. The tool assigns all the remaining unlabeled images in that row to the class you choose.
When you finish training a Classify tool, the Training Data tab should contain no unlabeled images.
After you train a Classify tool, Cognex recommends you test it with another set of candidate images. You might choose to test the tool in your production environment or use a different set of pre-saved images. Use the Results tab of the Classify tool edit control to verify the results for an assortment of test images.
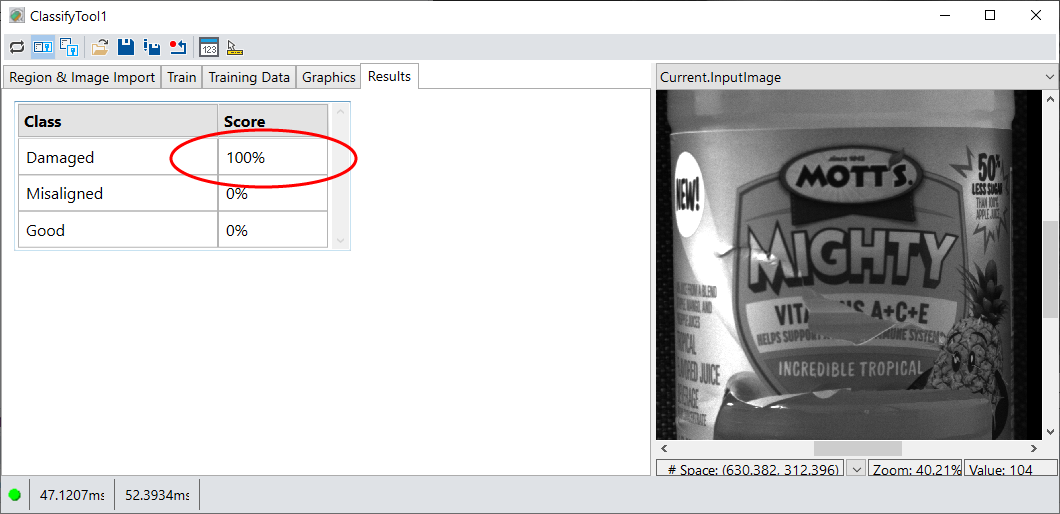
If the Classify tool fails to assign the correct class to any test images, use those images to perform additional training. All your test images should pass before your deploy your vision application.