Set Region of Interest
The Set ROI step of the application allows you to define the Region of Interest (ROI) for the application to inspect on each acquisition. You can also enable fixturing and define a separate fixture region. Once a fixture is trained, the device searches for the fixture and automatically adjust your ROI relative to the fixture location.
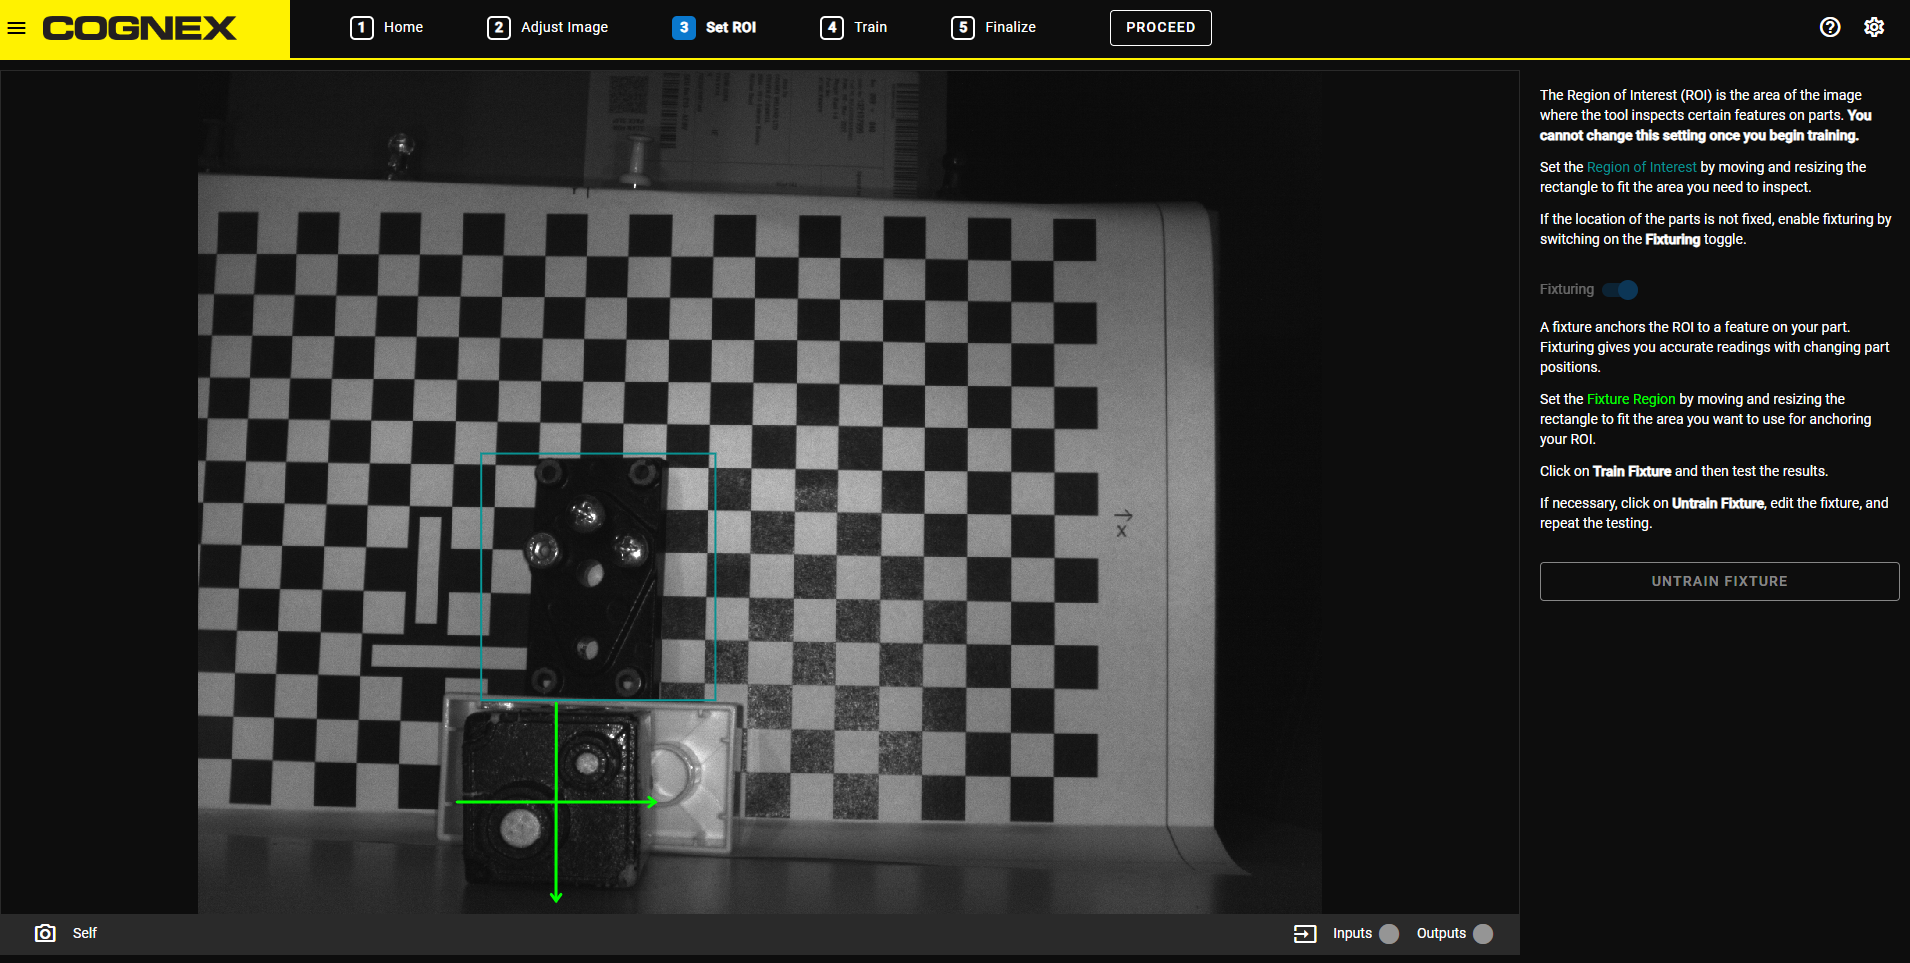
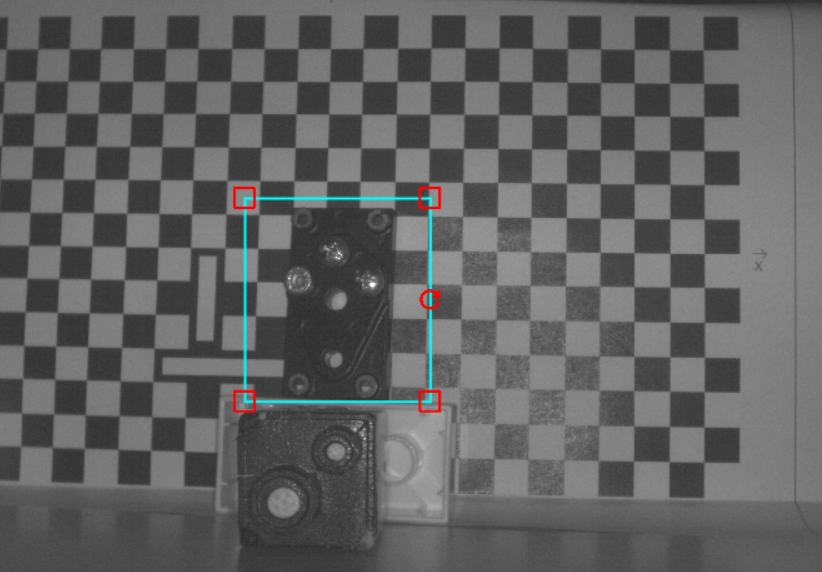
The Region of Interest (ROI) is the area of the image where the application inspects the object. Set the Region of Interest by moving, resizing, and rotating the cyan rectangle on the image to fit the area you need to inspect.
If you define the ROI without a fixture, the ROI always inspects the same area on each acquired image.
To move the ROI, click and drag anywhere inside the cyan rectangle. To resize the ROI, click and drag the corner handles in each corner of the cyan rectangle. To rotate the ROI, click and drag the rotate handle on one side of the cyan rectangle.
Set up a Fixture
A fixture anchors the ROI to a feature on your object. Fixturing can give you more accurate readings with changing object positions.
When your fixture region is trained, the ROI becomes relative to the fixture location on each acquired image. When you set up the fixture, you train the application to recognize the particular shape or pattern within the Fixture Region, and place the ROI depending on the pattern location in each acquisition.
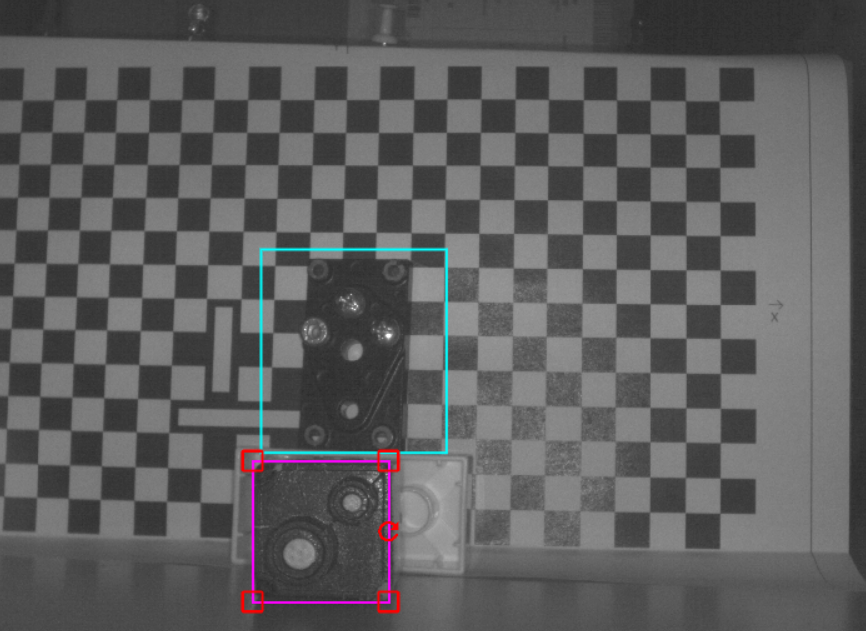
When you enable fixturing, a magenta rectangle appears on the image. Set the Fixture Region by moving, resizing, and rotating the magenta rectangle to fit the area you want to use for anchoring your ROI.
To move the Fixture Region, click and drag anywhere inside the magenta rectangle. To resize the Fixture Region, click and drag the corner handles in each corner of the magenta rectangle. To rotate the Fixture Region, click and drag the rotate handle on one side of the magenta rectangle.
For the best results:
-
Use asymmetric and distinct shapes as fixtures.
-
Do not use reflective parts as fixtures.
-
Do not use fixturing when you need to inspect the whole image.
When you finished adjusting the Fixture Region, click on Train Fixture to train the fixture. After training, the fixture region changes from a rectangle to a set of crosshairs.
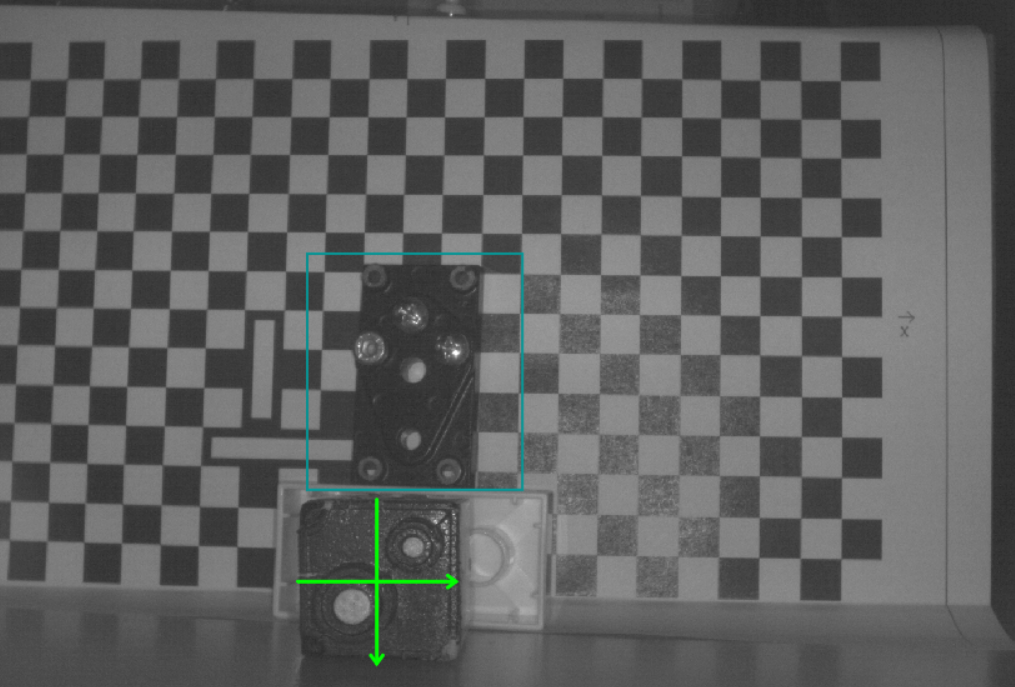
To test your fixturing, move the fixtured part around. If the fixturing works properly, you can proceed to the next application step.
To modify or adjust your fixture, first click on Untrain Fixture and modify the Fixture Region. Then click on Train Fixture to train your fixture again.
When you are satisfied with the ROI and fixture placement, click Proceed.