Monitoring View
The Monitoring View allows you to see the live feed of the vision sensor.
You can reach the Monitoring View in two ways:
-
Click on Enter Monitoring View on the Home page.
-
Click on Enter Monitoring View in the Finalize step.
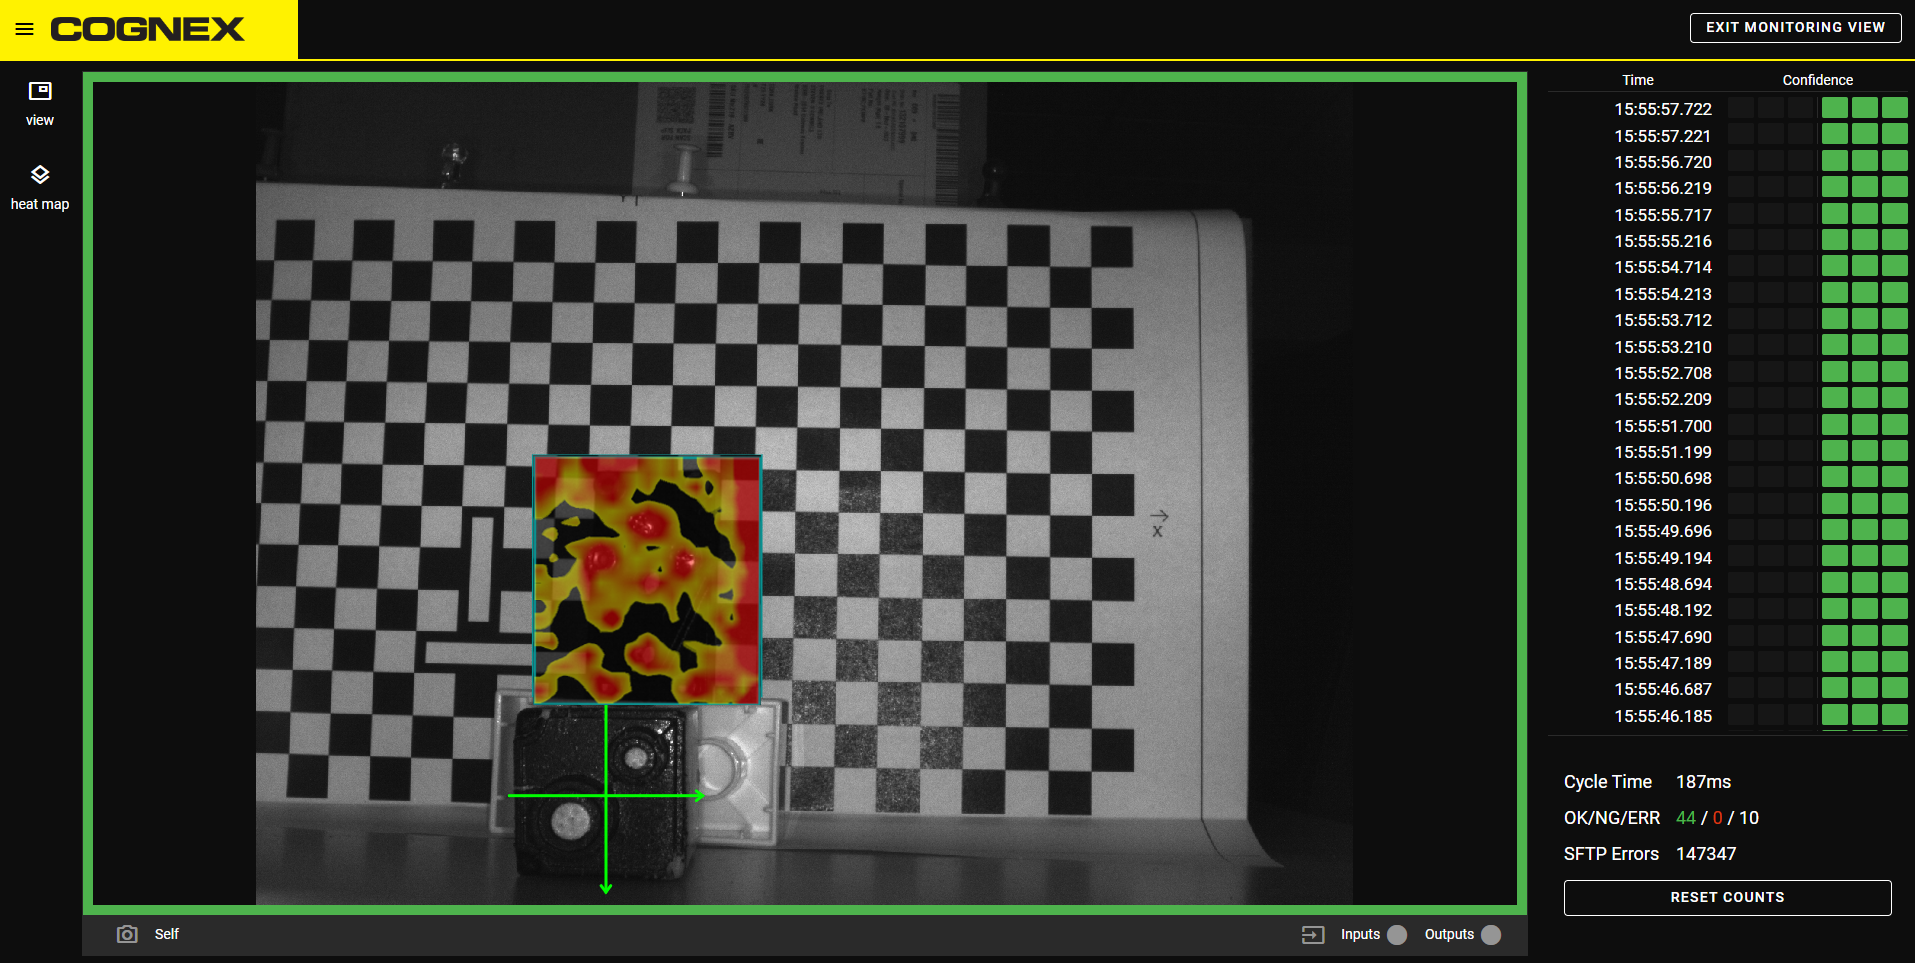
You can switch between ROI view and full view if you click on the View button.
When using the Anomaly Detector, you can turn on the heatmap if you click on the Heat Map button.
When using the Classifier, you can turn on showing the label of the image by clicking on the Text button.
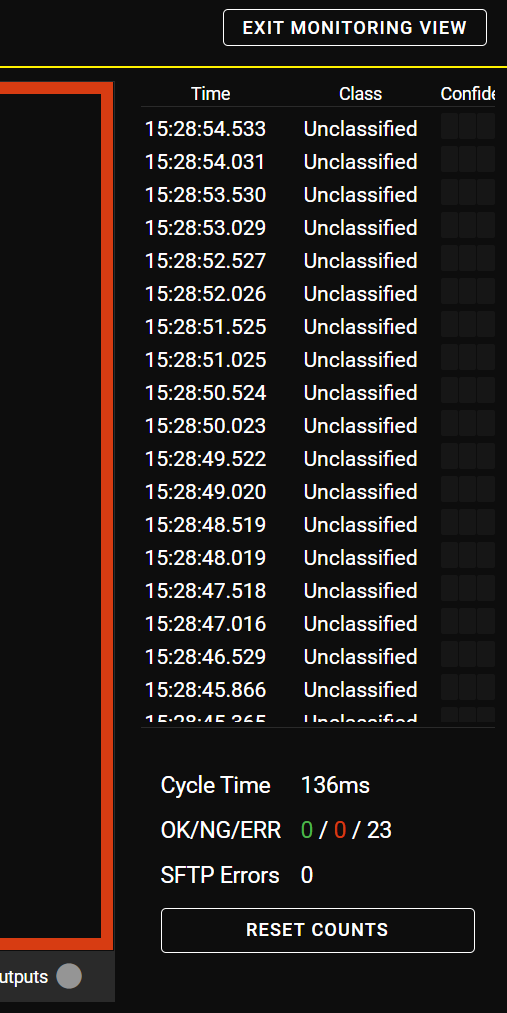
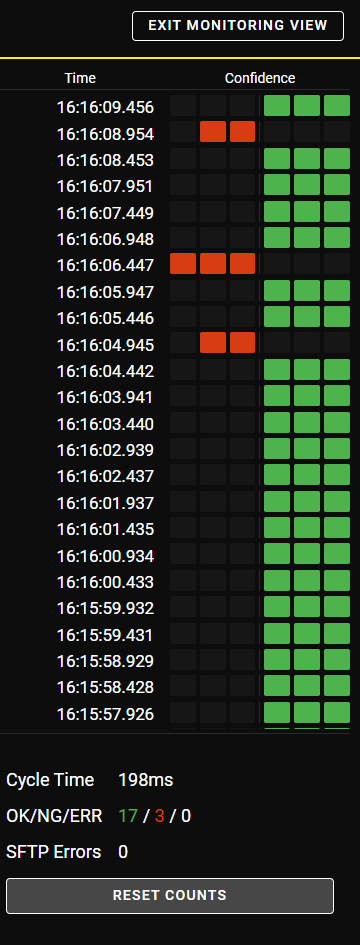
When using the Anomaly Detector, the Monitoring View shows the time when the image was taken and the confidence level of each image .
When using the 2-Class Classifier, the Monitoring View shows the time when the image was taken and the class of the images.
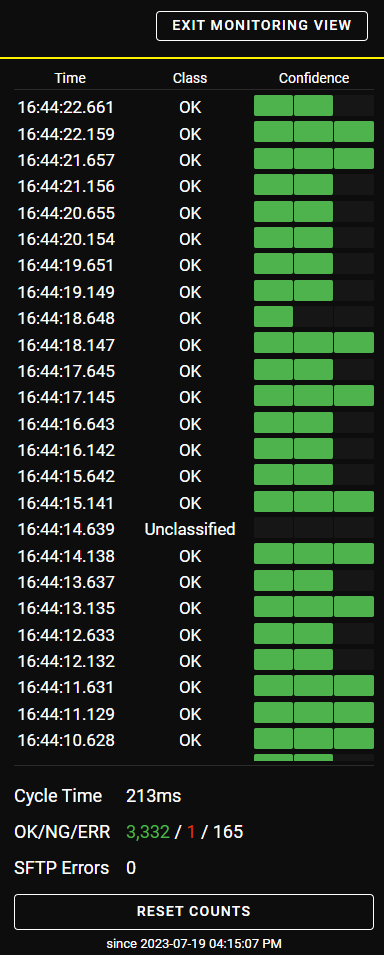
Cycle Time shows the time passed between the trigger event and the processed result.
OK/NG/ERR shows the number of the OK, NG, and ERR images.
SFTP Errors shows the number of SFTP errors.
Click on the Reset Counts button to clear the OK/NG/ERR and SFTP Errors counters.
Click on the Exit Monitoring View to leave the Monitoring View.
When using the 2-Class Classifier tool, if the tool is not properly trained, for example, the fixture is missing or the ROI is out of bounds, the Classifier can return the images as Unclassified. The Classifier considers the unclassified images as an error.