User Settings
The User Settings utility allows you to configure users and their access capabilities on an In-Sight vision system. You can determine which users can log onto the vision system, use the adapter of the product, as well as the changes they can make through the web-based HMI of the vision system.
Each In-Sight vision system has its own set of users, separate from every other vision system on the network. If a user needs access to a particular vision system, they have to know a user name and password that already exists on that vision system.
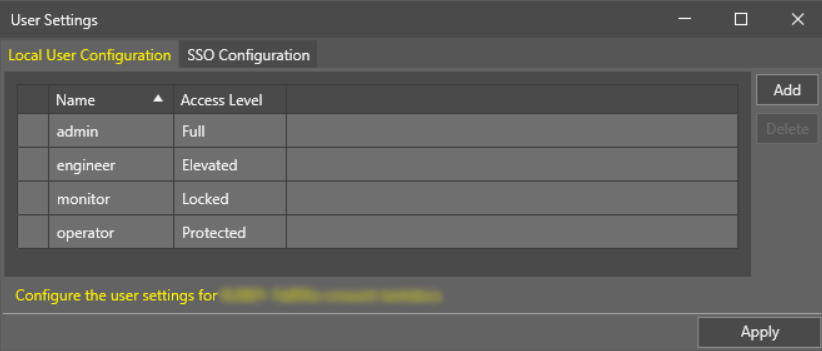
When selecting a vision system in In-Sight Vision Suite, you can use the User Settings utility to configure users for that vision system. Users can then use the configured user names and passwords to log in to the vision system. The user access mechanism acts as a security measure, with four different access levels (Full, Protected and Locked) available to users.
- Only users with an Access Level set to Full can add, delete or modify users. However, the default admin user cannot be renamed, its Access Level cannot be modified, and it cannot be deleted, even if another user with Full access is configured on the vision system.
- Each vision system must have a user with an Access Level set to Full.
- Each vision system can have a maximum of 64 users, of varying Access Levels.
- Each user name can be a maximum of 64 characters.
- User Names are case sensitive and have to be unique (that is, there can be no duplicate user names on the vision system).
- User Names and Passwords can use Unicode characters.
- Passwords are displayed as asterisks.
- There is no minimum Password strength requirement such as minimum length or special characters. Passwords can also be left blank.
- Launch the In-Sight Vision Suite if it is not running yet.
-
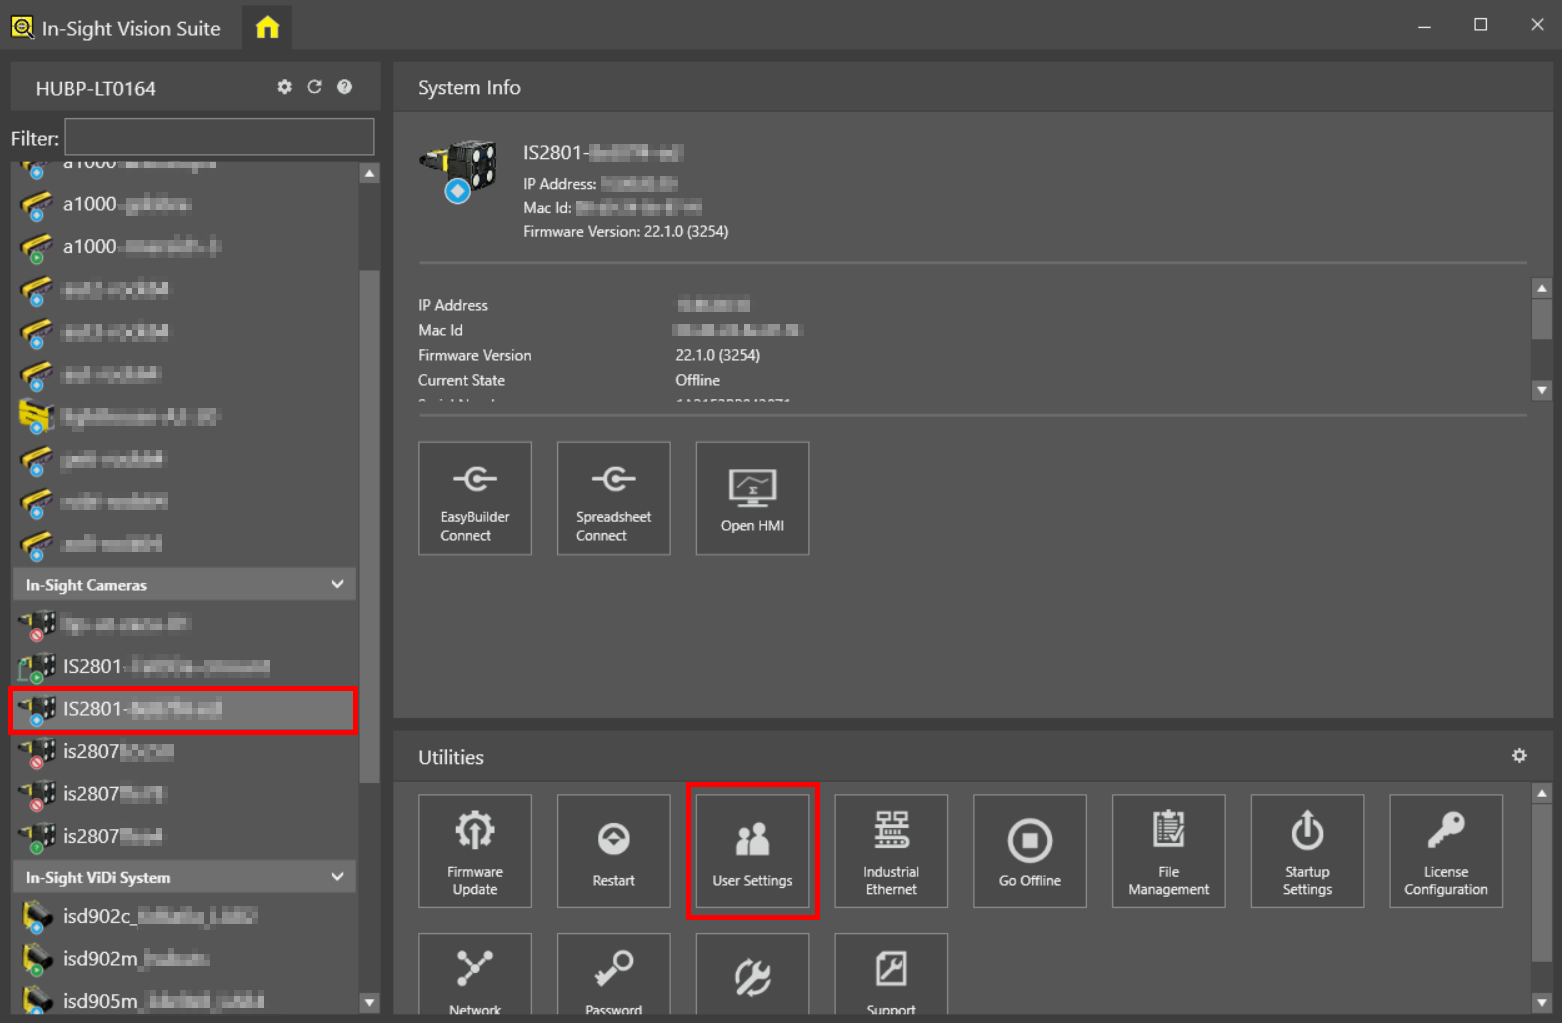
Left-click to select the vision system you want to configure from the list of vision systems the on the left. The list of utilities applicable to the selected vision system then appears at the bottom of the window.
-
Click the User Settings button in the list of utilities to launch the User Settings dialog.
-
To add a new user, click the Add button. To modify an existing user, click on the row of that user in the list.
-
In the Change the user settings: section, specify the User Name, Access Level, and optionally the Password for the new user.
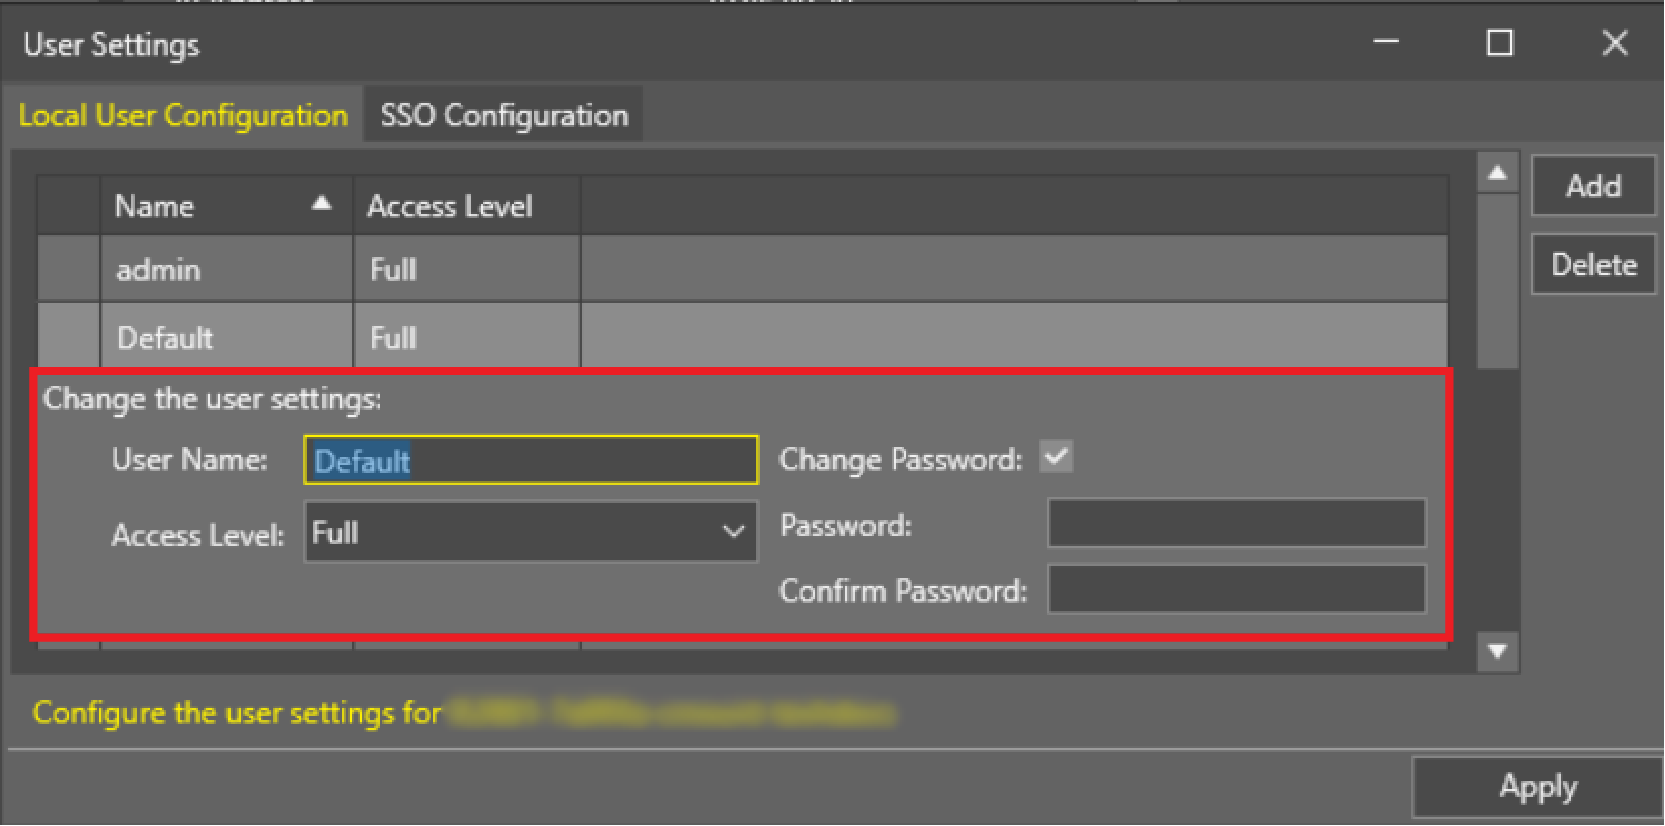
New users are automatically named Default, their Access Level is set to Full and have a blank/empty Password.
-
To delete a user, click on the row of that user in the list, and then click the Delete button.
Note: The Delete option has no confirmation dialog, so make sure that you only delete unused users. Deleted users cannot be recovered later.