Audit Logging
The Audit Logging utility allows you to track jobs and system level changes and enable traceability and accountability for modifications made to the vision system.
The following actions in In-Sight Vision Suite trigger audit logging events:
| Changes in the Spreadsheet Editor | System changes | Changing complex tools | Changing utilities |
|
|
|
|
Configure Audit Logging in In-Sight Vision Suite
To use audit logging, perform the following procedure:
-
Launch In-Sight Vision Suite if it is not already running.
-
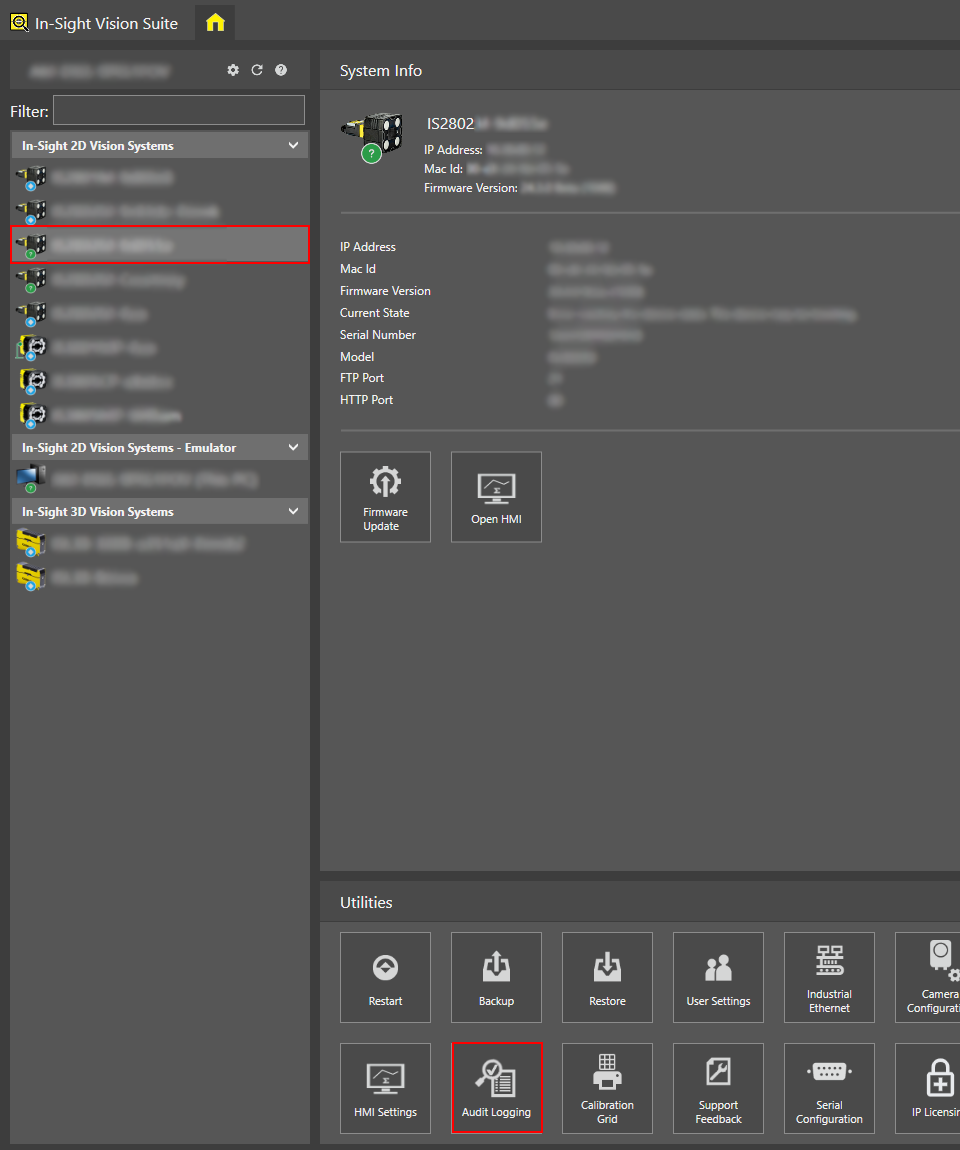
Left-click the device you want to configure on the In-Sight® Device Pane on the left. The list of Utilities applicable to the selected vision system then appears at the bottom of the window.
-
Click Audit Logging.
The Audit Logging window appears.
-
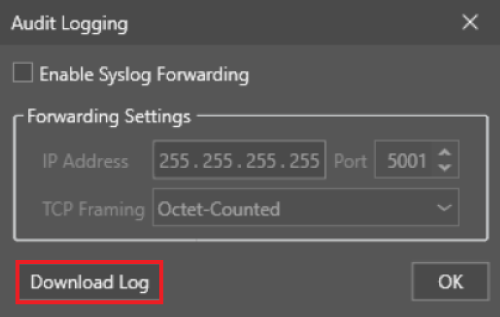
Retrieve the audit log by doing one of the following:
-
Download the audit log by clicking Download Log.
-
Click Enable Syslog Forwarding to enable sending the audit log to a remote server.
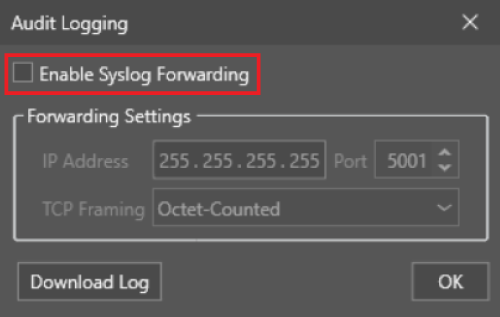
After setting up the IP address and the port number, open the TCP Framing dropdown and select the TCP framing option to use:
-
Octet-Counted (default): each message is prefixed with its length in bytes, followed by the message. Preferred for Linux-based syslog servers.
-
Traditional: messages are delimited by a newline character (\n). Preferred for Windows-based syslog servers.
Note: In-Sight Vision Suite uses syslog forwarding protocol to store audit log records. You need to set up a syslog server for collecting audit records. -
-
-
Click OK.
To receive audit messages from your In-Sight vision system in a Windows application, perform the following procedure:
-
Download and install a Windows-based syslog server, such as Syslog Watcher.
-
Start the Syslog Watcher application with Windows administrator privileges.
-
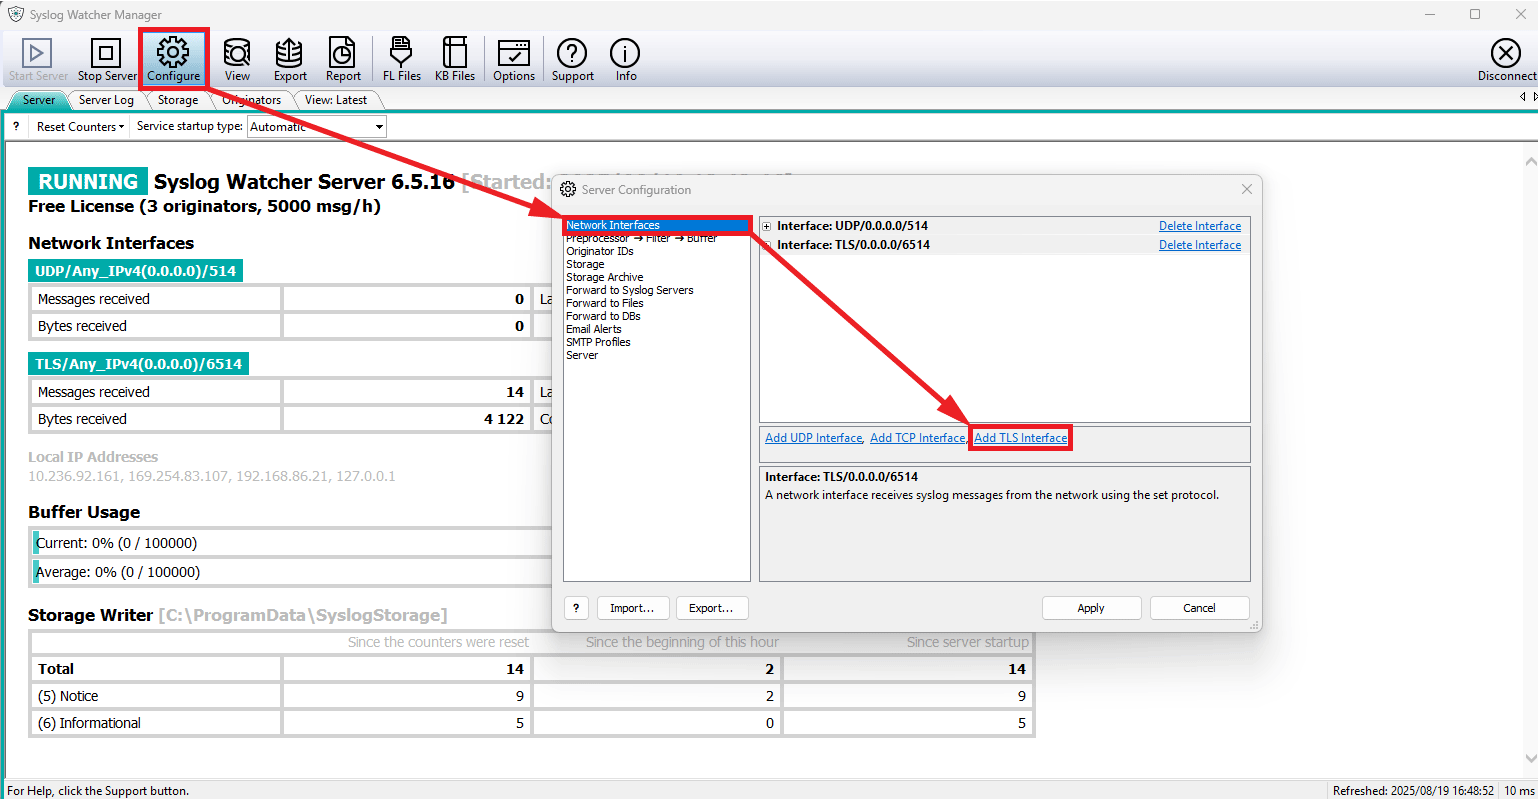
Open the Syslog Watcher Manager, and go to Configure > Network Interfaces > Add TLS Interface.
-
A new TLS interface appears in the list of network interfaces. Set the Syslog port for the TLS interface to the same port that you configured for audit log forwarding on your In-Sight vision system.
-
Open the TLS Options dropdown, and set Minimum Protocol Version to TLS 1.2.
-
Click Apply.
-
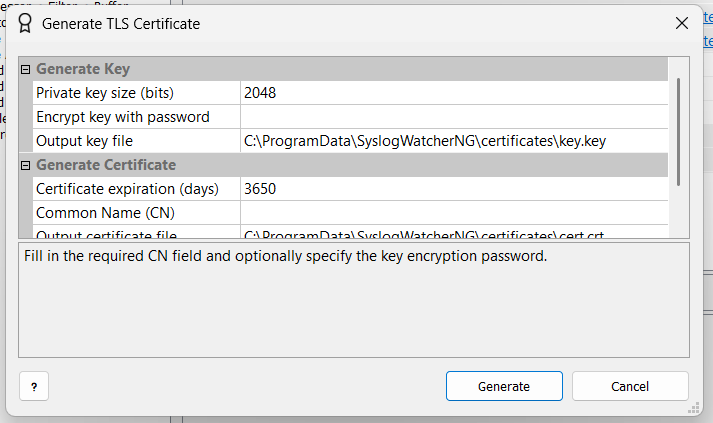
A pop-up dialog appears stating that a TLS certificate is required, and provides the option to generate a self-signed certificate. Click Yes to open the dialog for generating the certificate.
-
Enter the name of your computer in the Common Name (CN) field, and click Generate.
-
Click Start Server on the main screen.
-
Verify that you can now see incoming messages in the View: Latest tab when you perform logged actions on your In-Sight vision system.
-
Download and install Fluentd for Windows.
-
Open the Audit Logging utility in the In-Sight Vision Suite. Perform the following:
-
Check the Enable Forwarding checkbox.
-
Set the IP address to the IP address of the host computer.
-
Select a Port Number.
-
-
Create the following files on the host computer according to the Fluentd instructions:
-
fluentd.conf
-
fluentd.key
-
fluentd.crt
-
-
Include the following settings in the fluentd.conf file and modify the port number and pathways to the location where you placed these files on your computer:
Copy<source>
@type syslog
port XXXX
tag system
frame_type octet_count
<transport tls>
ca_cert_path PATH\TO\YOUR\fluentd.crt
ca_private_key_path PATH\TO\YOUR\fluentd.key
</transport>
<parse>
@type syslog
with_priority true
time_format 1 %Y-%m-%dT%H:%M:%S.%N%:z
message_format rfc5424
</parse>
</source>
<match system.**>
@type stdout
</match> -
Select the same port as the Audit Logging utility in In-Sight Vision Suite.
-
Save the changes.
-
Open the Fluent Package Command Prompt. Run the following command, replacing the file pathway:
Copyfluentd -c PATH\TO\YOUR\fluentd.conf
The audit log messages now appear in the Fluent Package Command Prompt. To terminate the connection, press Ctrl+C.