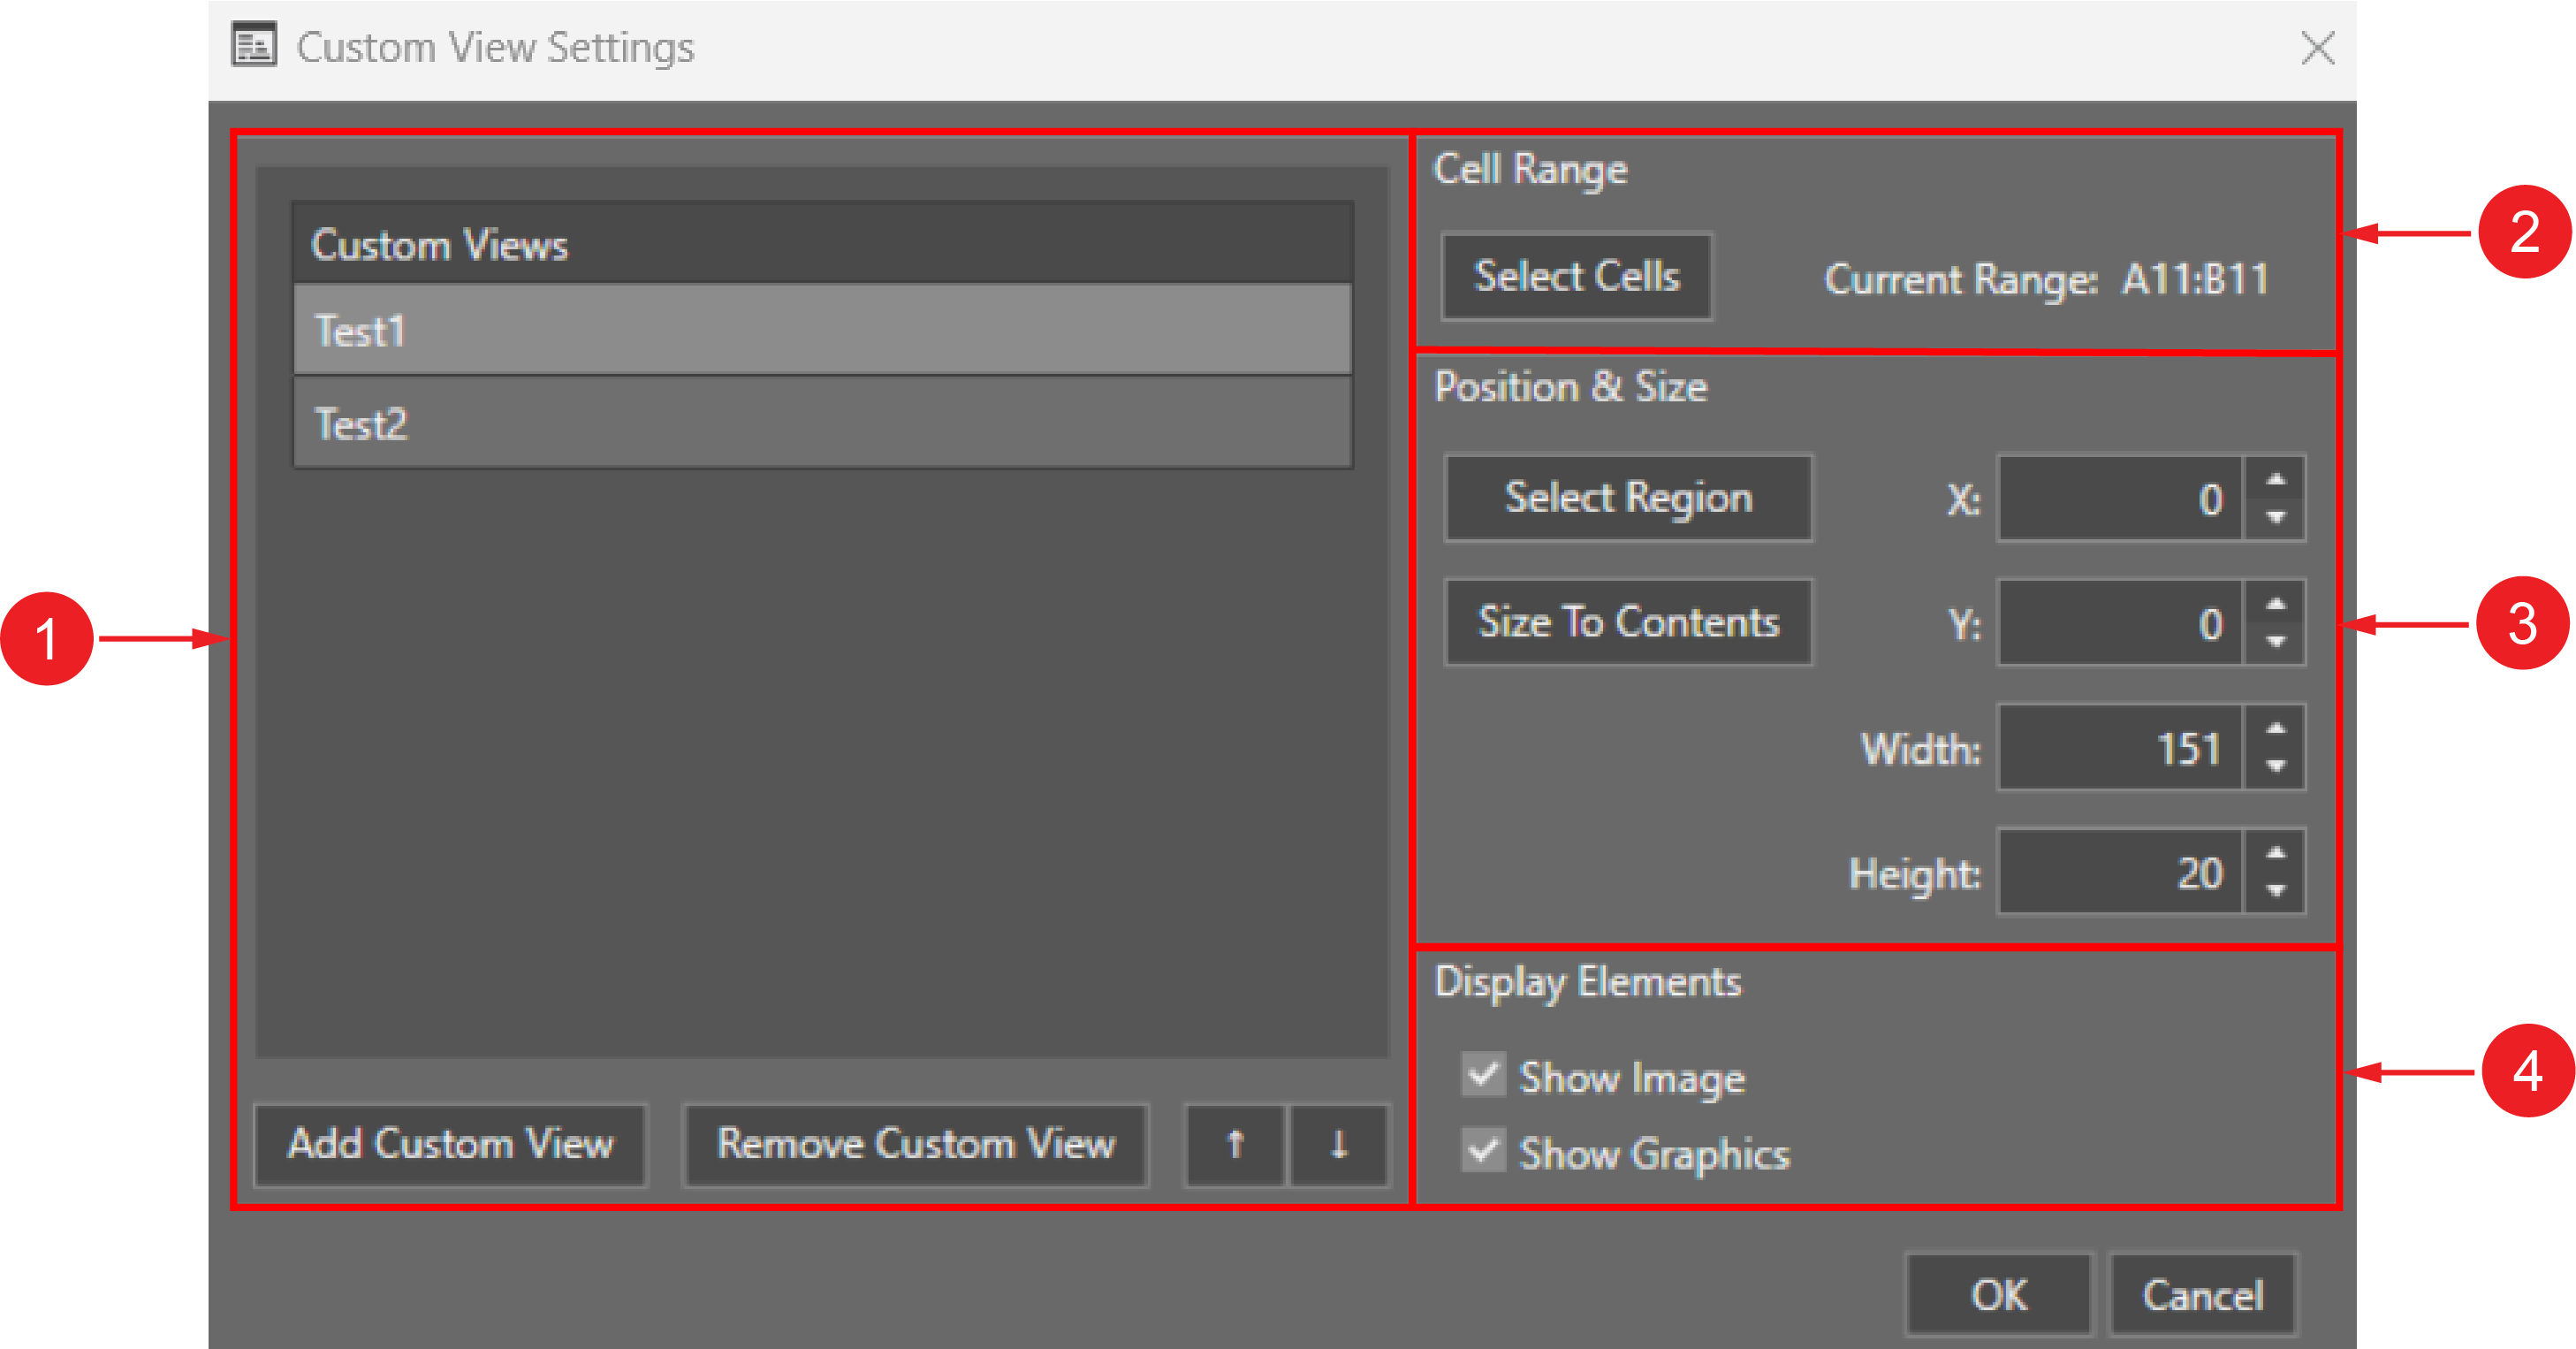
Custom View
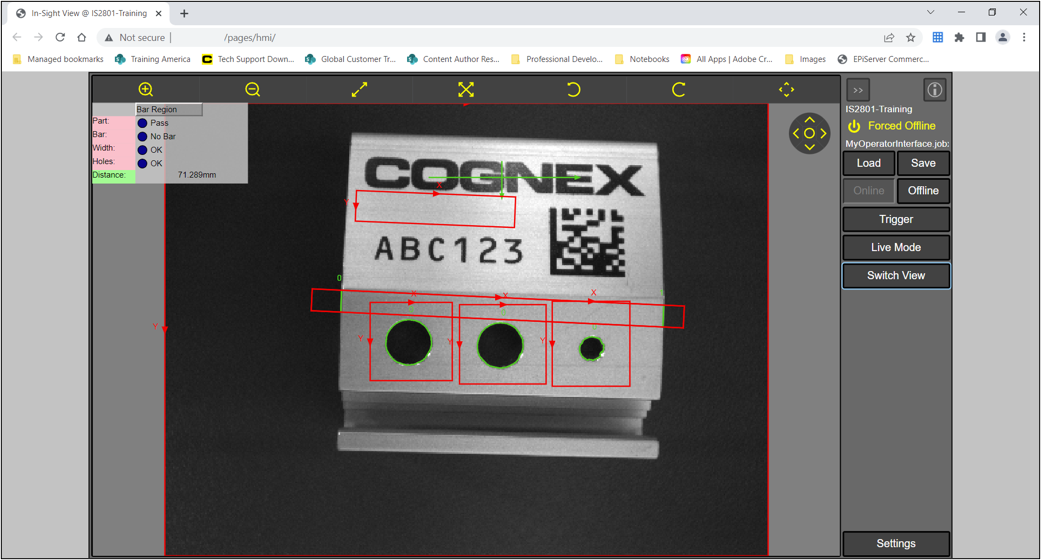
The Custom View panel in Spreadsheet allows you to select a range of cells to be displayed as a graphic overlay in the WebHMI The operator interface through which the operator interacts with the vision system.. You can open the Custom View panel in the Sensor menu.
|
||
|---|---|---|
| Number | Element | Description |
| 1 | Custom Views |
Lists the created Custom Views here. Click Add Custom View to add a new Custom View. Click Remove Custom View to delete a Custom View from the list of created Custom Views. Click the arrows to modify the order of the Custom Views. |
| 2 | Cell Range | Click Select Cells to select the cells on the Spreadsheet you want to display in Custom View. |
| 3 | Position and Size | Click Select Region to set the ROI on the image. You can adjust the size of the ROI by modifying the X, Y, Width, or Height. |
| 4 | Display Elements |
Enables/disabled to display the image itself, or the graphics outputs on the image in Custom View. The Show Image checkbox enables or disables the image display. The Show Graphics checkbox enables or disables the graphics outputs on the image. These settings are enabled by default. |
-
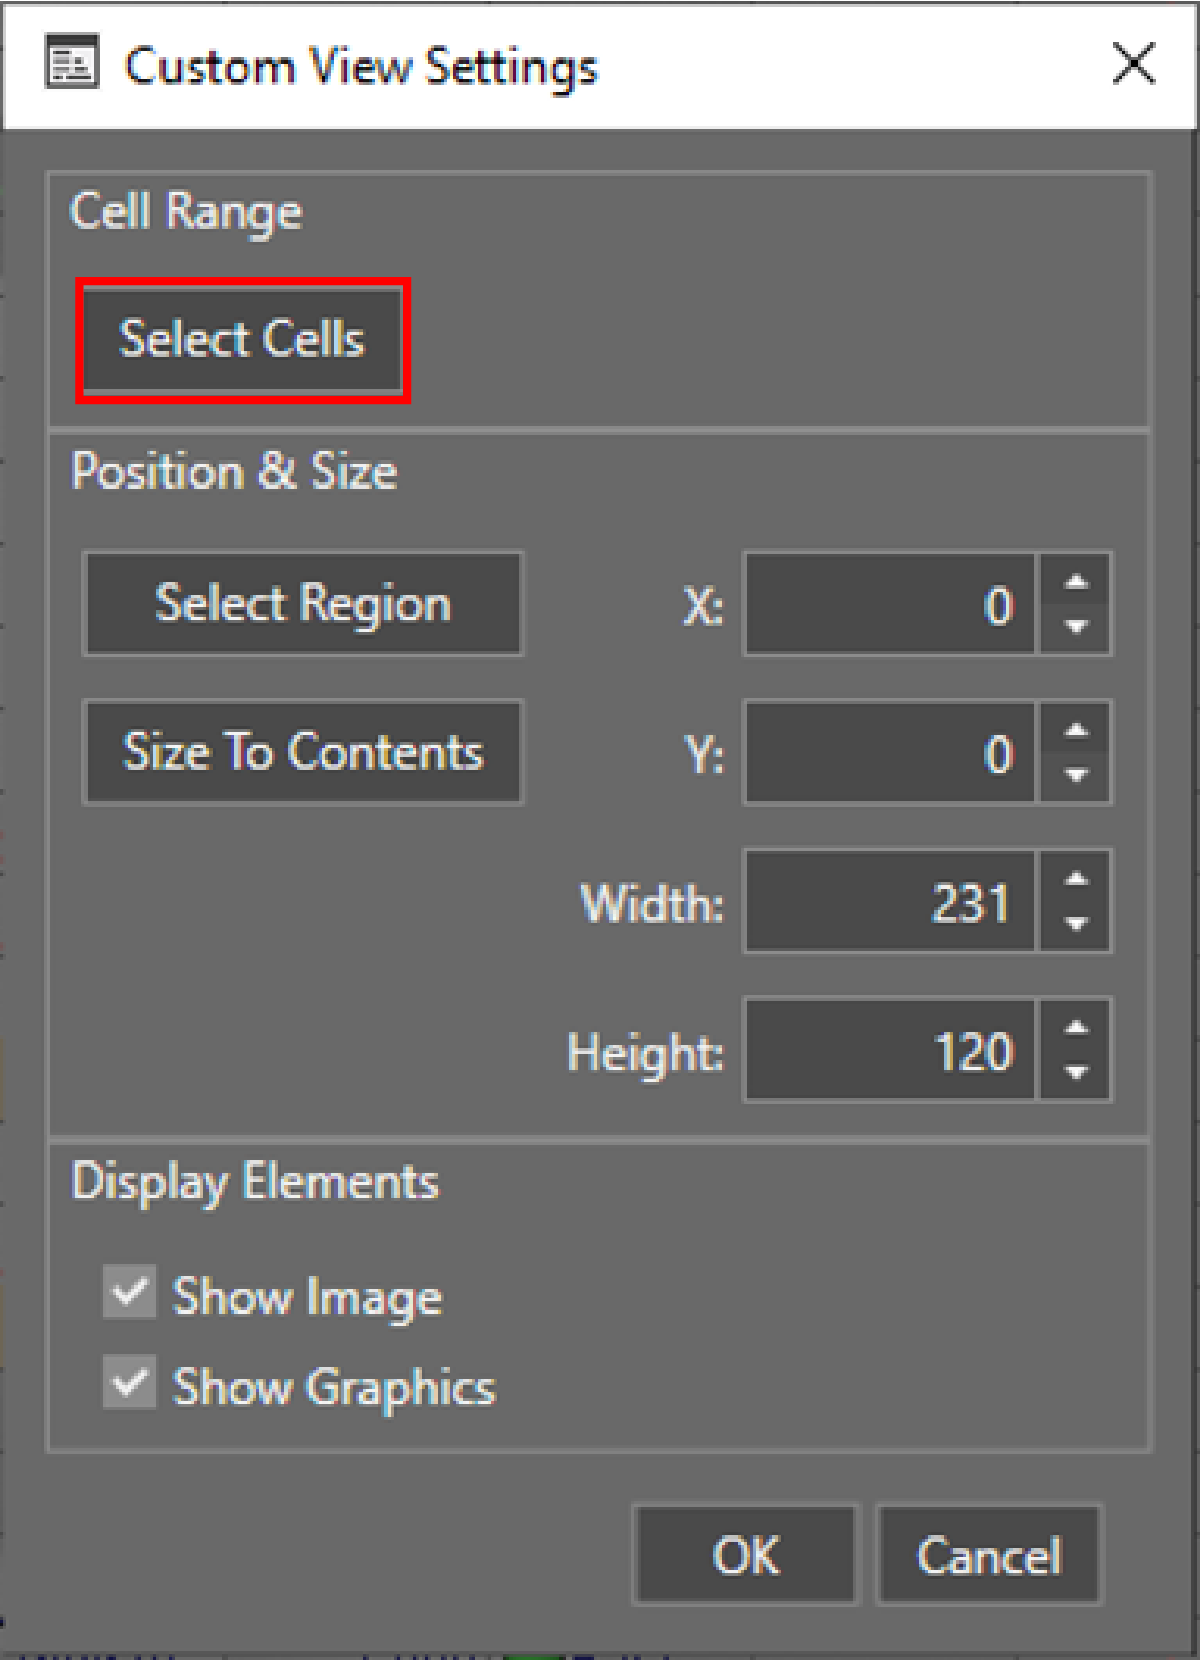
Navigate to Sensor menu and click Custom View Settings.

-
Click Select Cells.
-
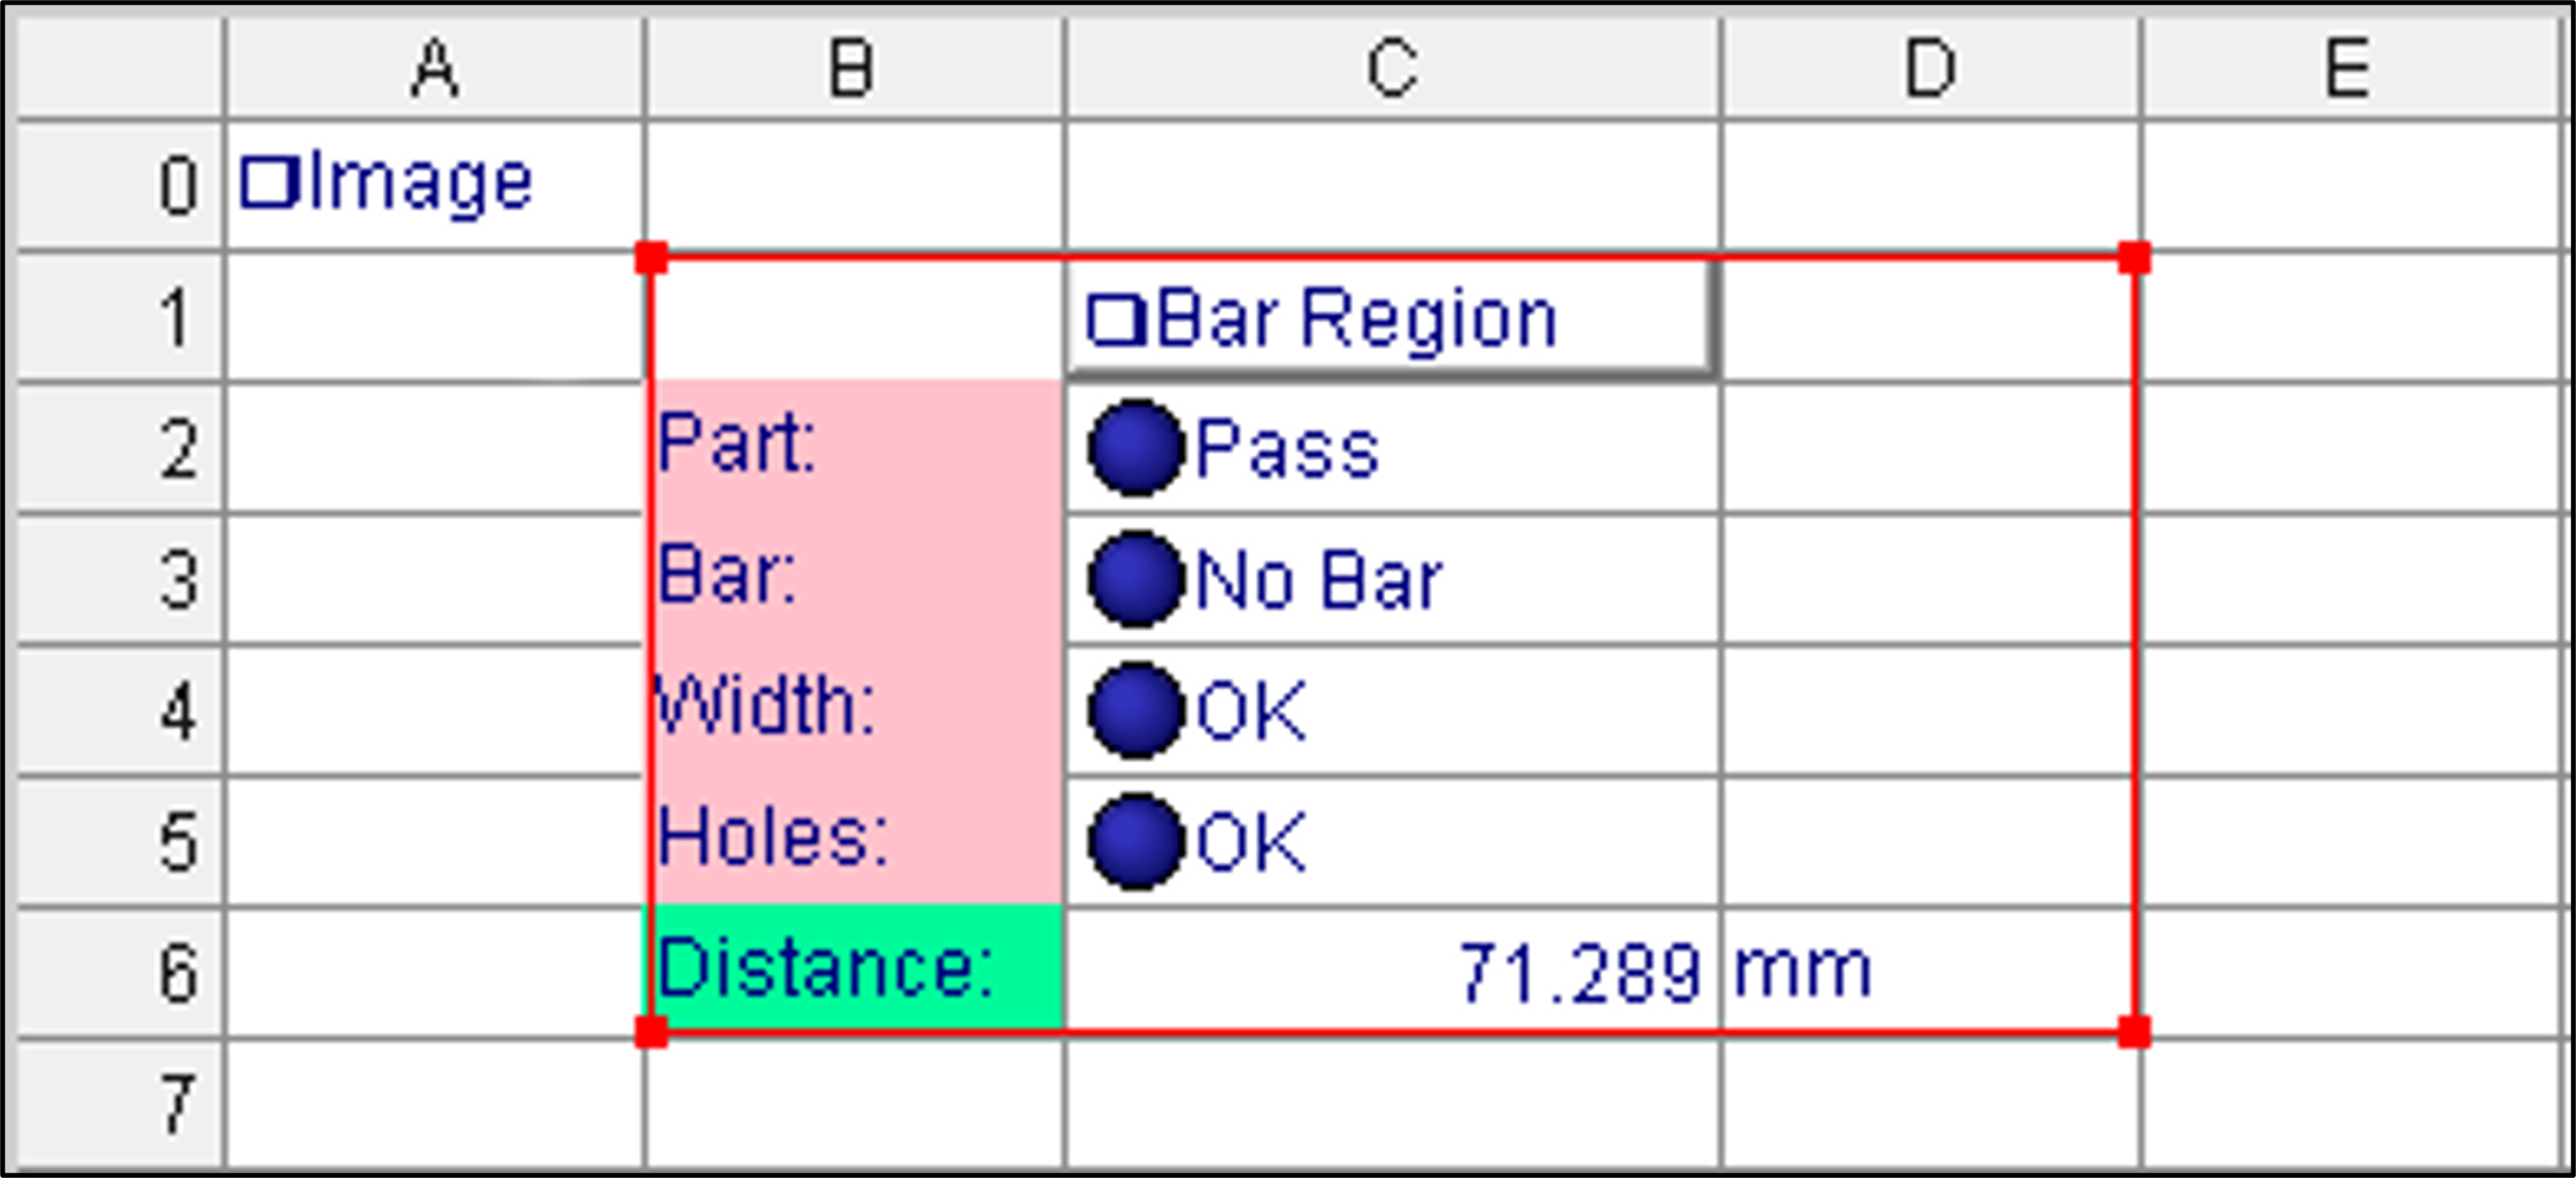
Select the cells on the Spreadsheet to display in the Custom View.
-
Click OK.
-
Open WebHMI and select Custom View to check your results.