Install the Cognex Network Server Application
Setting up an HTTPS connection toward the WebHMI in In-Sight Vision Suite of your job requires a valid common Certificate Authority (CA). In case you have no CA deployed on your network (and consequently, you have no custom certificates either), then use the Cognex Network Server (CNS) tool to create a CA and generate the required trusted certificates.
- CNS must be installed on a PC or server that your In-Sight devices and WebHMI browsers can both access.
- You do not have to install CNS if you already have custom certificates, and are planning to set up HTTPS connections with those.
- Likewise, you do not have to install CNS on your PC or server if you already have CNS installed and running on a device on the network. Use the host name and the IP address of the existing deployment in that case when setting up the connection with the Configure Secure Connection utility.
- CNS supports the following operating systems:
- Microsoft Windows 10 Professional (64-bit)
- Microsoft Windows Server 2016
Perform the following steps to install and configure CNS:
-
Download the CNS installer from the Cognex support site.
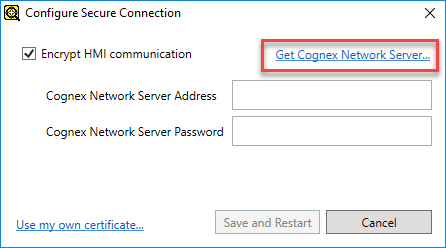
Tip:Click the Get Cognex Network Server... link of the Configure Secure Connection utility to quickly open the support page.
- Run the CNS installer, and follow the on-screen instructions to install the software.
-
When prompted by the installer, specify the adminserver password as shown below.
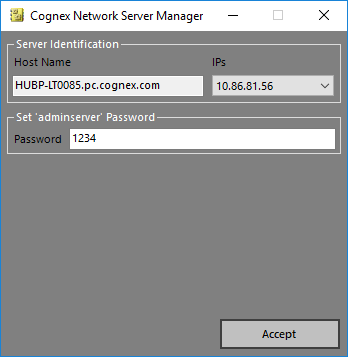
The default password is 1234, while the Host Name and the IPs setting fields are auto-populated by the installer with the host name and network IP address of the PC the installer is executed on. Once finished, click Accept to start configuring CNS and creating the server certificate.
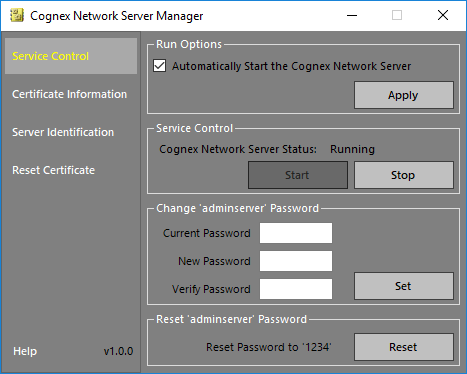
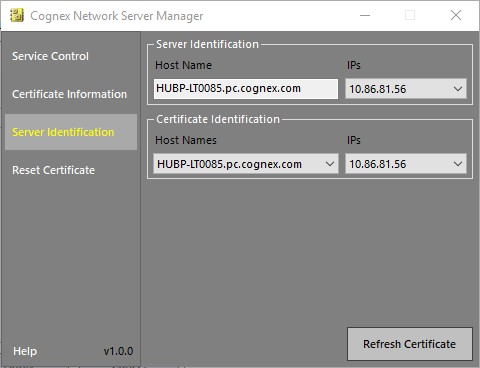
Tip:Take note of these settings, as you will need them to configure the HTTPS connection with the Configure Secure Connection utility of In-Sight Vision Suite. After installation, you can reset the password to 1234 in the Service Control tab of the software, if needed. The IP address of the CNS, on the other hand, can be checked in the Server Identification tab later.
- Click Finish to exit the installation wizard. For more information on using CNS, see the Cognex Network Server Help, available by clicking the Help button in the bottom left corner of the CNS dialog.
The Certificate Authority (CA) private key of CNS is saved in the following folder of the device on which CNS is installed:
C:\ProgramData\Cognex\Cognex Network Server\SSL
For security purposes, do not expose your CA private key.