Display the Custom View in Web HMI
To display the Custom View in the Web HMI application, you need to:
- Create a Custom View within the In-Sight Explorer and save it with the job. For information about how to create a Custom View, see Define a Custom View of the Spreadsheet.
-
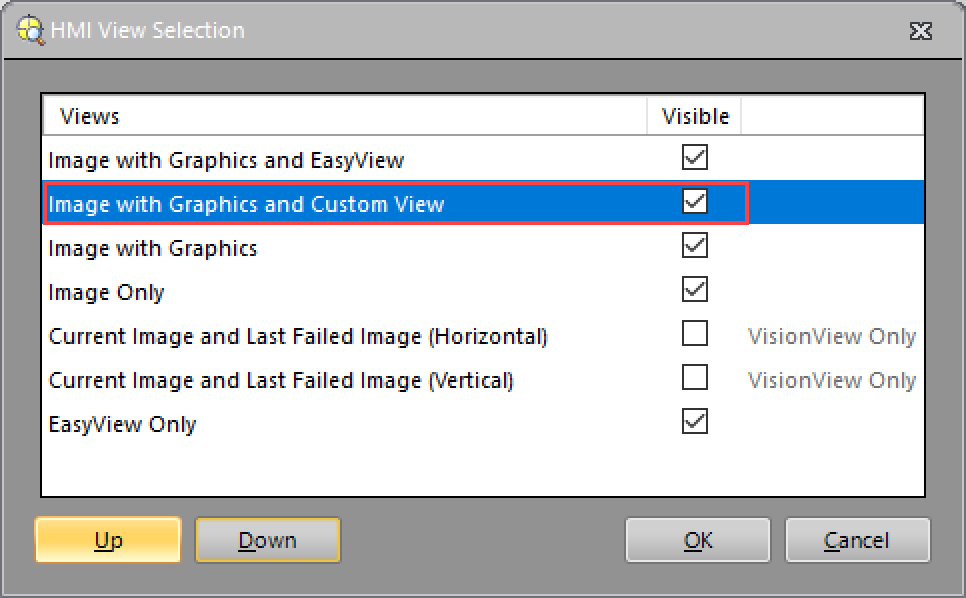
Enable the Image with Graphics and Custom View in the HMI View Selection dialog. By default, this option is enabled.
-
(Optional) Select the Image with Graphics and Custom View in the HMI View Selection dialog and click the Up button to move the Image with Graphics and Custom View up in the list. When you open an HMI application, the Custom View is displayed as the default view.
Note: If the Allow Local Storage option is enabled in the HMI Settings Dialog, the Web HMI application will display your last view as the default view. -
Enable Allow View Selection in the HMI Settings Dialog. By default, this option is enabled.

- Open the Web HMI application.
- If the Image with Graphics and Custom View is not displayed as the default view, click the Switch View button to switch the views in the Web HMI until the Custom View displays. The order of the views is specified in the HMI View Selection dialog.
-
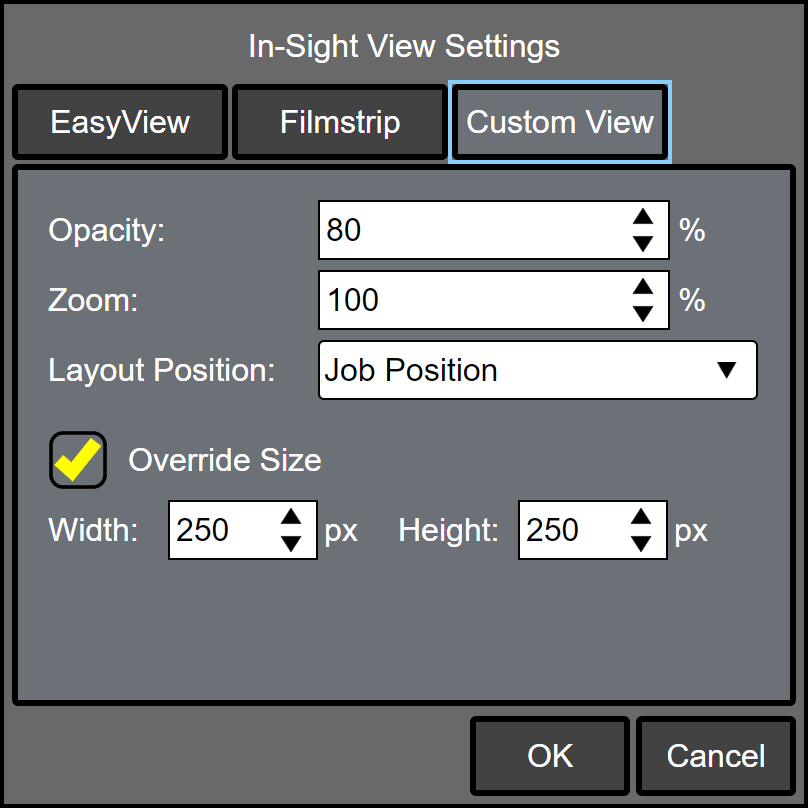
(Optional) If you want to adjust the opacity, layout position and size of the Custom View in the Web HMI application, click the Settings button in the Run Mode Controls Pane. Then select the Custom View tab.