Use the ExtractColor Tool
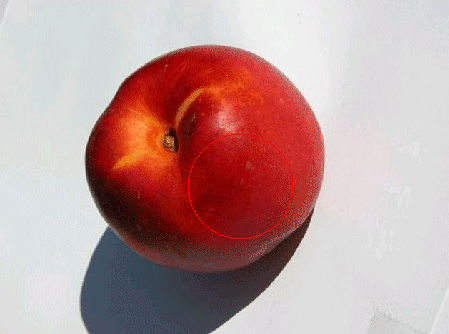
In this example, the TrainExtractColor and ExtractColor functions will be used to determine whether the object in the image is a red apple or an orange, based on the pixel count. For more information, see TrainExtractColor and ExtractColor.
Open the ExtractColor Training Dialog
- Right-click an empty cell in the spreadsheet and select Insert Function to open the Insert Function dialog.
- In the left side of the Insert Function dialog, expand the Vision Tools list of tool categories.
- Select the Color tool category.
-
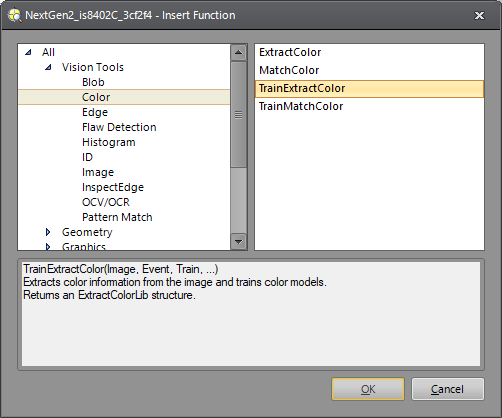
Select the TrainExtractColor function from the Function List and press the OK button or double-click on the function.
-
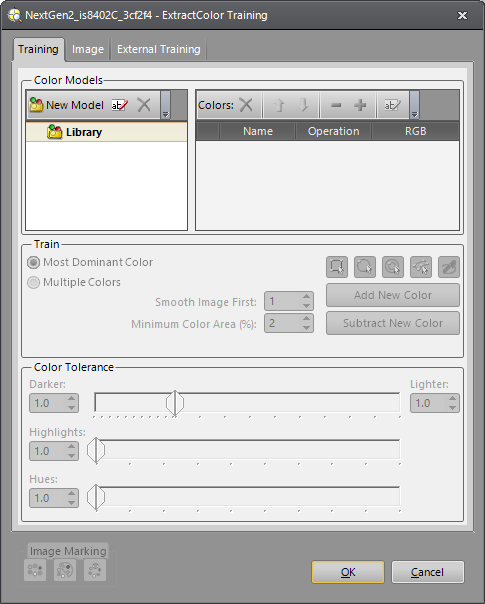
The ExtractColor Training dialog appears.
Add a Color Model
-
A Color Model is a collection of Colors that are used to define an object and the background in an image. Each Color Model represents a 3D color space in which you add or subtract the RGB values of Colors of the object and background you are acquiring. When more than one Color Model is used, the Color Models are ranked in the results.
- Click New Model under Color Models. The new Color Model is added to the Library with the default name Model_1.
- If desired, rename the Color Model name when you initially add it. You can rename a Color Model at any time by highlighting it and clicking the rename button
 above the Library list.
 -
If needed, you can delete a Color Model by highlighting it and clicking the delete
 button.
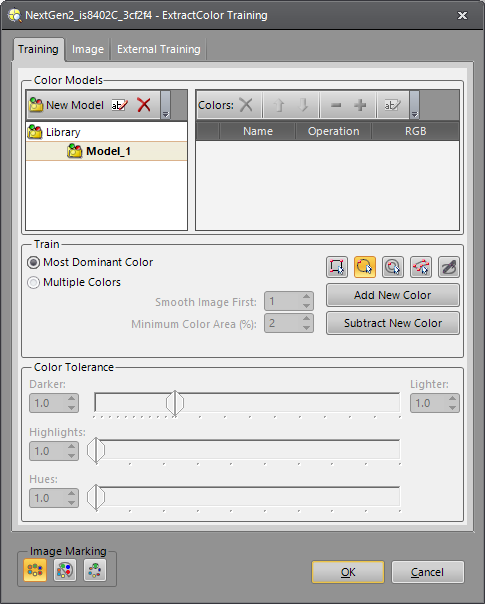
Add and Subtract Colors in a Color Model
- Select the Color Model to modify by clicking on the Color Model's name.
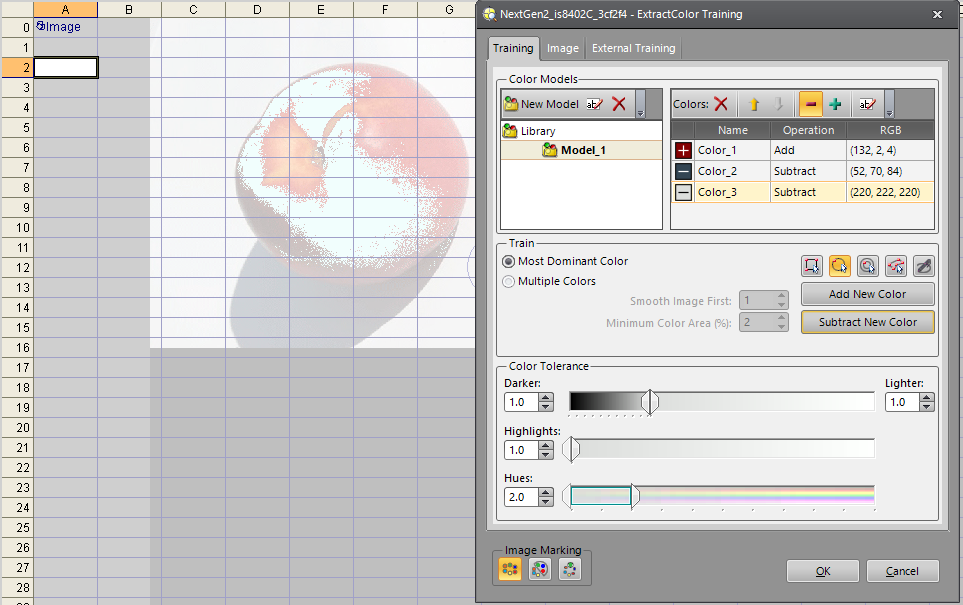
- In the Train section of the dialog, select the shape of the Region of Interest (ROI) that you will use to define the Color: Region, Circle, Annulus, Polygon, or Freehand. For this example, a Circle ROI will be used.
-
Press the Add New Color button to enter interactive graphics mode and position the Circle ROI within the image so that it includes the RGB values that you want to add. For more information, see Interactive Graphics Mode.
- Press the OK button in the Job Edit toolbar once you have configured the ROI. The Color added to the Color Model contains the peak RGB values from within the ROI you defined.
- If there are any colors that you do not want included in the Color Model, repeat the above process but click the Subtract New Color button instead. In this example, the shadow and white background are subtracted.
-
Use the up and down areas to change the order of operations of the colors in your Color Model. The first Color applied to the inspection is listed first.
Adjust Color Tolerance
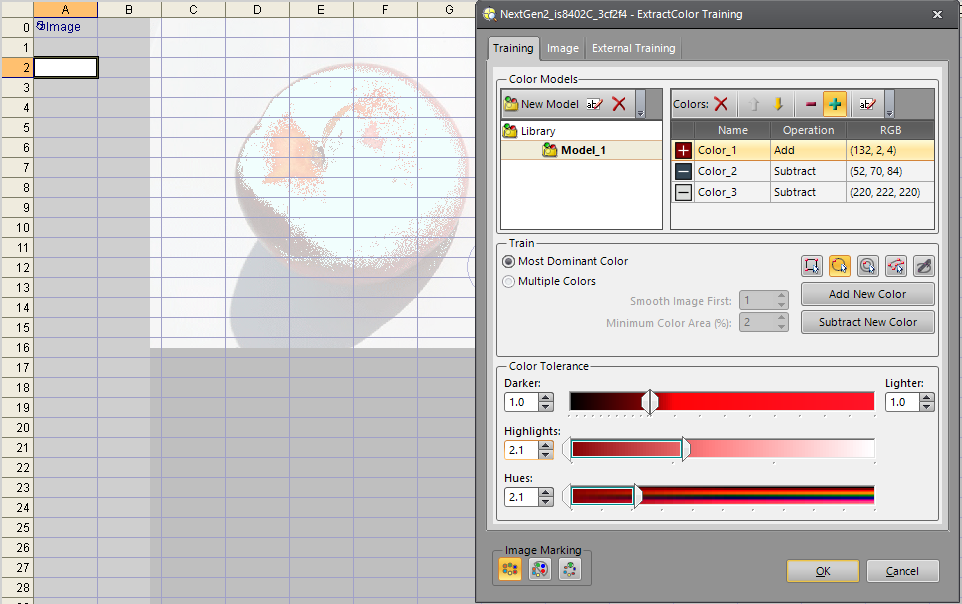
The Image Marking shows you how much of your object is detected. You can increase or decrease the sensitivity by using the Darker, Lighter, Highlights, and Hues settings in the Color Tolerance section of the dialog.
|
Darker |
Increasing the Darker setting adds space to the color toward Black (0,0,0). |
|
Lighter |
Increasing the Lighter setting adds space to the color toward White (255,255,255). |
|
Highlights |
Increasing the Highlights setting adds space to the color from the initial color position toward White (255,255,255). |
|
Hues |
Increasing the Hues setting increases the 3D "box" of the initial color in 3 dimensions in the color space. |
Notice that the changes in the Color Tolerance settings increases the number of pixels detected in the apple image.
Use Multiple Color Models
- Add a second Color Model to the Library. The first Color Model counts red pixels that you would find in the image of a red apple. The second Color Model will be set up to detect pixels in the image of an orange.
- Select the ROI you will use to define the Color: Region, Circle, Annulus, Polygon, or Freehand. For this example, a Circle ROI will be used.
- Press the Add New Color button to enter interactive graphics mode and position the Circle ROI within the image so that it includes the RGB values that you want to add. In this example, the orange's color is fairly uniform and the circle can include most of it.
- Press the OK button in the Job Edit toolbar once you have configured the ROI.
- Finally, adjust the Color Tolerance settings until most of the orange is highlighted.
Image Marking
The Image Marking buttons at the bottom of the dialog allow you to set what is highlighted in the image when you are adding Colors and Color Models. The setting you choose is applied to the active (highlighted) Color Model in your Library.
|
Entire Group |
All of the Colors in your Color Model are marked in the image. |
|
Up to Selected Color |
If you select the second Color in a list of three, the first and second Colors are marked in the image. |
|
Selected Color Only |
Only the selected Color is marked in the image. |
Add the ExtractColor Function
In this example, the inspection can determine if the fruit in the image is an apple or orange based on the pixel count for the associated model.
- Click the OK button in the TrainExtractColor dialog.
- Right-click an empty cell in the spreadsheet and select Insert Function to open the Insert Function dialog.
- In the left side of the Insert Function dialog, expand the Vision Tools list of tool categories.
- Select the Color tool category.
- Select the ExtractColor function from the Function List and press the OK button or double-click on the function.
-
The ExtractColor property sheet appears.
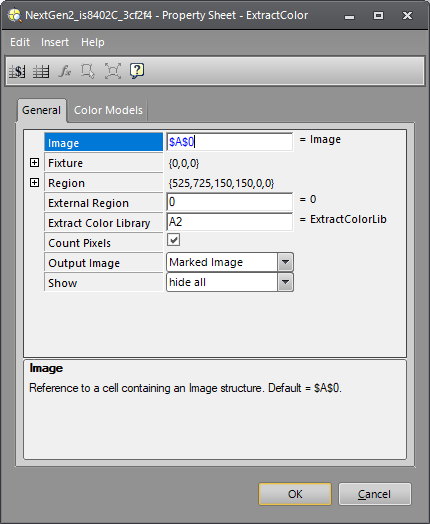
- In the Extract Color Library parameter, insert a cell reference to the ExtractColorLib data structure returned by the TrainExtractColor function. This cell contains the Color Models that will be used by the ExtractColor function.
- Once the parameters are configured, press the OK button to close the property sheet.
-
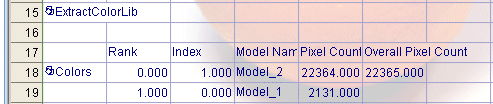
The results for the apple image are show below.
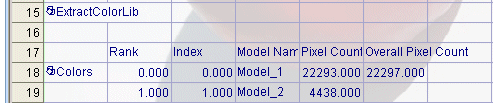
-
The results for the orange image are shown below.