Configure the Web HMI
This topic explains how to configure and open the Web HMI application with a web browser.
- Launch the In-Sight Explorer, and then connect to the vision system or sensor.
-
On the Sensor menu, select the HMI Settings.
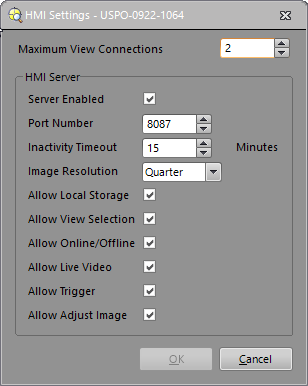
- Check the Server Enabled check box to enable the Web HMI server.
-
Specify other settings in the HMI Settings dialog, if different from the default.
Note: For detailed information, refer to HMI Settings Dialog. -
Click OK to close the dialog.
Note: You must restart the vision system or sensor for the HMI settings to take effect.
-
Optionally, create an EasyView within In-Sight Explorer to add buttons, checkboxes, tool results, interactive graphics controls to the Web HMI, and to allow users make simple changes to the job directly from the Web HMI.
- Create an EasyView in Spreadsheet View. For more information, see EasyView Settings Dialog.
-
Create an EasyView in EasyBuilder View
For more information, refer to Configuring an EasyView topic in the EasyBuilder Help file, accessible from the Help menu within In-Sight Explorer.
-
Configure the views for the Web HMI application. You can customize which views are visible in the Web HMI application and the order of the views when you click Switch View in the Web HMI application. For more information, see Run Mode Controls Pane.
-
On the Edit menu, select the HMI View Selection. For more information, see HMI View Selection Dialog.
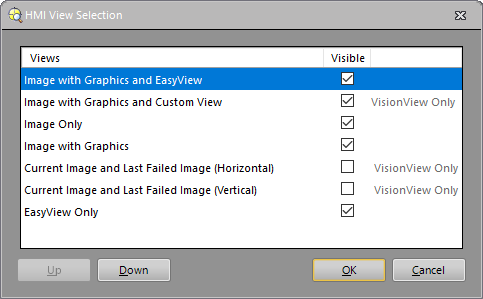
- Select the Views you want to display in the Web HMI application.
-
Use the Up or Down button to specify the order of the views when the Switch View button is pressed. When you open the Web HMI application, the first view listed in the HMI View Selection dialog is displayed as the default view.
Note:- The Web HMI application does not support Current Image and Last Failed Image (Horizontal), Current Image and Last Failed Image (Vertical) and Image with Graphics and Custom View options.
- To toggle the Run Mode views, you must first enable the Allow View Selection option in the HMI Settings dialog.
- To make the EasyView options available in the HMI View Selection dialog, you must first create an EasyView within In-Sight Explorer and save it with the job.
-
-
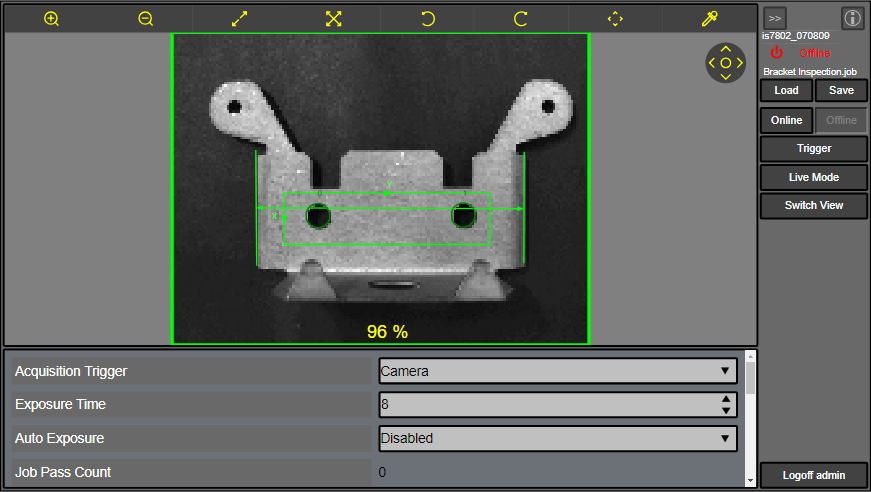
Open the Web HMI application.
There are two options for opening the Web HMI application :
Option 1: Enter the web address into a web browser
-
Open the web browser. Supported web browsers: Google Chrome™ browser, version 64 or greater and Internet Explorer, version 11 or greater.
-
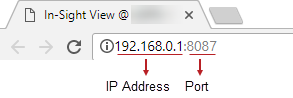
Enter the IP address and port number of the selected vision system or sensor in the web browser's address bar. Web Address Syntax: http://<IP Address>:<Port>/
Option 2: Use the Open Web Browser View Option
- From the In-Sight Network pane, right-click the selected vision system or sensor. For more information, see In-Sight Network.
-
Click the Open Web Browser View to open the default browser to the Web HMI application of the selected vision system and sensor. For more information, see Open Web Browser View.

-
-
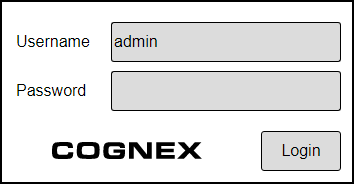
Log on to the vision system or sensor.
If prompted, enter the user name and password to log on to the vision system or sensor.
-
(Optional) Access the Web HMI with the Standard View Connection.
An In-Sight vision system or sensor can connect to only one application with the Standard View Connection. If both In-Sight Explorer and the Web HMI application are connected to the same vision system or sensor, the In-Sight Explorer application is always in the Standard View Connection mode, and the Web HMI application is in the View Only Connection mode with a Locked access.
To access the Web HMI with the Standard View Connection, you need to disconnect the vision system or sensor in the In-Sight Explorer. Once the vision system or sensor is disconnected, the Web HMI application is automatically converted to the Standard View Connection mode.
Note: After disconnecting the vision system or sensor from the In-Sight Explorer, it might take up to 30 seconds for the Web HMI application to convert to the Standard View Connection mode.