Advanced Acquisition Settings
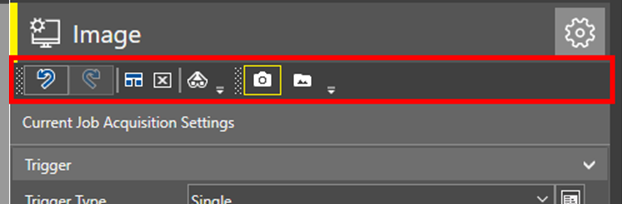
With Advanced Acquisition Settings, you can adjust the settings for the next image acquisition. To see advanced acquisition settings, click on the cogwheel button on the right side of the Setting Image pane. The Advanced Acquisition Settings are only available in Camera mode.
![]()
After Advanced Acquisition Settings mode becomes visible on the right side of the screen, you can find the action bar on the top of the Image pane.
|
|
|
|---|---|
| Icons | Action |
|
|
To undo last action, click Undo. |
|
|
To redo last action, click Redo. |
|
|
To reset the settings back to the property values in-use when first connected to the device, click Reset Settings. |
|
|
To reset acquisition settings to the default values, click Reset Acquisition. |
|
|
To toggle visibility of settings that currently have no effect, click Show/hide no effect settings. |
|
|
To set the source of images to the camera, click Camera Mode. |
|
|
To set the source of images to the image folder, click Image Folder Mode. |


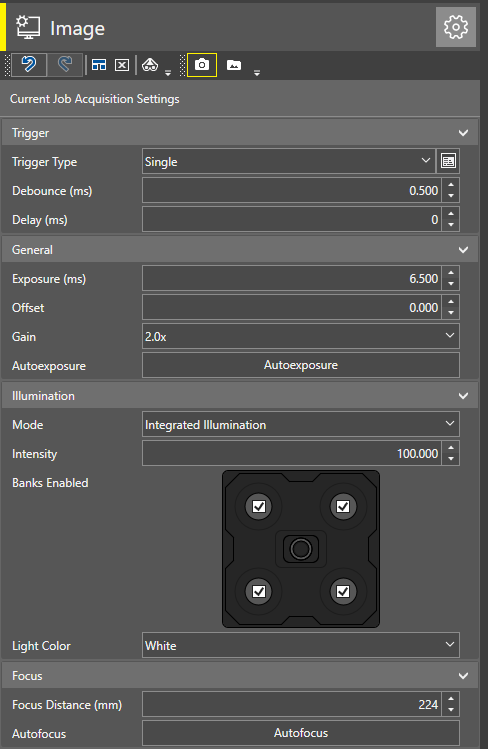
To further adjust the configurations for triggering, image formation, and calibration, use the tools under Current Job Acquisition Settings.
|
|
|||
|---|---|---|---|
| Section | Tool | Function | Values |
| Trigger | Trigger Type |
Defines the type of trigger signal that begins an image acquisition. |
Single |
| Self | |||
|
Trigger Interval (ms) (Appears in Self Trigger Type mode) |
Defines the time in milliseconds between acquisitions when using an interval trigger type. | [0,10000] | |
|
Debounce (ms) (Appears in Single Trigger Type mode) |
Defines the time in milliseconds that a camera trigger has to last to a trigger acquisition. | [0,65.535] | |
|
Delay (ms) (Appears in Single Trigger Type mode) |
Defines the delay between the time that the vision system receives a trigger to acquire an image, and the time the vision system begins the image acquisition. | [0,10000] | |
| General | Exposure (ms) | Defines the exposure time. When the vision system receives an image acquisition trigger signal, light is integrated into the image sensor array for the specified duration. | [0,1000] |
| Gain | Defines the gain of the amplifier stage that precedes the analog-to-digital conversion. | [0,255] | |
| Autoexposure |
A single button to auto-set the exposure based on current light settings. |
||
| Illumination | Mode | Defines the illumination devices. | Integrated illumination |
| Disabled | |||
| Intensity | Specifies the intensity of the illumination LED banks as a percentage. | [0,100] | |
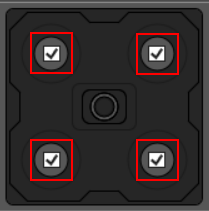
| Banks Enabled |
Check or uncheck the checkboxes inside the banks on the graphic to enable or disable each bank. Note: Banks graphics can vary depending on the illumination hardware attached to the vision system.
|
|
|
| Light color |
Defines the illumination color. Note: Light color tool appears only if a Mini Torch is connected to the vision system.
|
WHITE | |
| RED | |||
| GREEN | |||
| BLUE | |||
| Focus Note: Focus options appear only when a liquid lens is attached to the vision system. |
Focus Distance (mm) | Focus distance in millimeters. | [65,4043] |
| Autofocus | A single button to auto-set the focus position based on current settings. | ||
To return to Source and Lightning settings view, click the cogwheel button in the right top corner of the Image pane again.