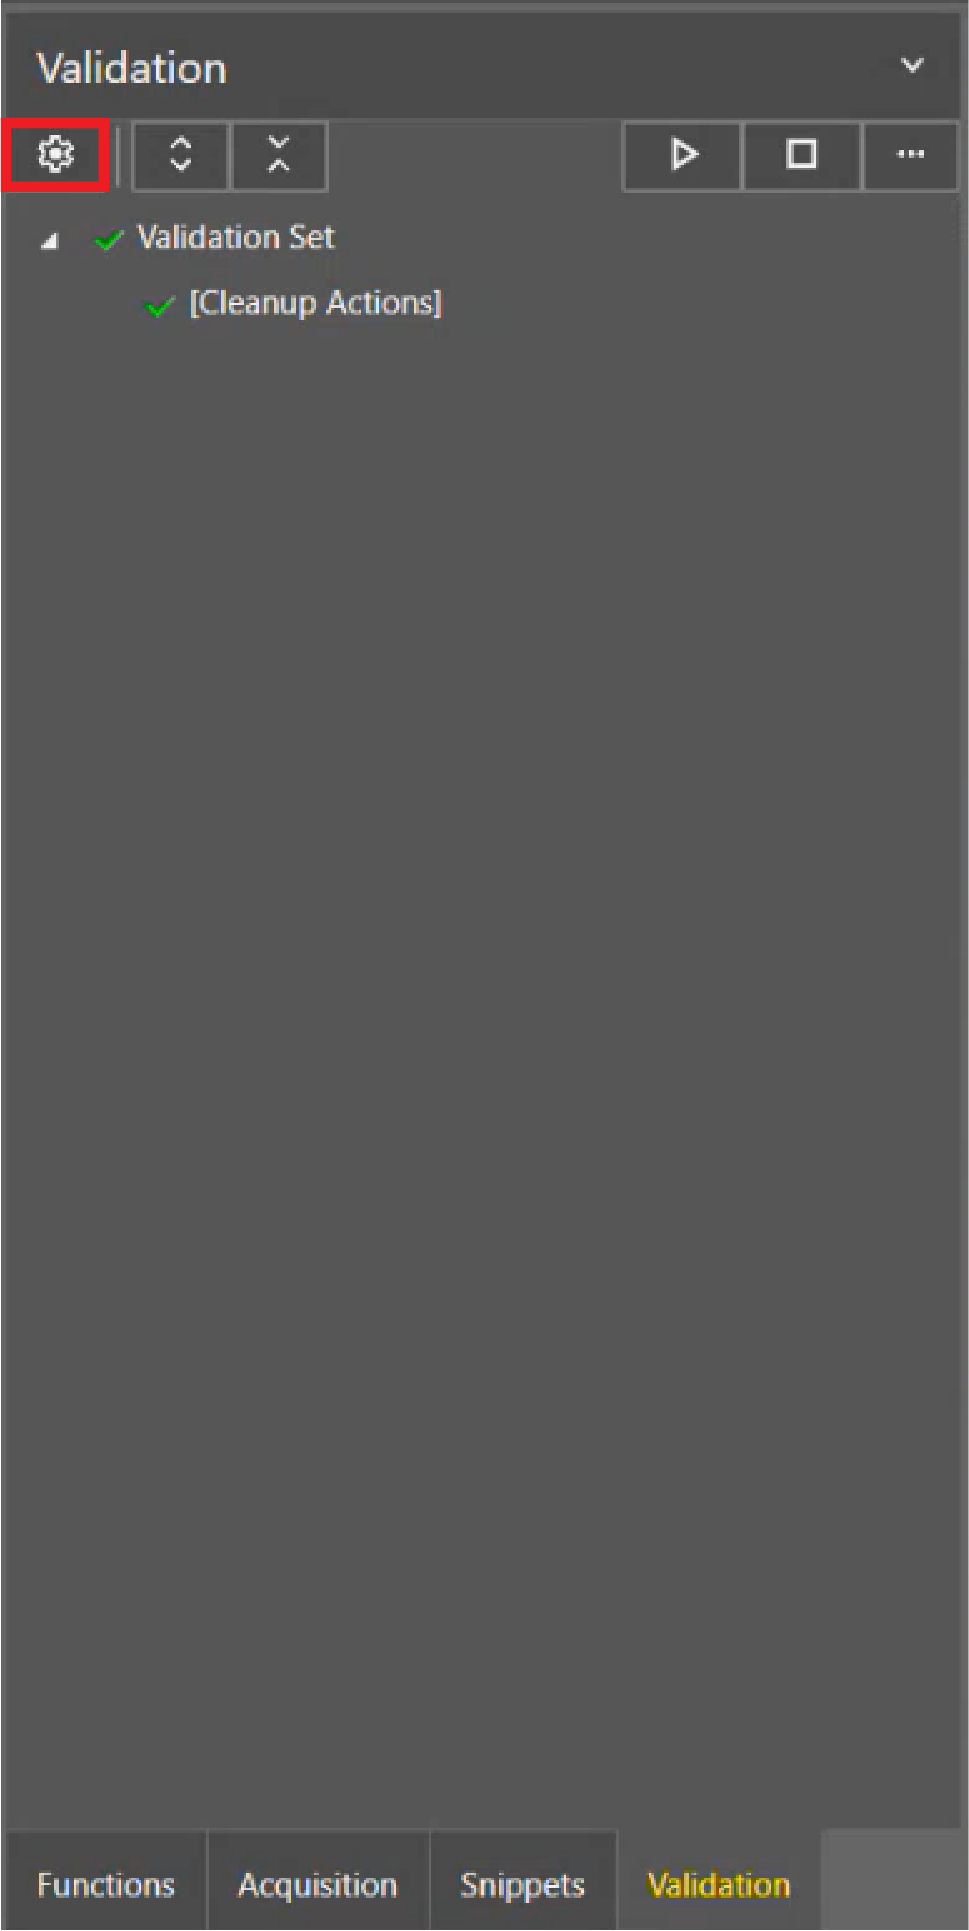
Job Validation Panel
Use Job A job is a user-configured program in Spreadsheet consisting of functions and designed for specific applications. You can create and edit jobs using the Spreadsheet interface, and load them on a vision system for deployment in a live environment. Validation to confirm that a job is operating within expected parameters. Job Validation performs tests on the job and compares the results of those tests against expected values.
To access the Job Validation panel, select the View tab of the Menu Barand choose Job Validation.
Prerequisites
Before you start, you must meet the following prerequisites:
-
Develop the machine vision application and save the application as a .job file on In-Sight Spreadsheet.
-
Establish a connection to the vision system and load the .job file.
-
Save a set of images on the device file system to use as Test images during Job Validation.
Note: When configuring Job Validation for the first time, Cognex recommends storing test images on the device using the WriteImage function Functions are tools that are available in Spreadsheet for processing and analyzing acquisitions or other results. You can add functions to your Spreadsheet job to create tool chains and produce results for specific applications.. For more advanced usage, you can also store test images on an external FTP server.Note: Ideally, include examples of "good" images that result in a Pass, and "bad" images that result in a Fail. Job Validation is able to operate with a variety of file organization structures for the image database, however, sorting the images into separate "good" and "bad" folders before launching Job Validation simplifies the process.
Configure Job Validation
To configure the Job Validation:
After configuration, Run Job Validation to evaluate the results.
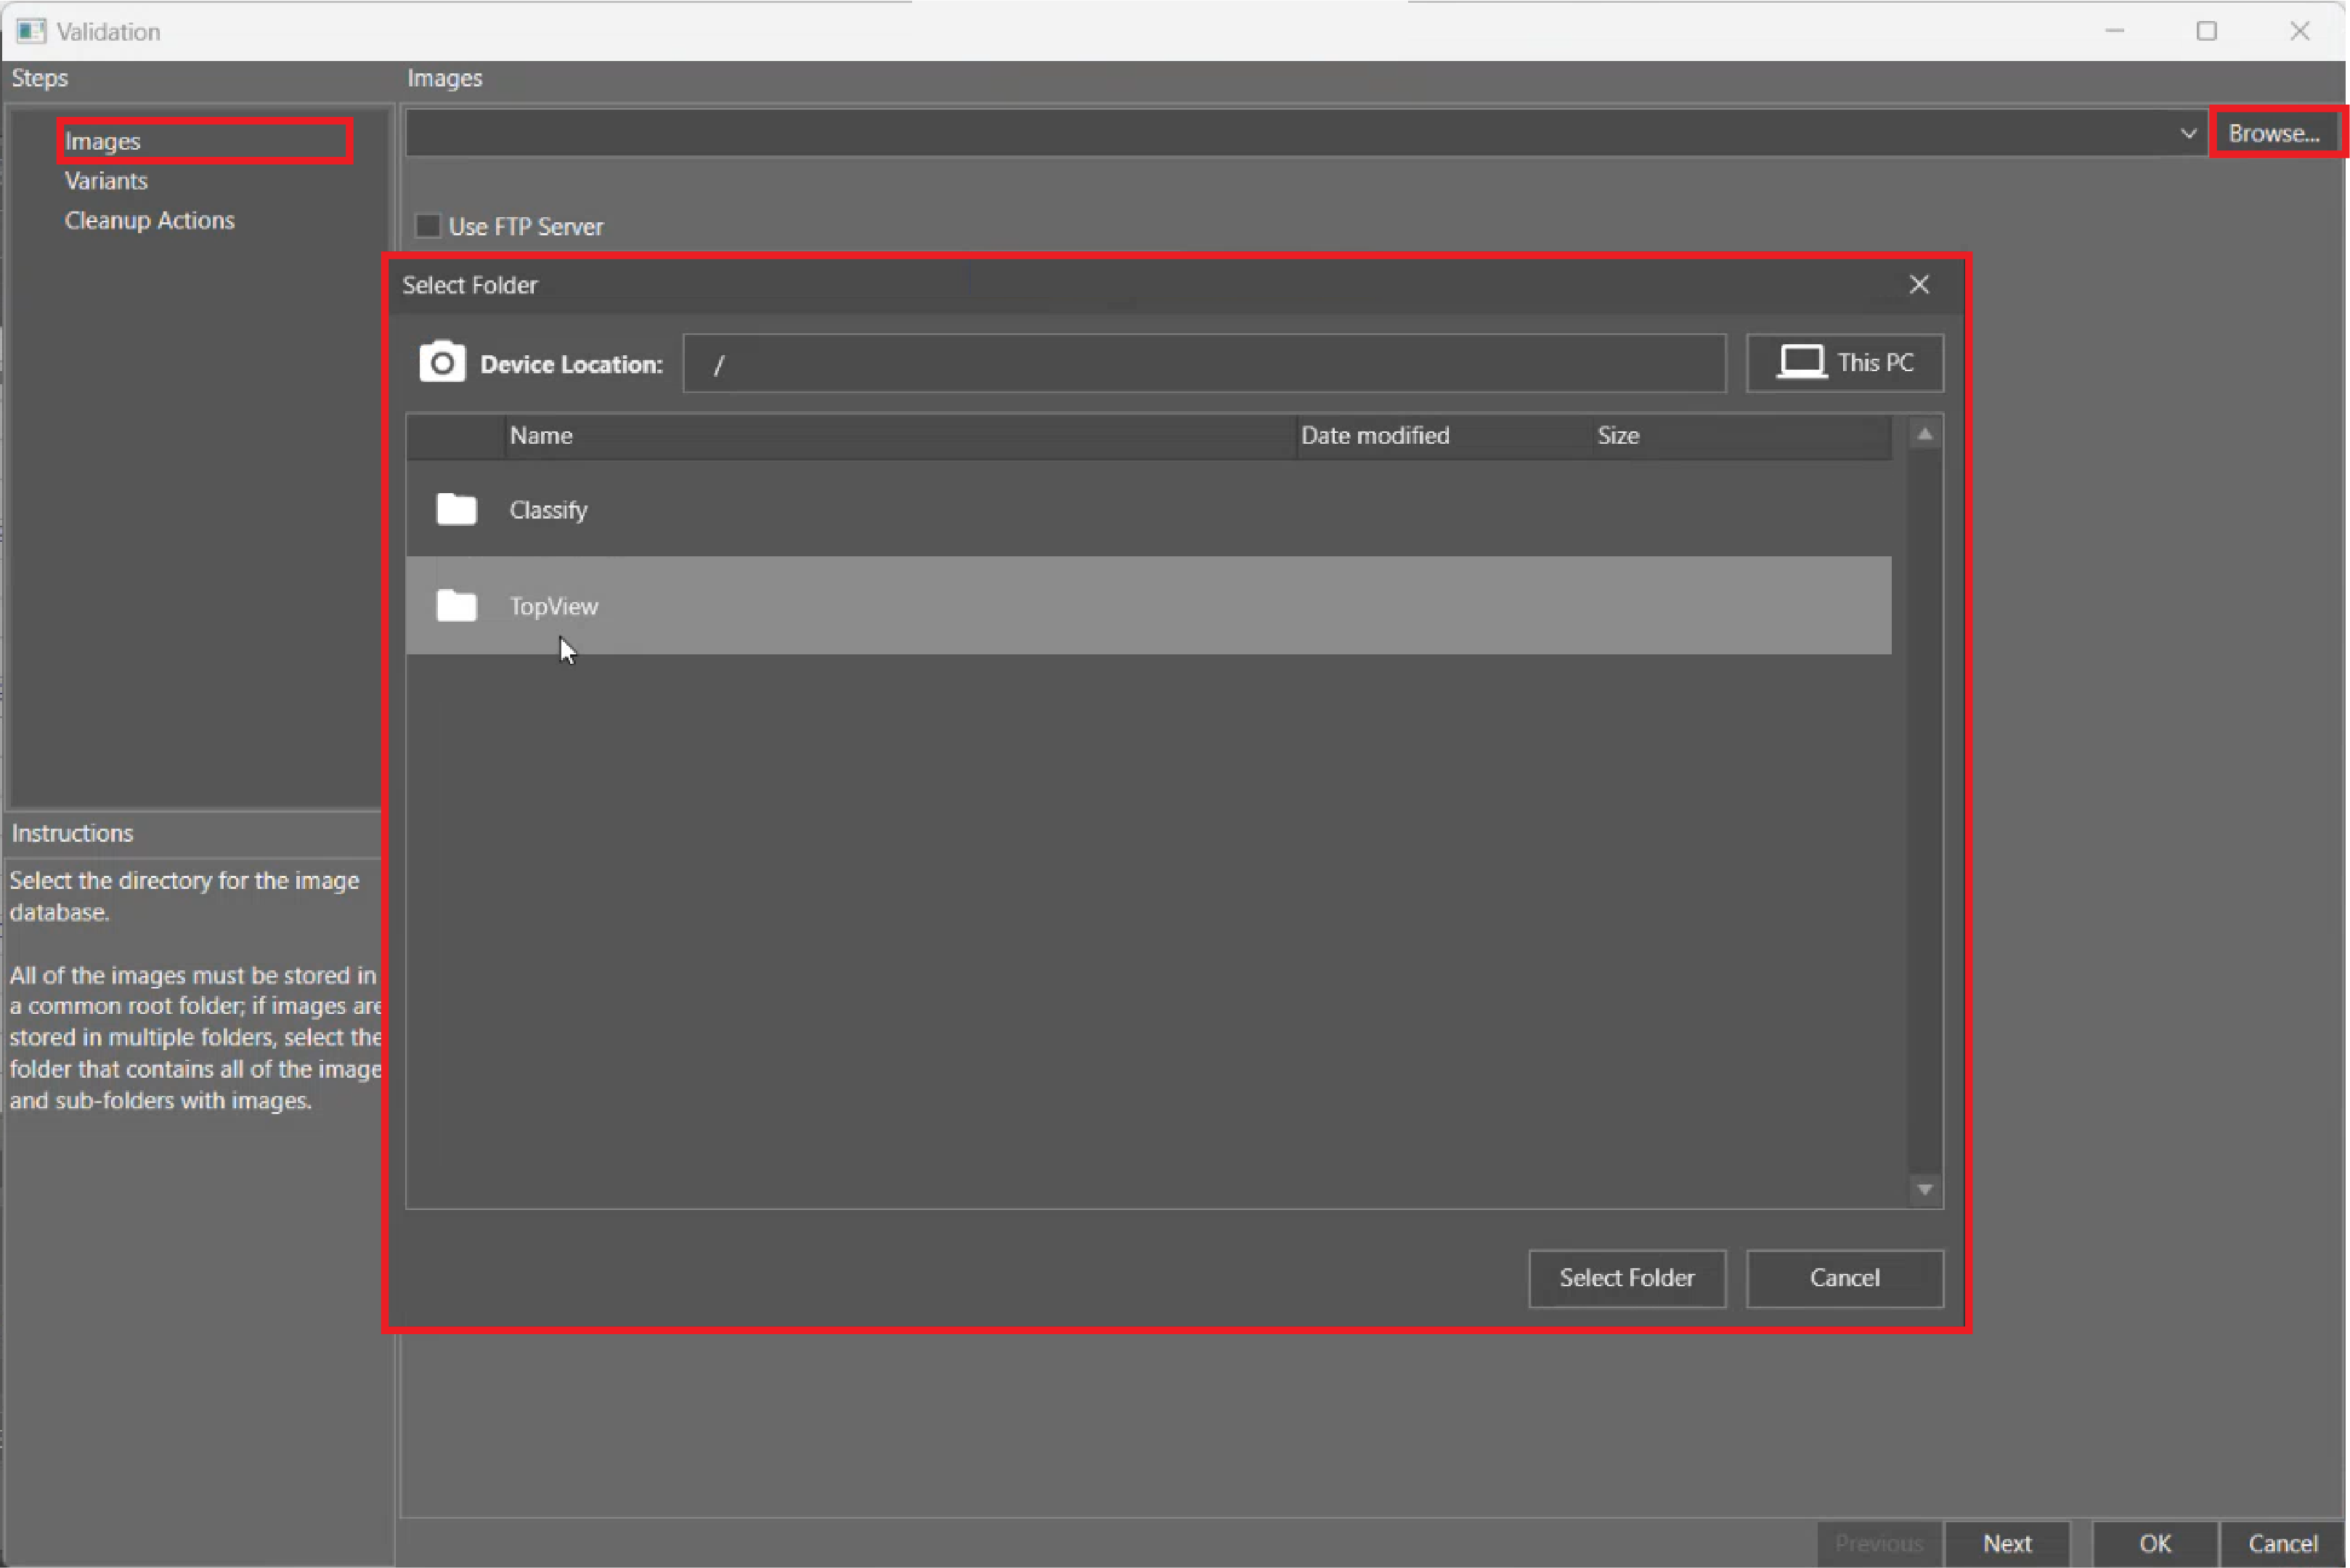
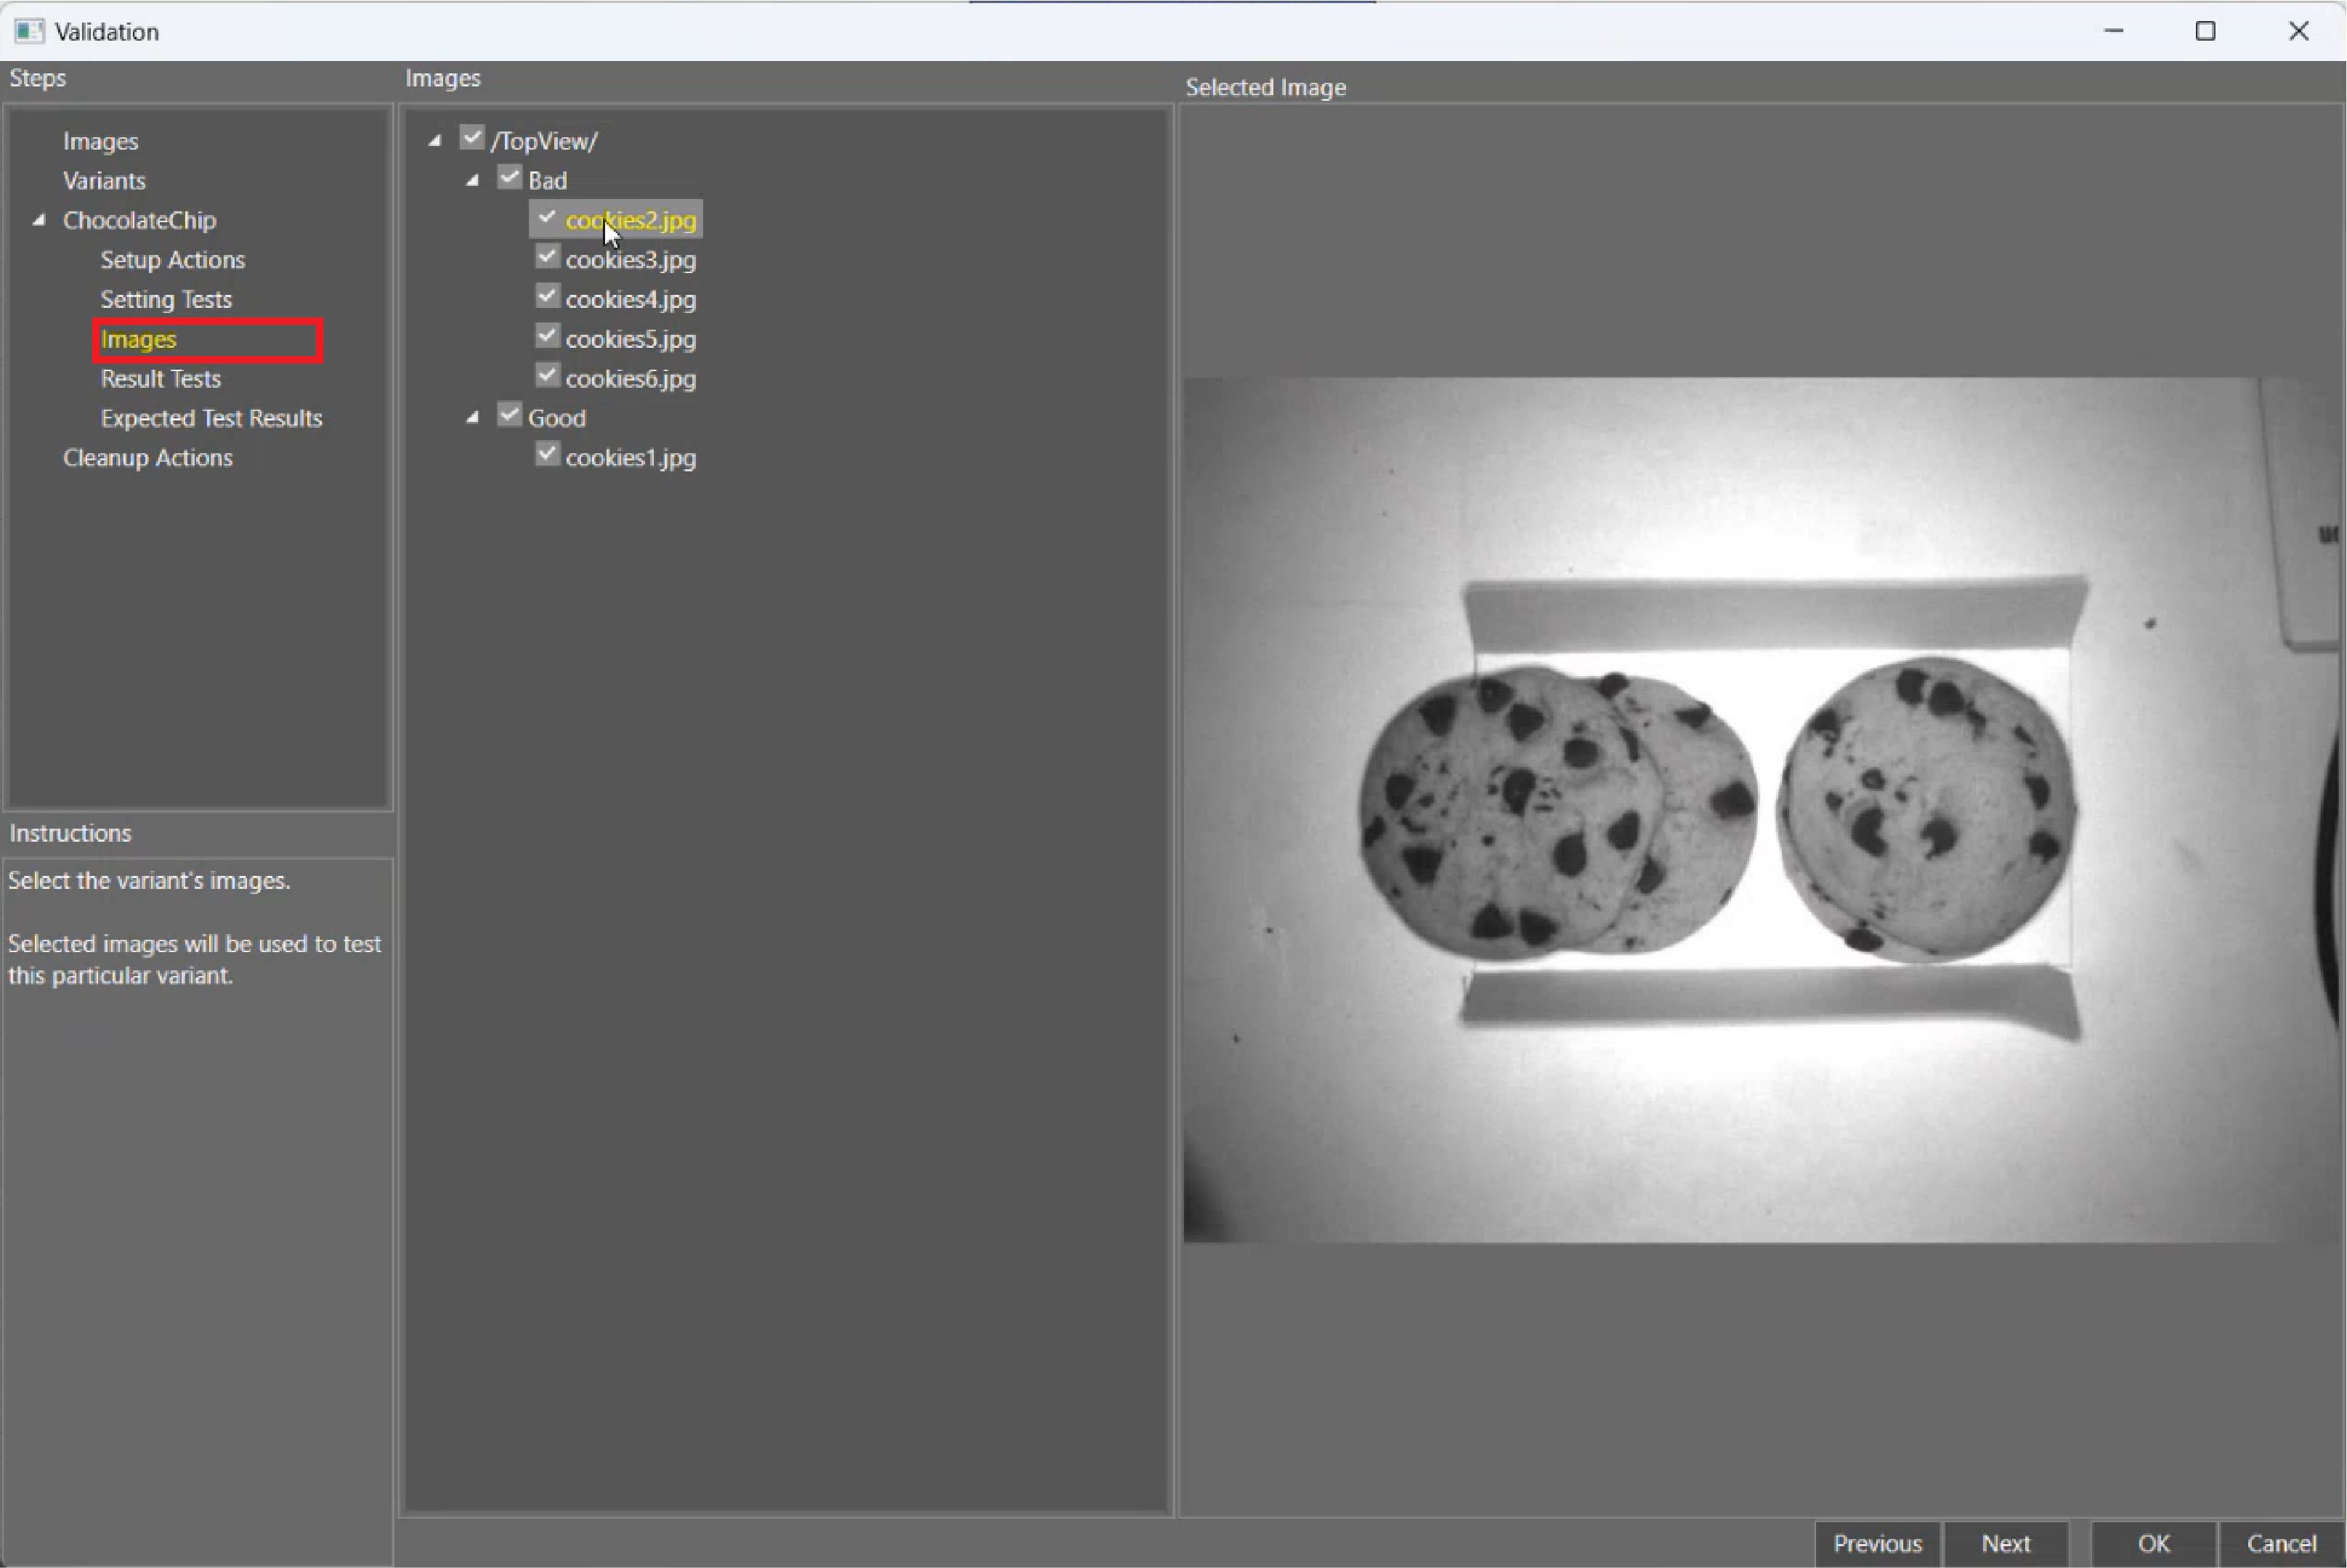
Add Images
To add images to the Job Validation:
-
Open the Job Validation configuration dialog by clicking the Settings icon.
-
Click Browse to open the image location.
-
Click Select Folder to load images from the device location or PC.
Define Variants
A job can contain one or more inspections. For example, you can create jobs to handle multiple products. Each of those separate inspections is considered a variant.
To define a variant:
-
Click Add and then click Rename.

-
Provide a name for the variant.
-
Click Next.
-
 Optional: Choose the Setup Actions.
-
Select a named cell on the Settings panel.
-
Configure the initial value the cell takes during Job Validation.
-
Determine the sequence of the Setup Actions.
Note: The Setup Actions are editable cells within the spreadsheet that are named. For more information on naming cells, see Cell Name.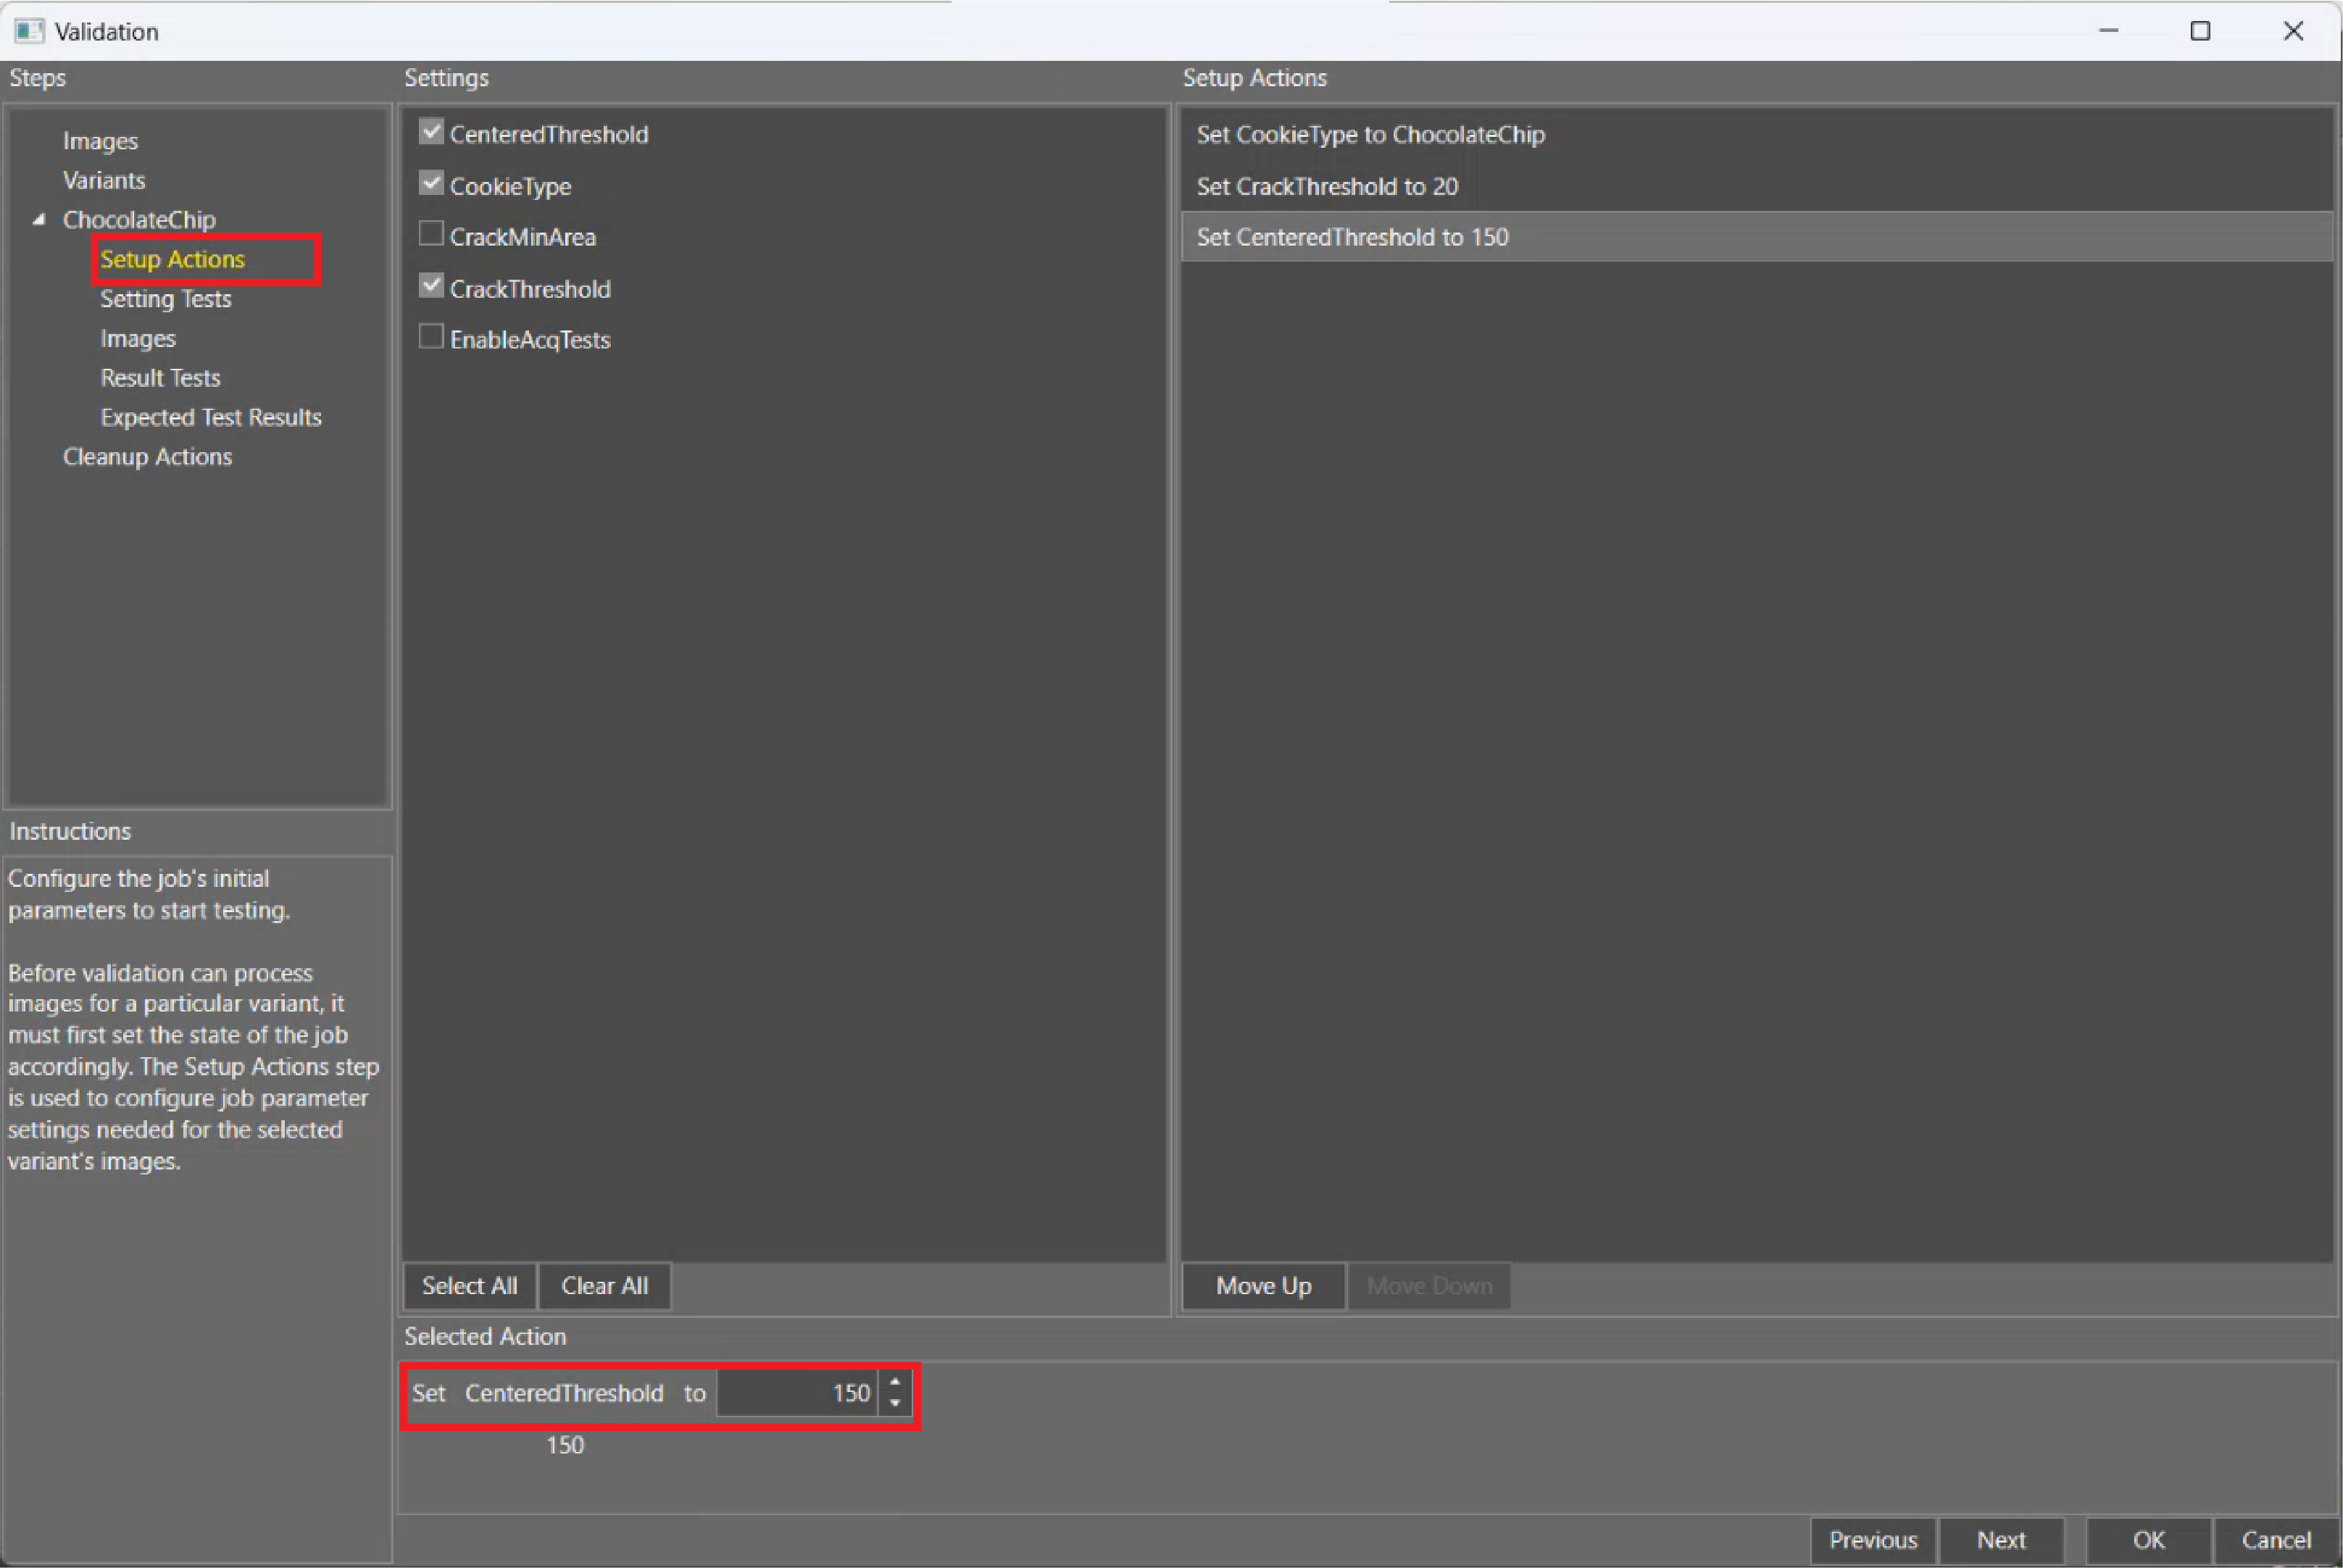
-
-
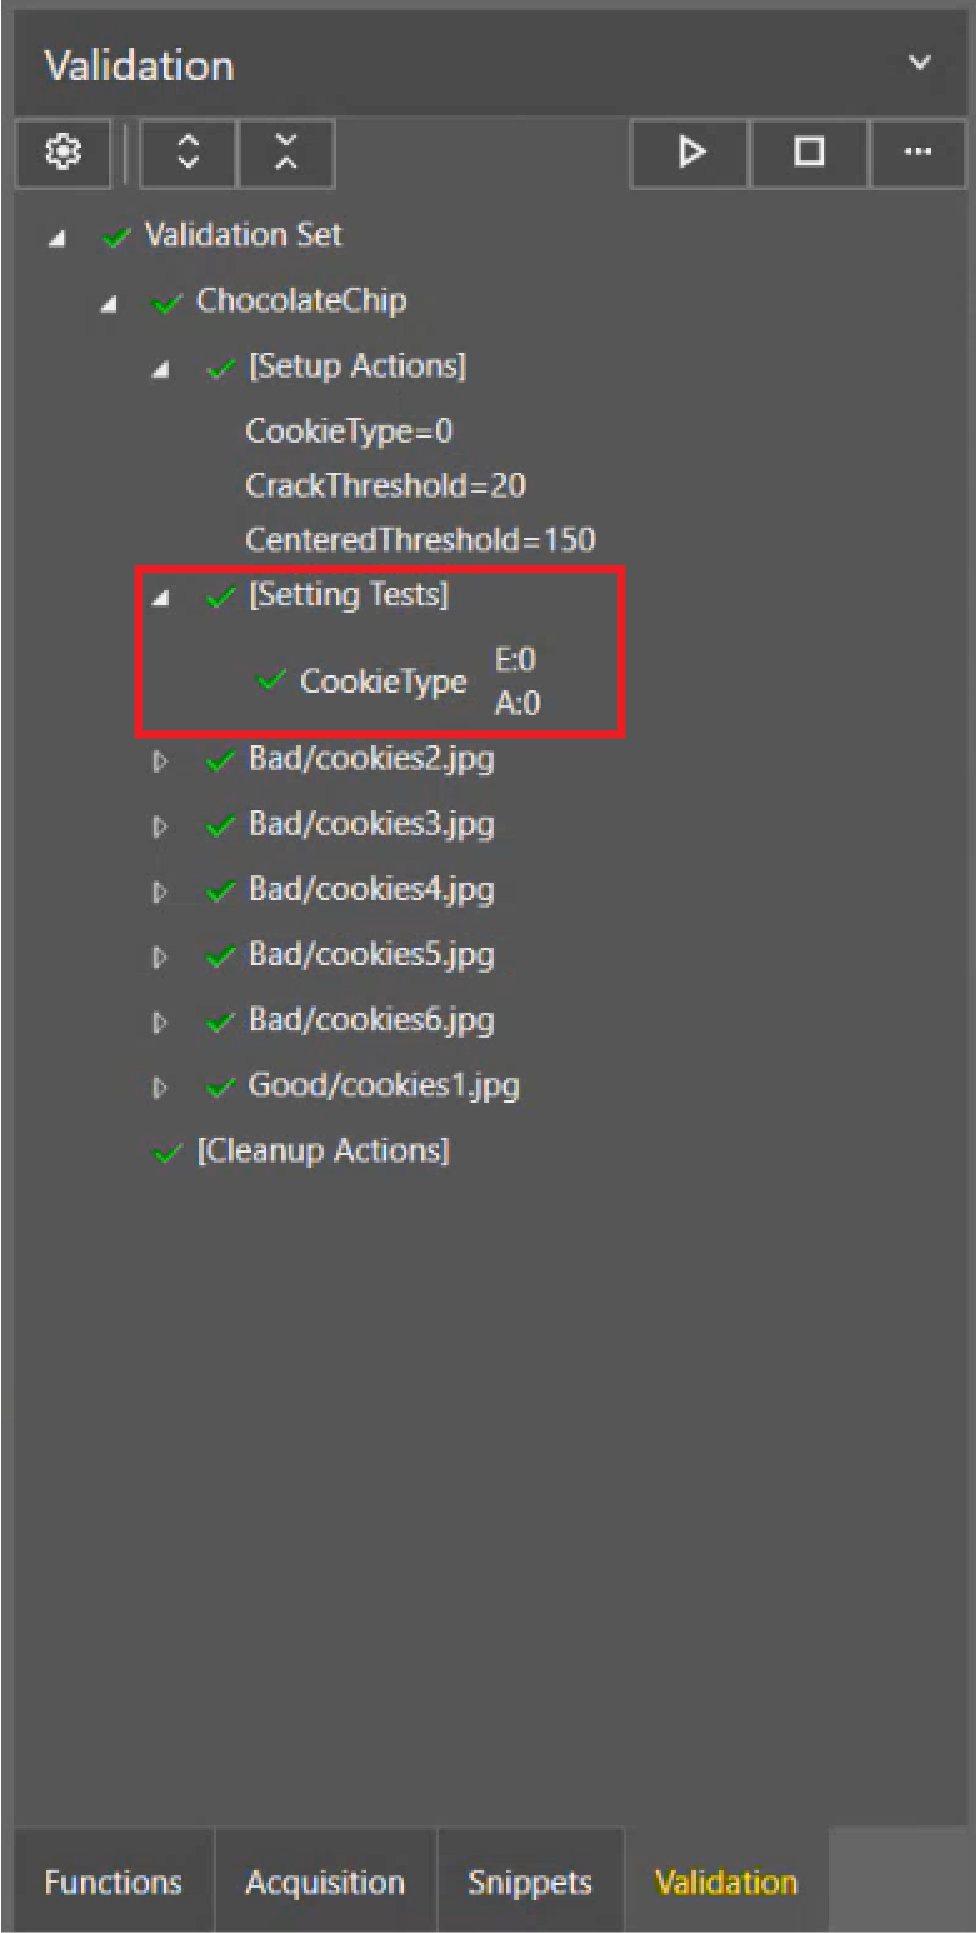
Optional: Choose the Setting Tests.
-
Select a named cell on the Settings panel.
-
Configure the value against which Job Validation tests the cell.
-
Determine the sequence of the Setting Tests.
Note: Even if you chose the same option in Setup Actions, Setting Tests verify that the settings are correct.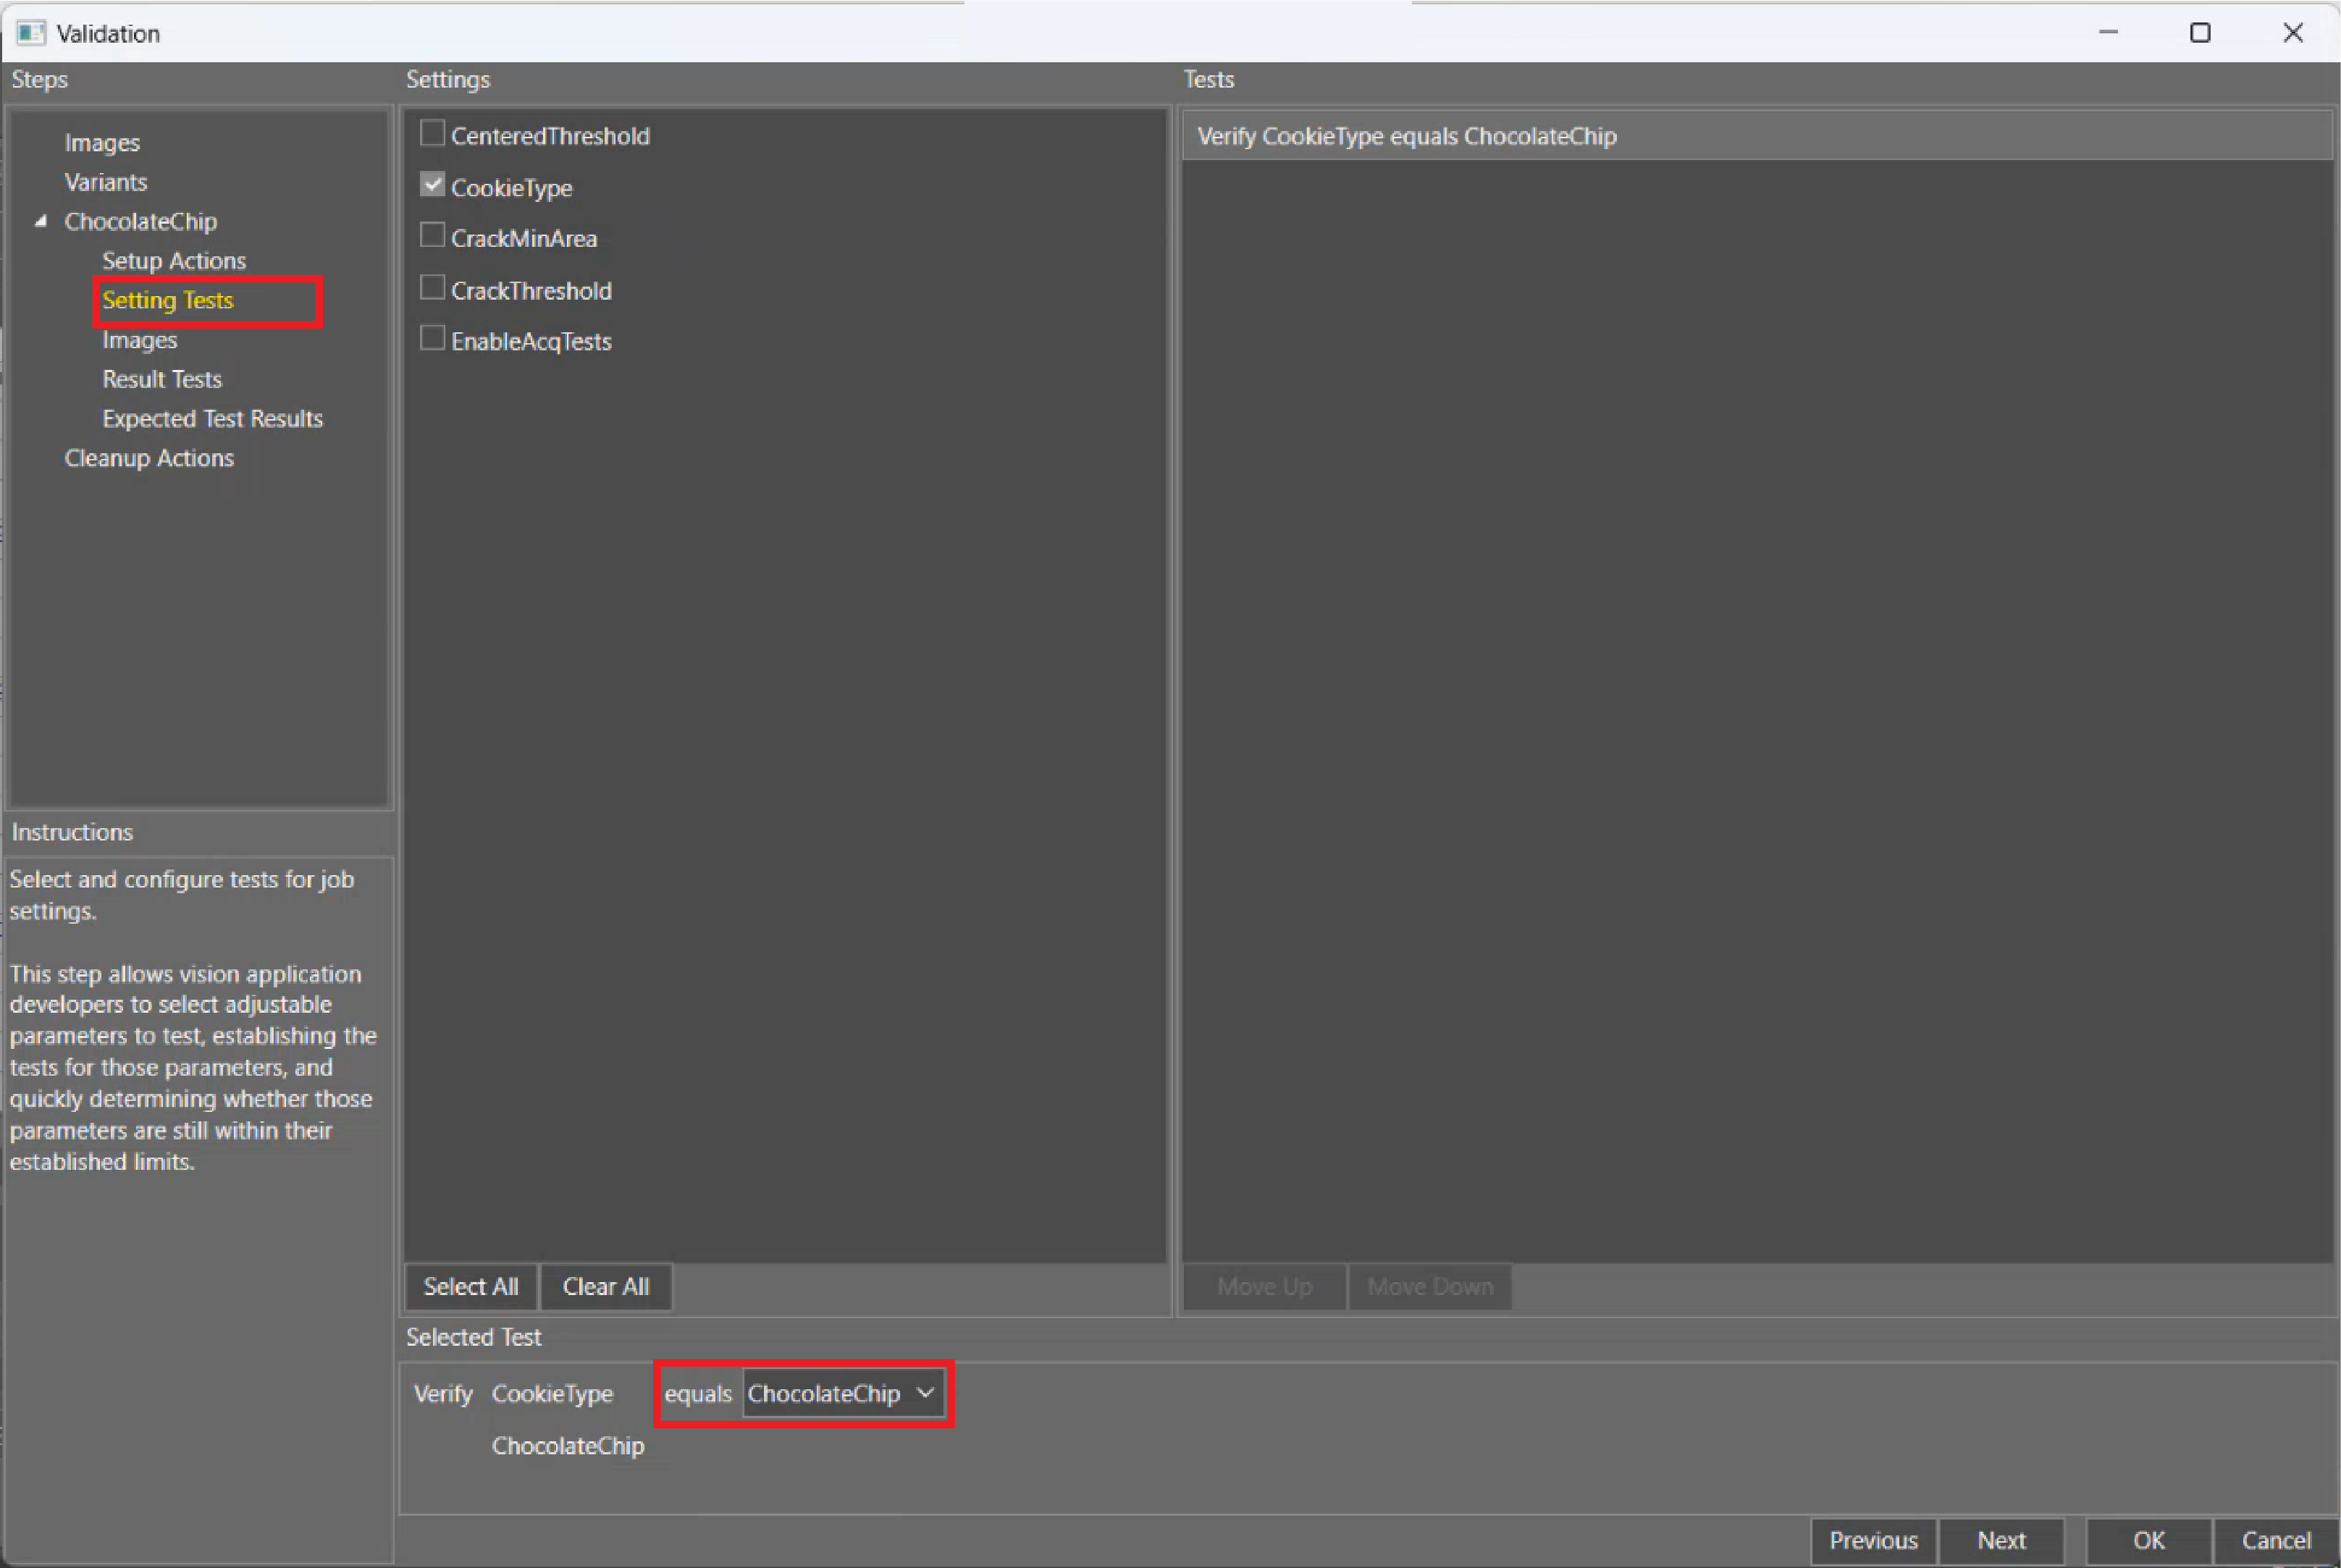
-
-
Select the images. You can click on the image name to view it.
-
Select the named Results cells from the spreadsheet.
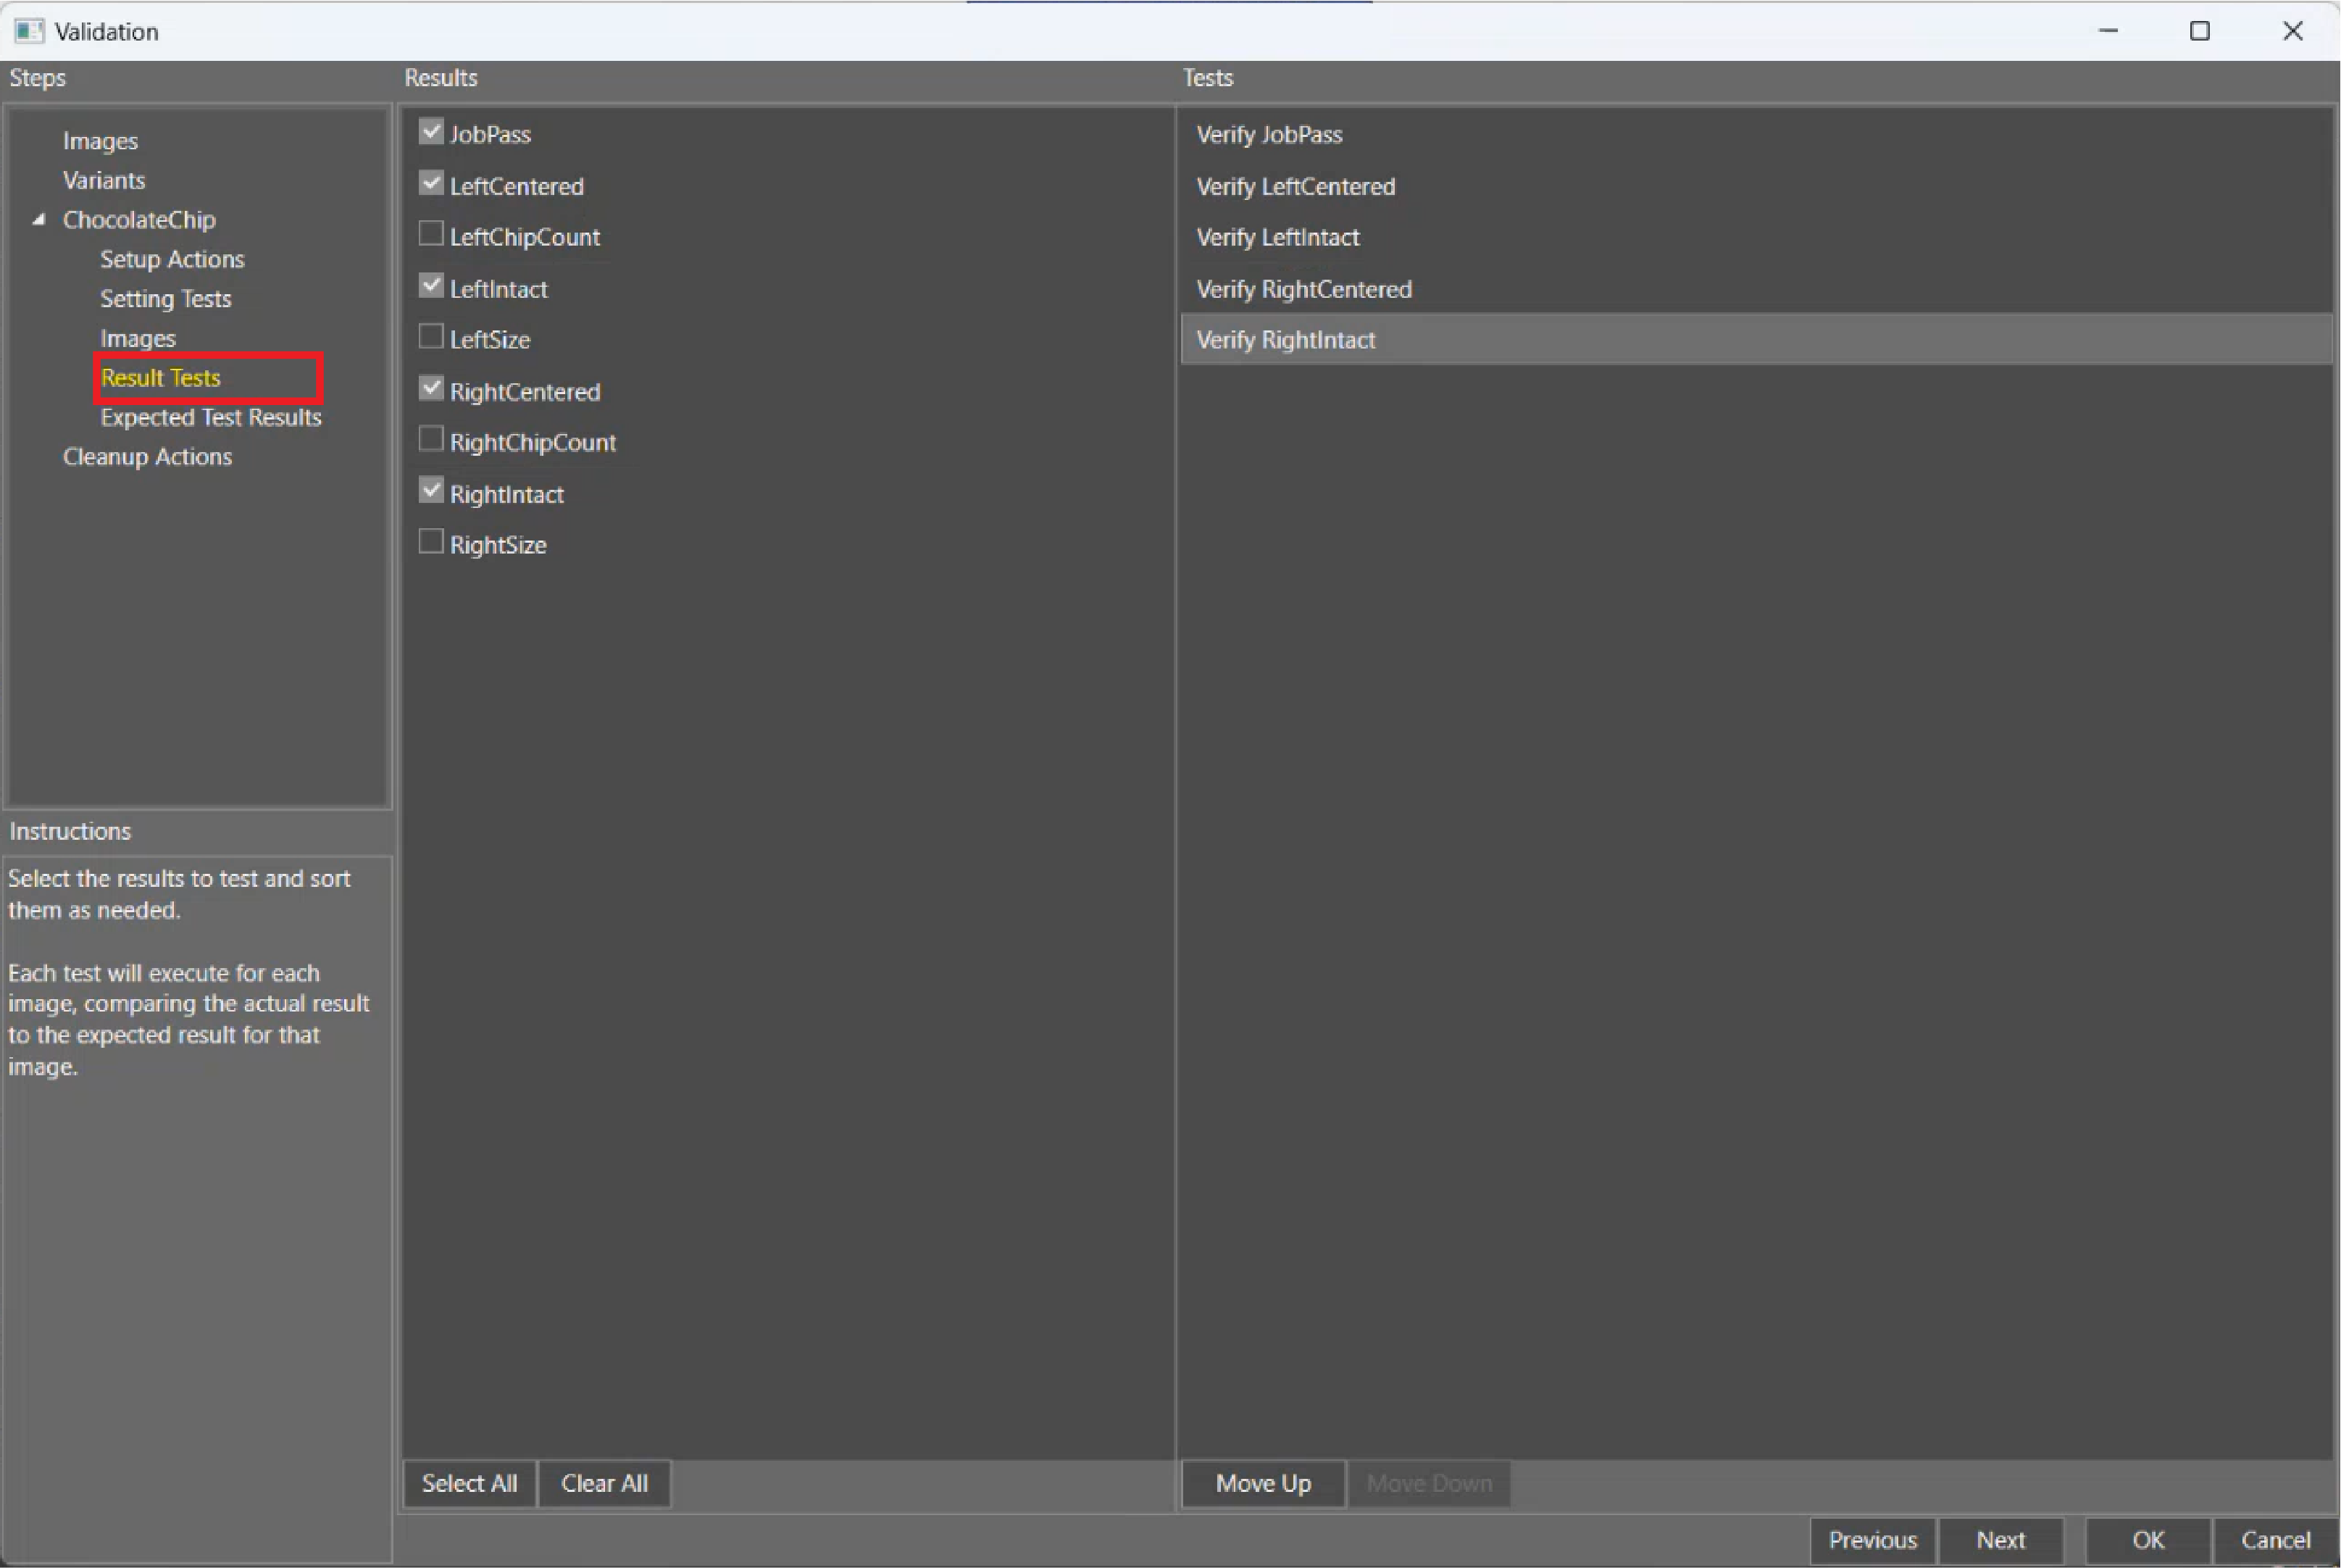
-
Click Next.
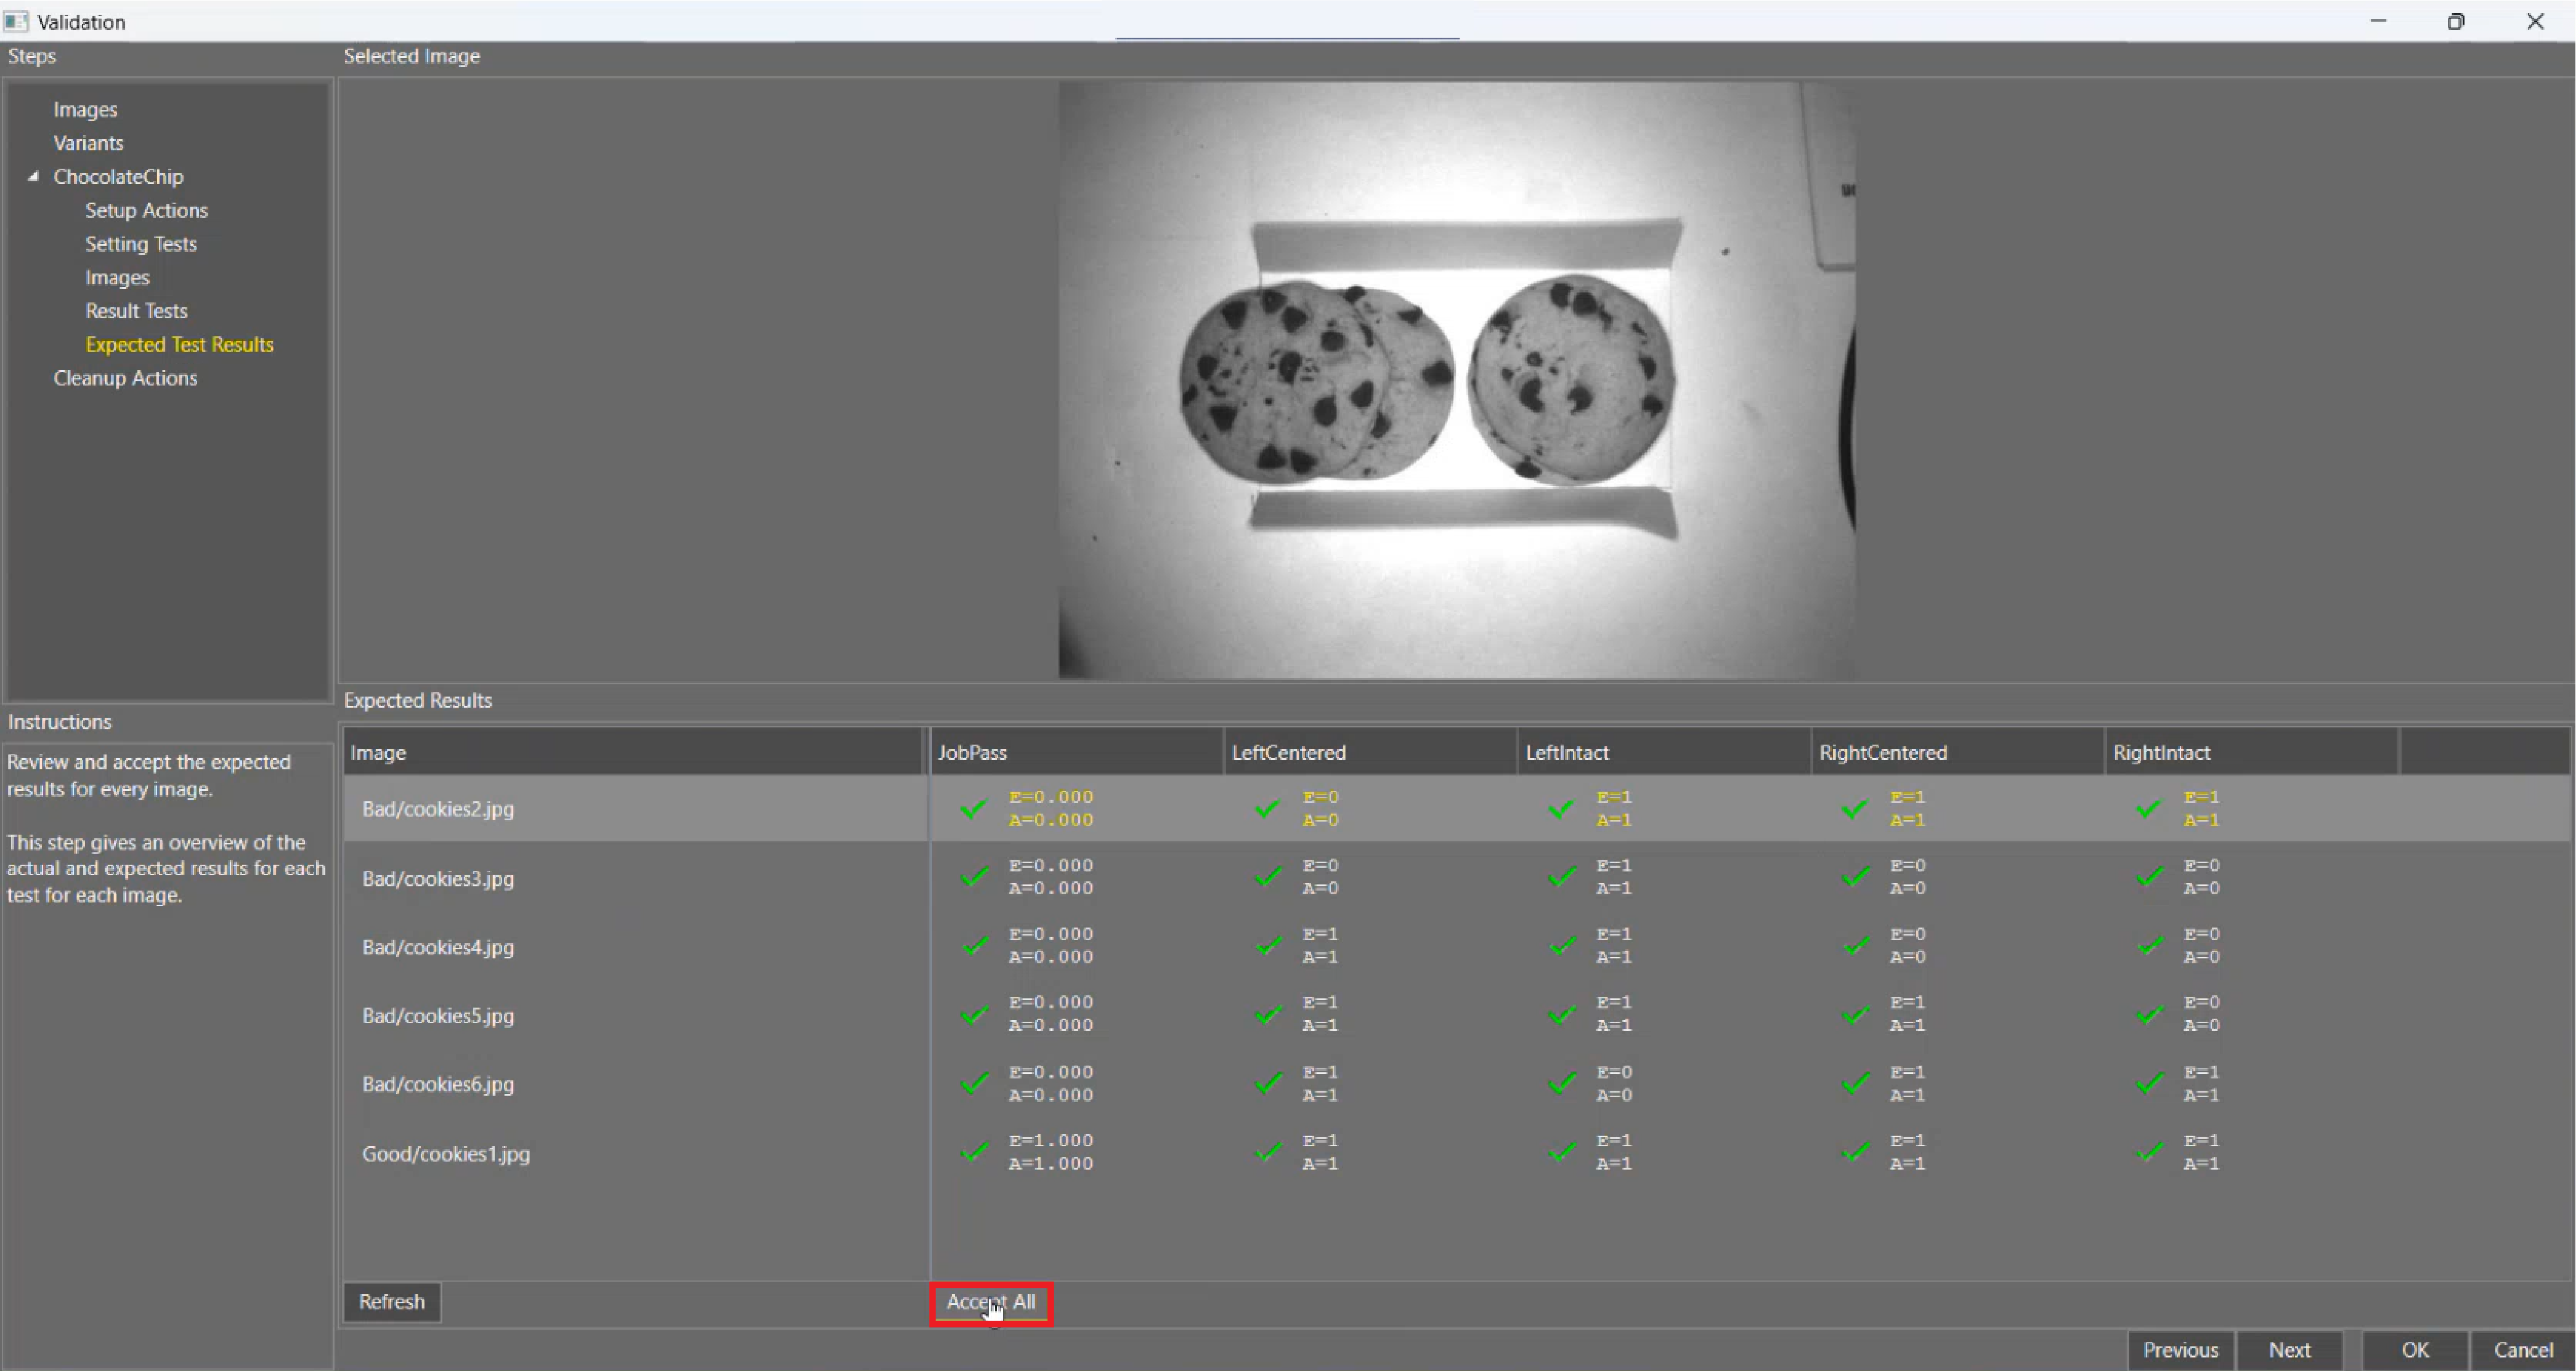
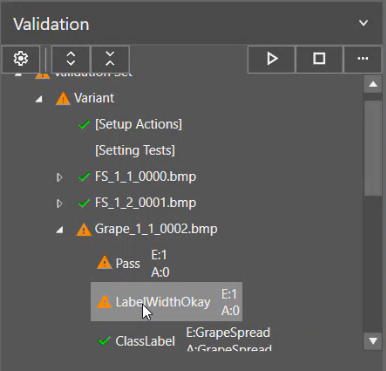
Validation runs the images through the settings.
-
Review the Expected Test Results and verify that the Actual (A) values are correct.
In the example, "bad" equals zero, which is correct.
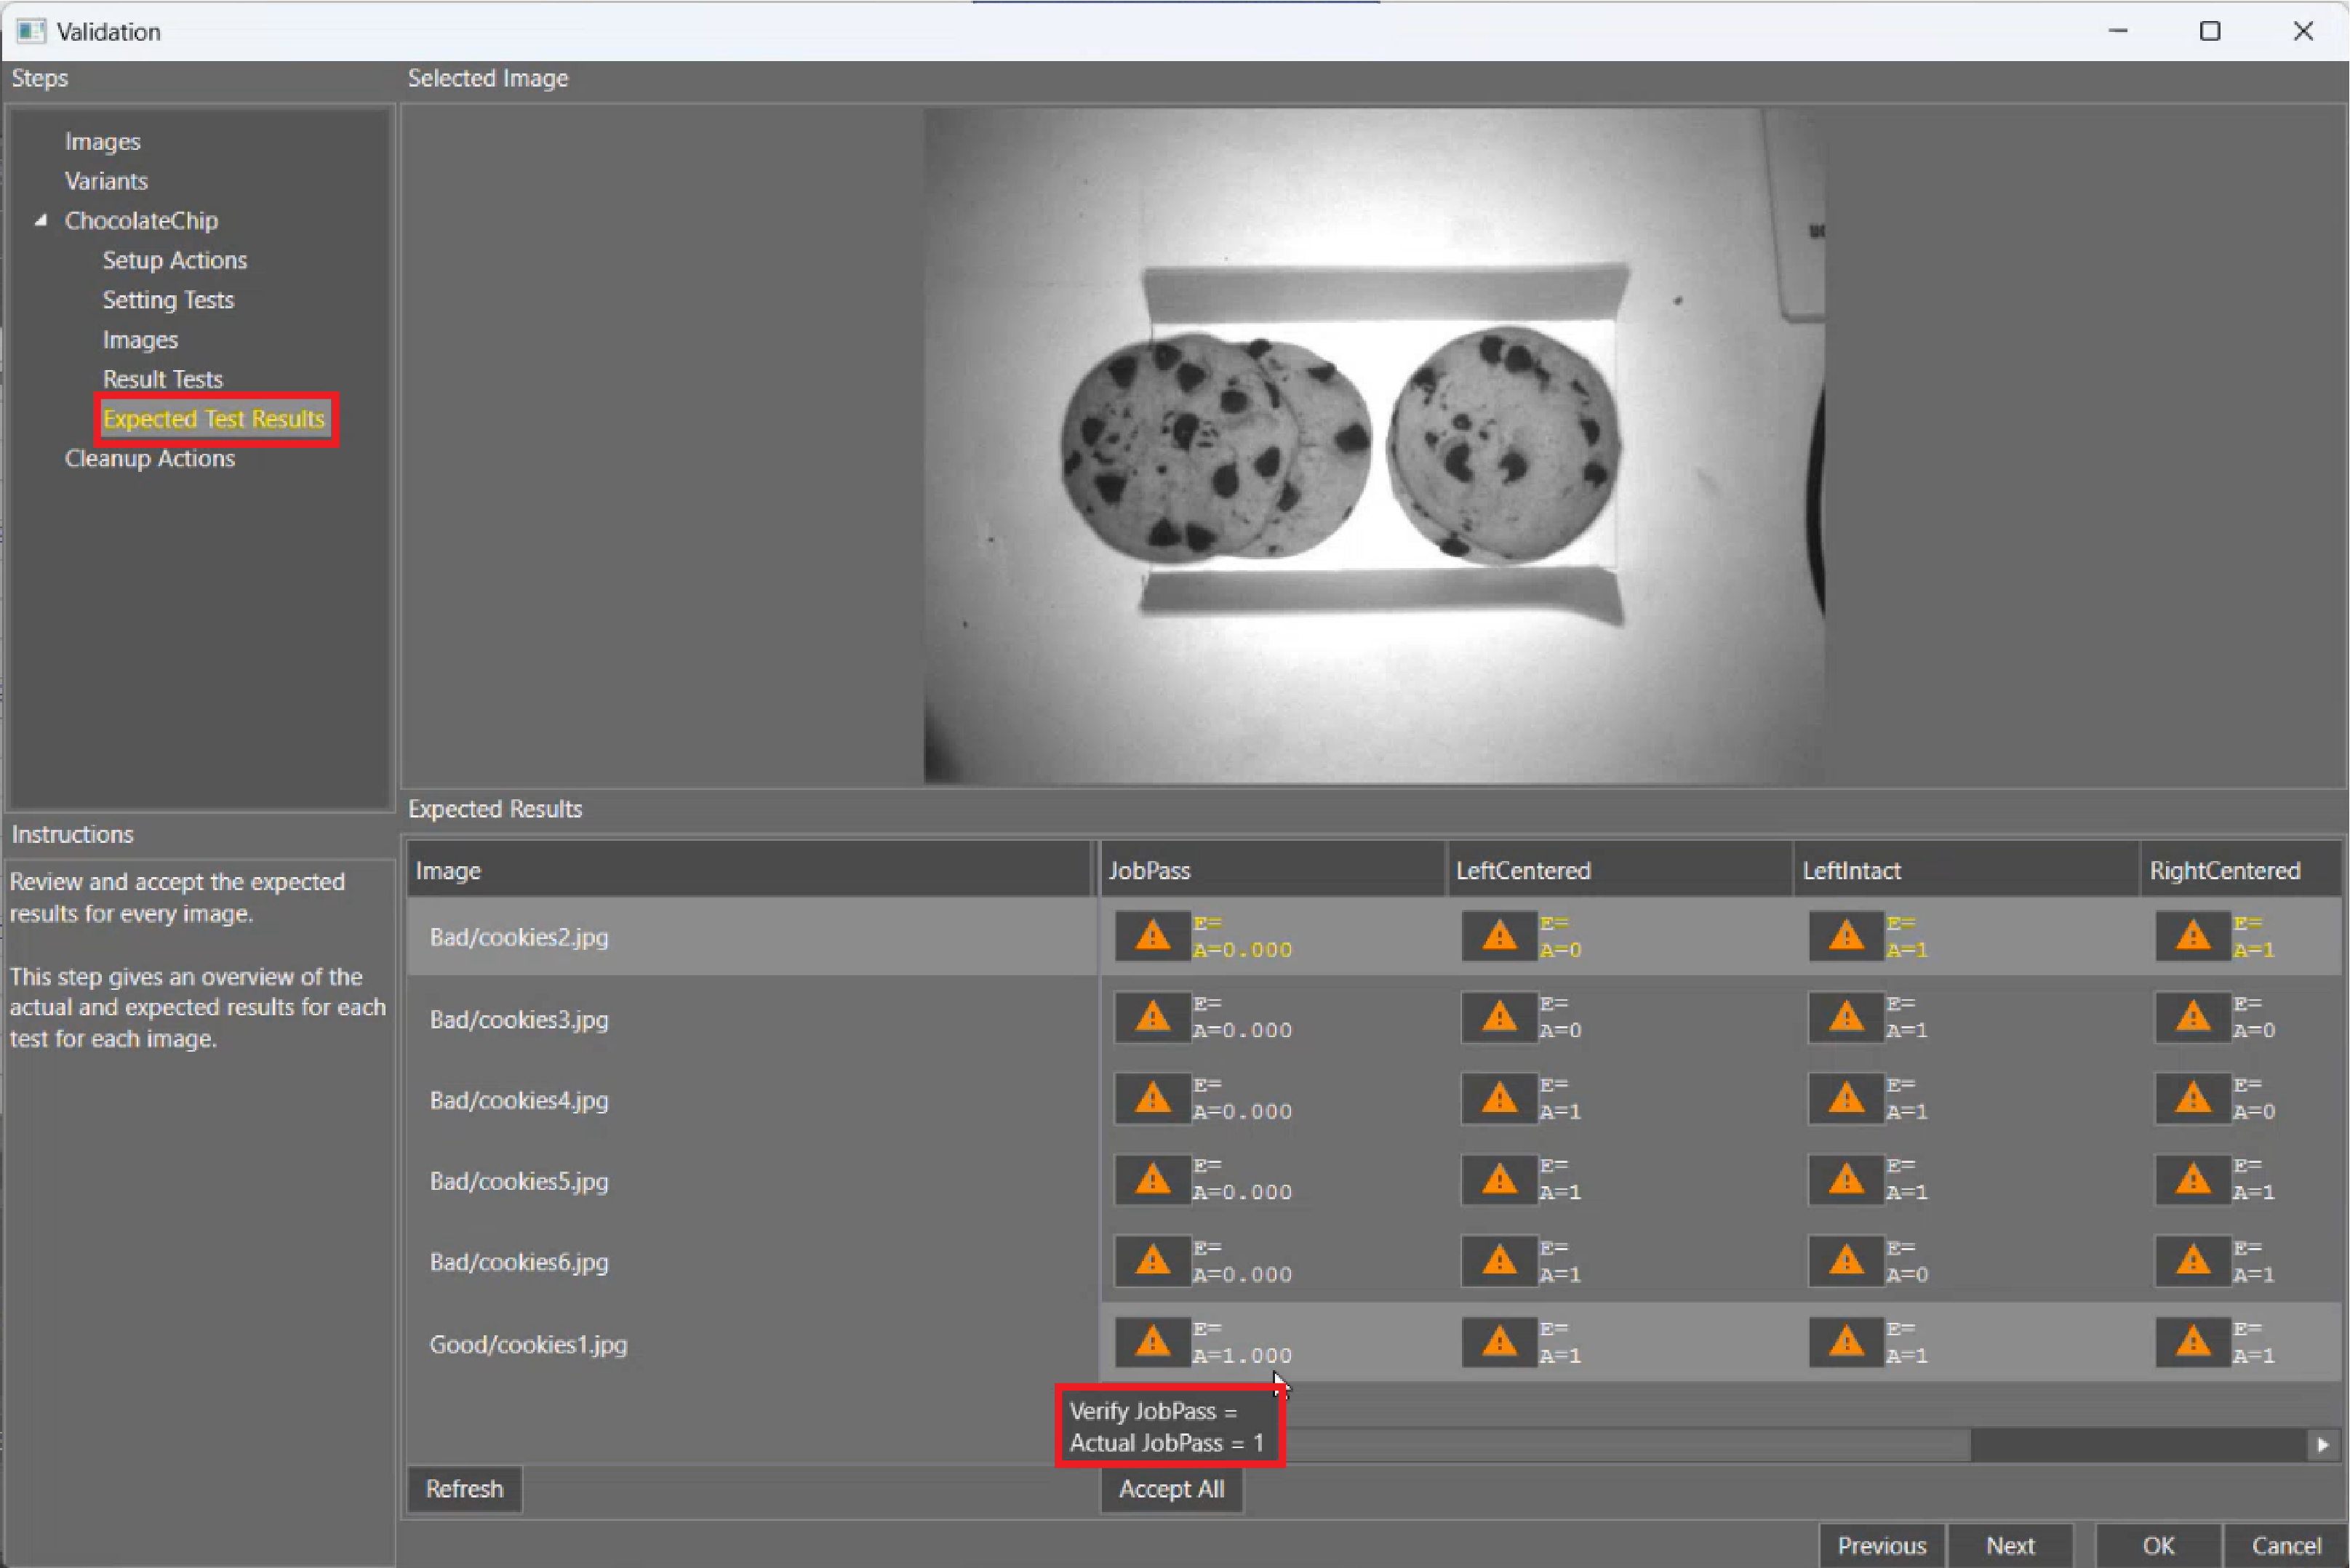
-
Click Accept All or individually set results to Accepted by clicking on the values.
Accepting the Actual value (A) updates the test with a new Expected value (E). Run a Job Validation Result Test to determine whether the Actual value from running the Job on the supplied image matches the Expected value saved in the test.
Optional: Set Cleanup Actions
The Cleanup Actions restore the job to a constant state. For example, when processing a large number of images, counters in a job can increment, which should not be included in production results. Cleanup Actions can reset the counters.
-
Set the Cleanup Actions.
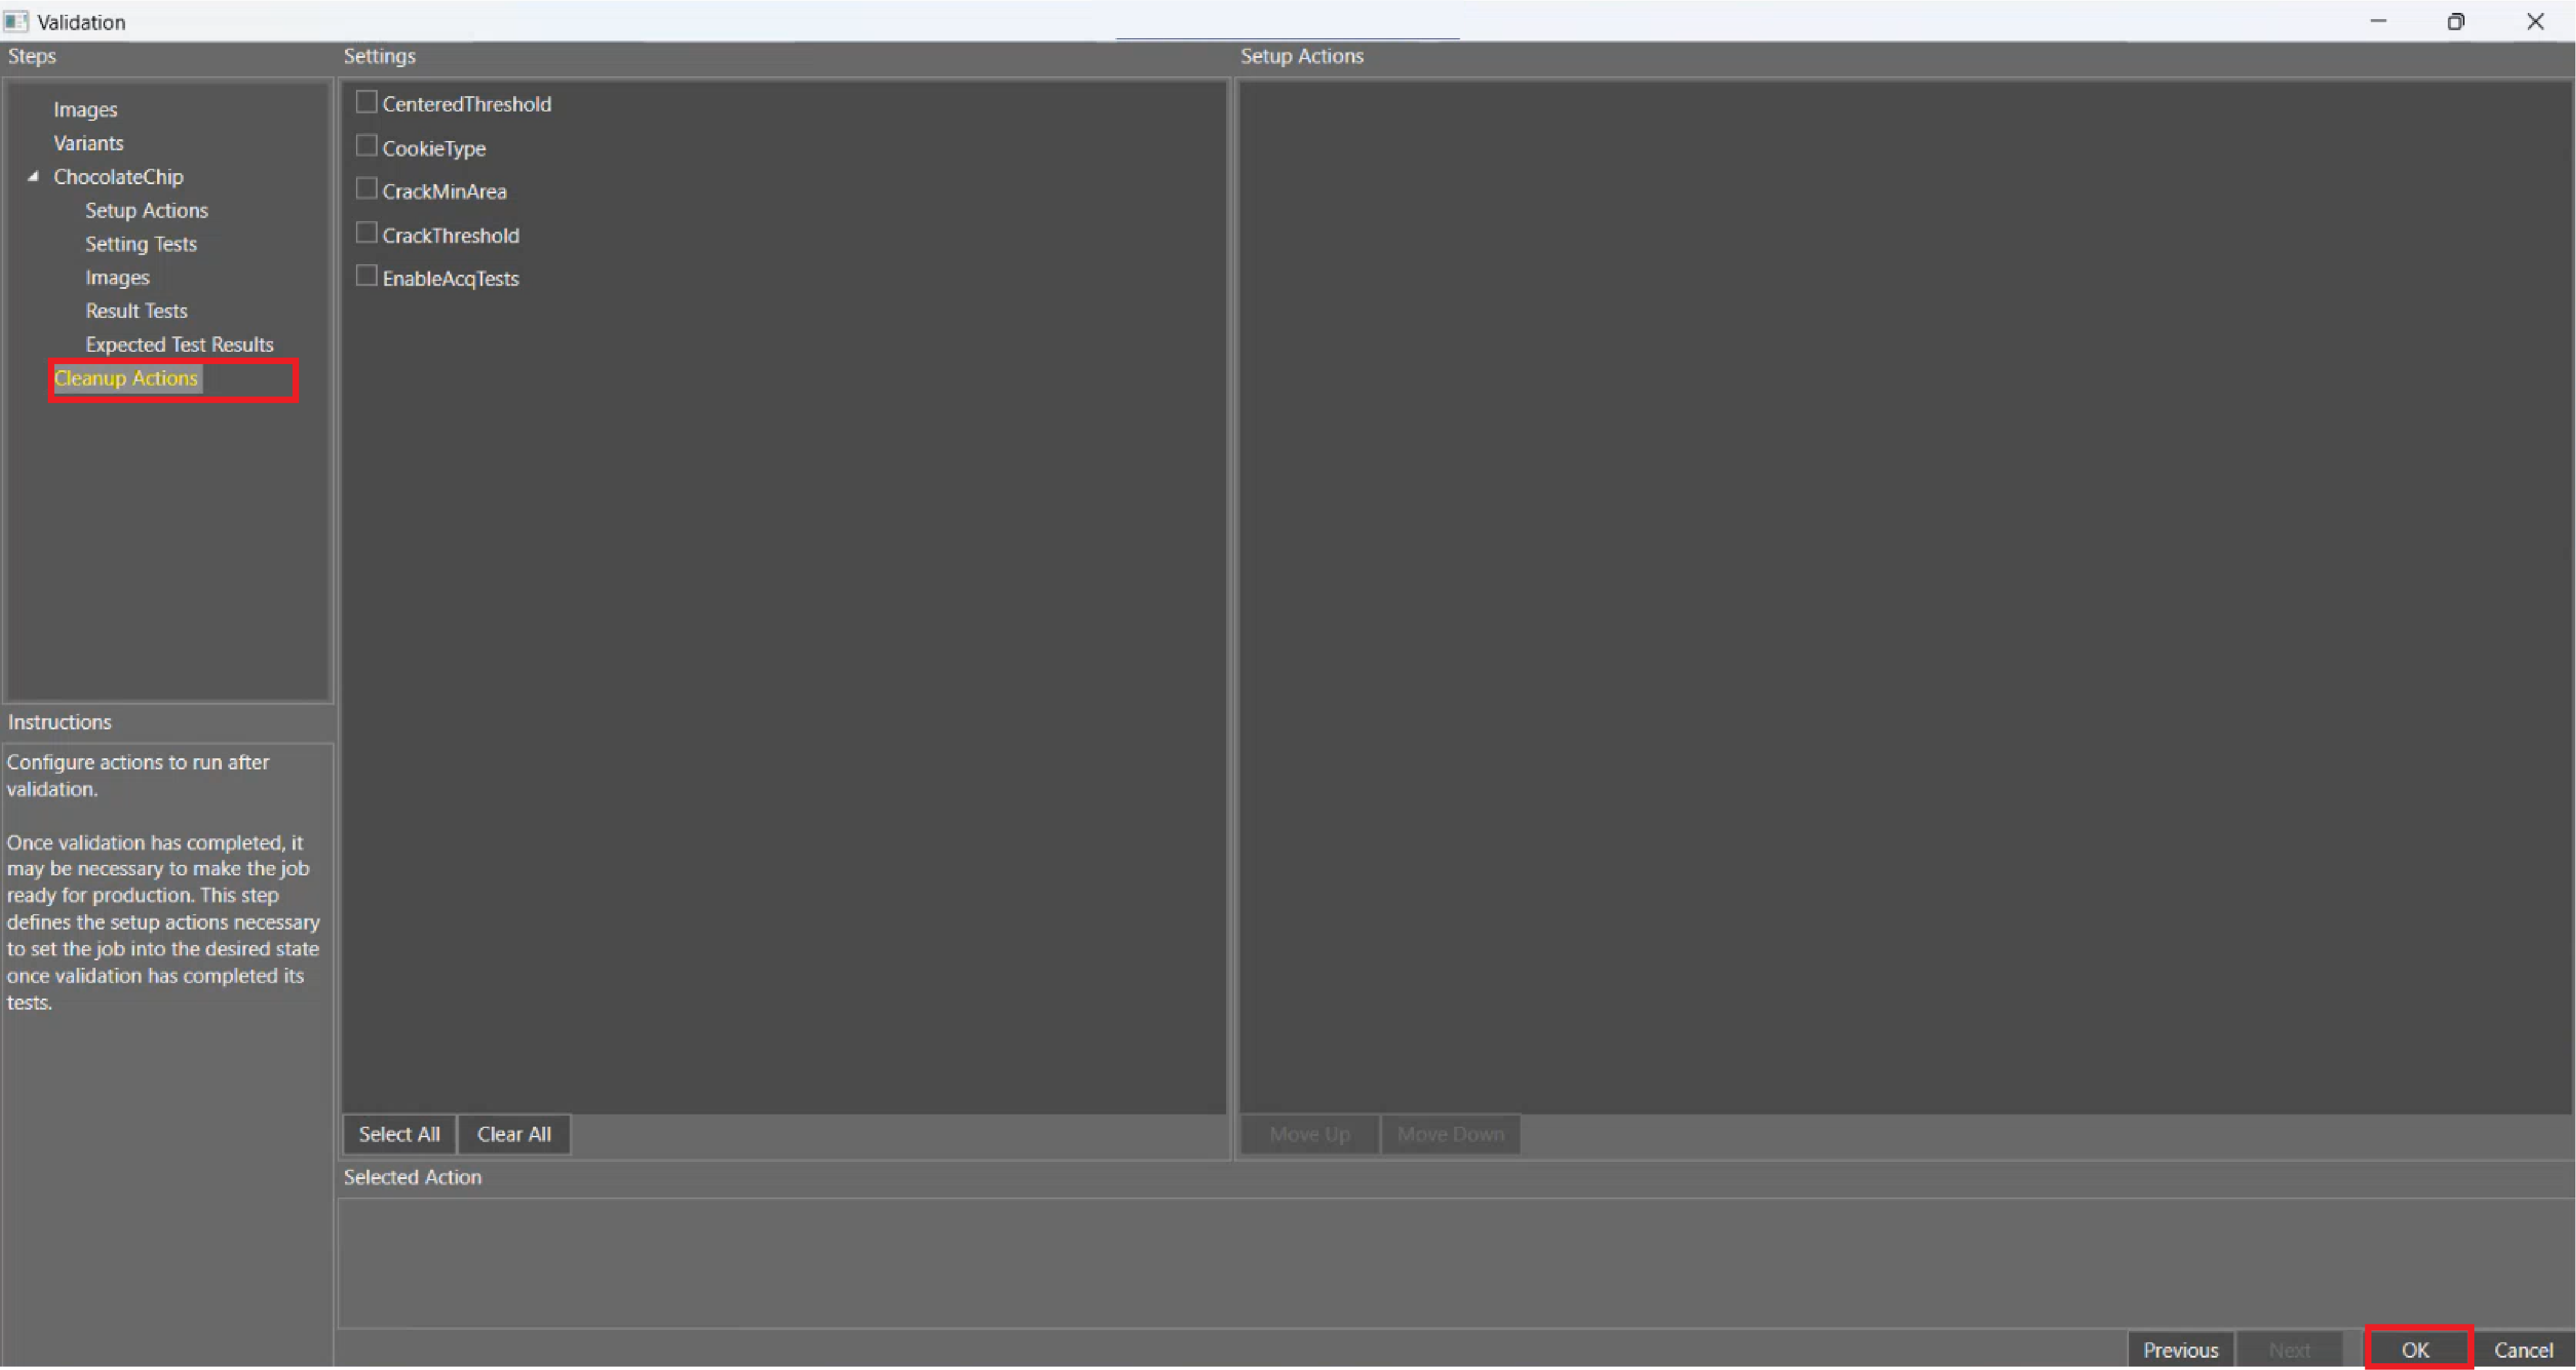
-
Click OK.
Run Job Validation
After configuration, run Job Validation and examine the results.
-
Click the Run ▶ button. The job runs through the Job Validation.
-
Click on an item to expand the results.
-
Select a test to see the confusion matrix. Depending on the test, the confusion matrix changes.
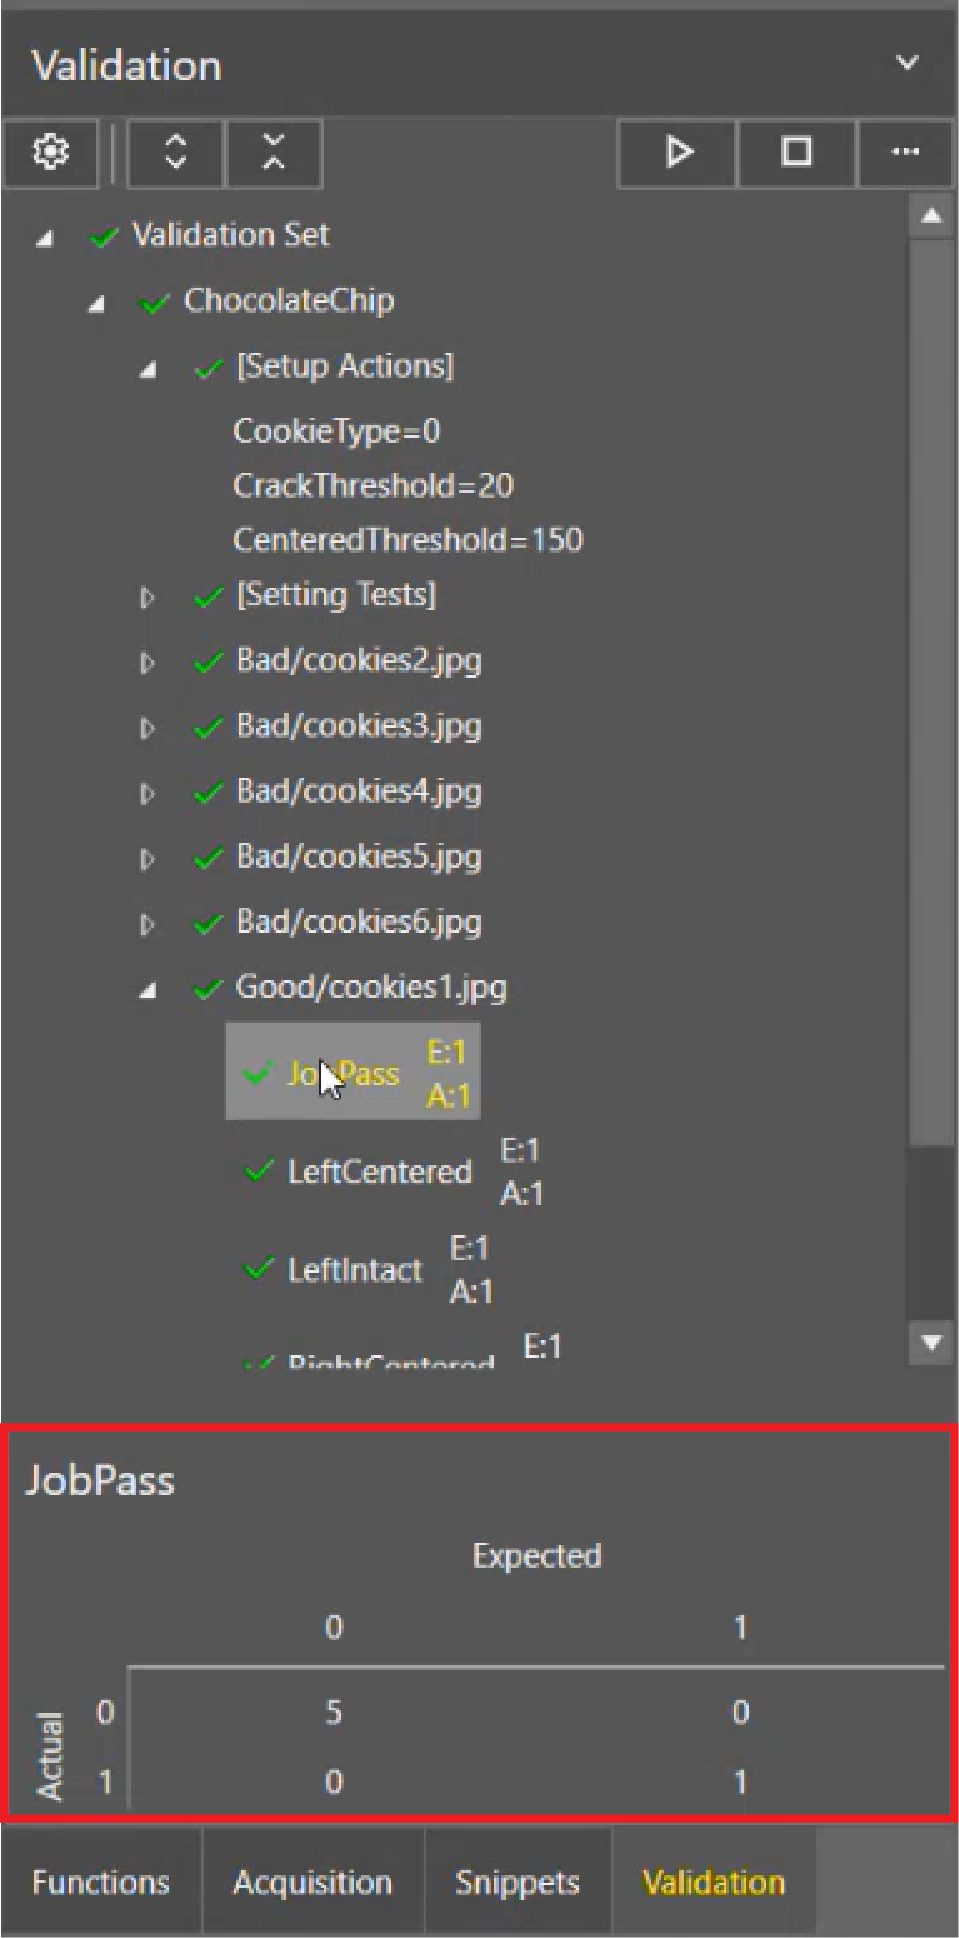
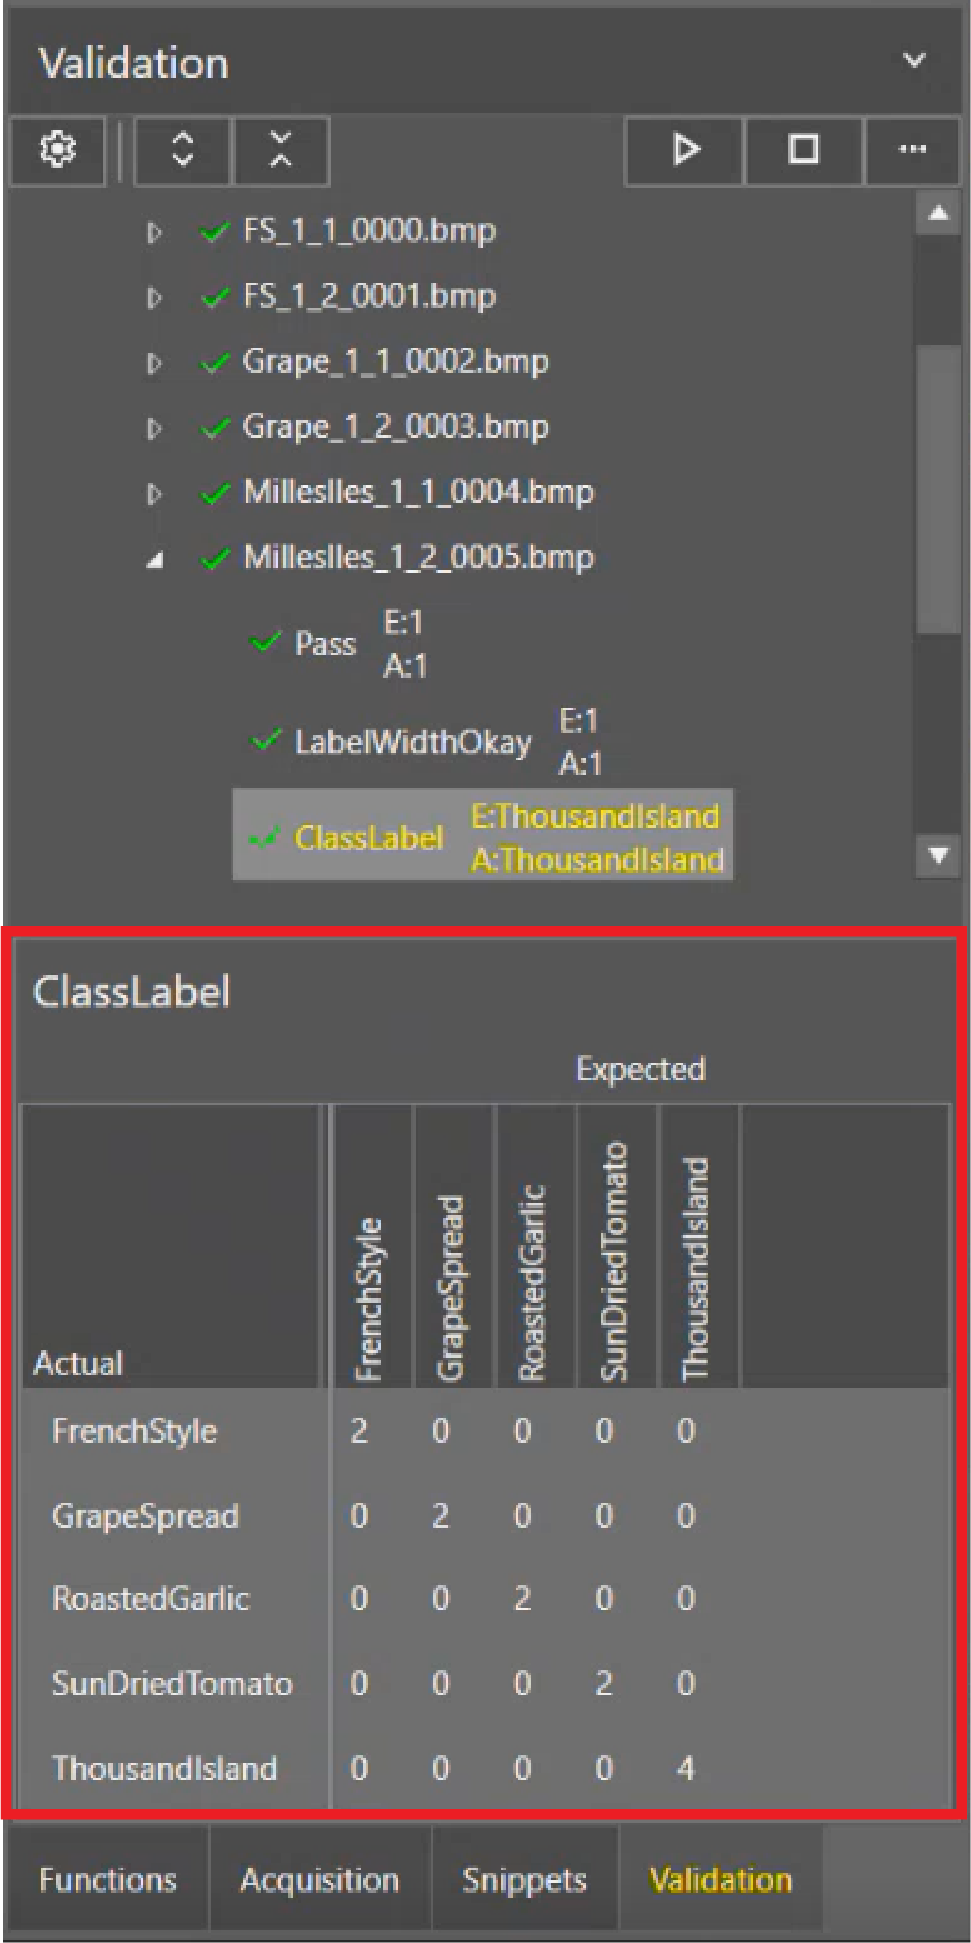
JobPass Confusion Matrix ClassLabel Confusion Matrix -
An icon appears next to each result, showing the state.
Icon State Description 
Valid All actual cell values match the configured expected cell values and no errors were encountered during the execution of Job Validation. 
Invalid Some actual cell values do not match the configured expected cell values and no errors were encountered during the execution of Job Validation. 
Error An error occurred while running Job Validation. This can be caused by several factors, including:
-
A named cell was not found.
-
The image was not found in the configured location.
There is an error message that provides more details about the error.
Note: Job Validation errors are separate from #ERR error cell results in the spreadsheet. Job Validation errors indicate that something unusual prevents Job Validation from running.
NotRun Job Validation has not been executed since the last time it was configured. To fix a fail result:
-
Go to the Expected Test Results under Settings.
-
Accept results individually rather than selecting Accept All.
-