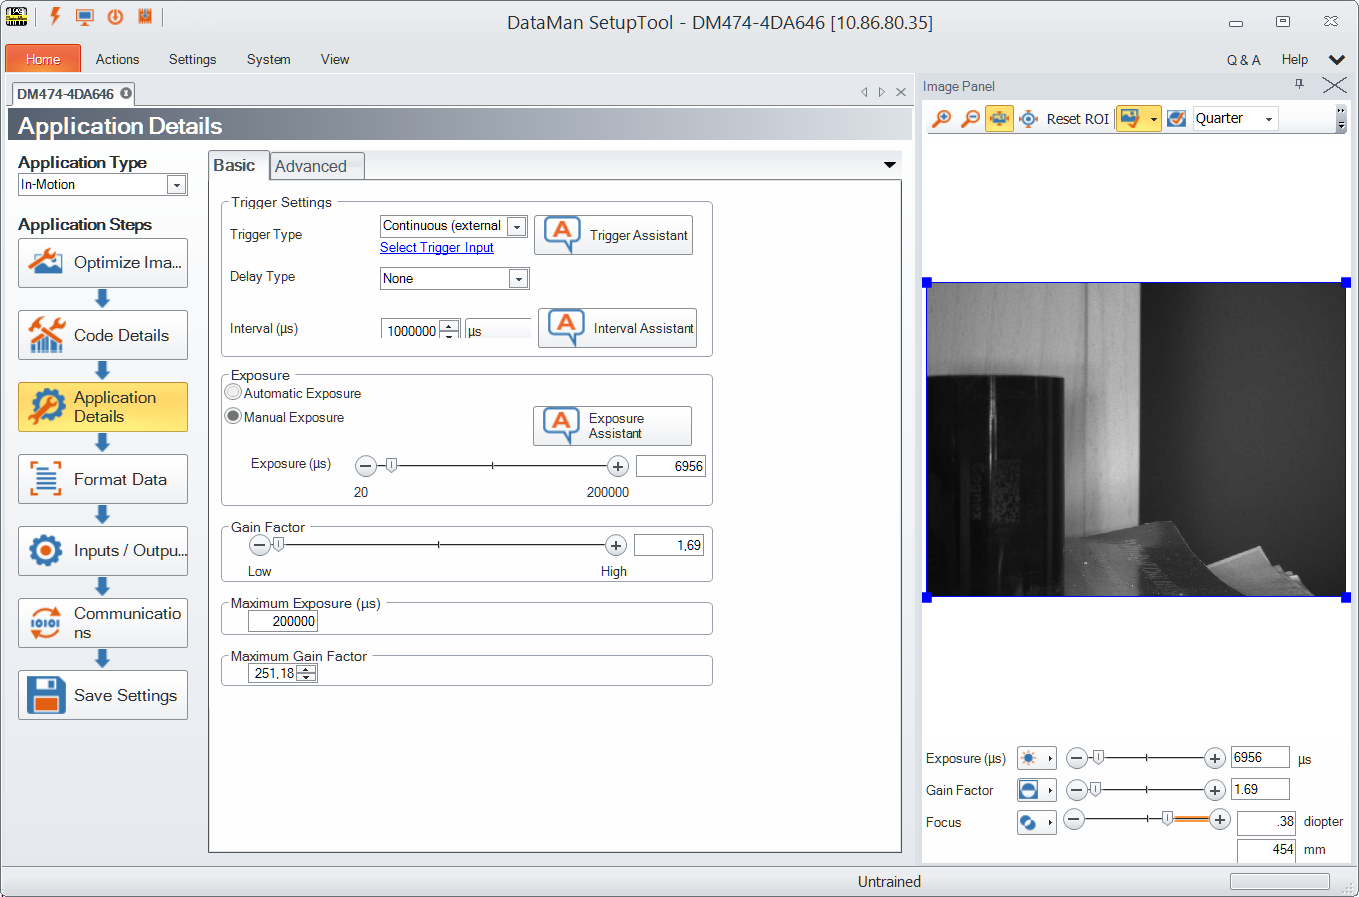
Application Details
This step deals with light and imager settings. The Basic tab gives you the opportunity to set the trigger types, its delay, timeout, interval and burst length. Exposure options and data can also be given.
-
Single triggering acquires a single image and attempts to decode any symbol it might contain. This trigger mode supports a read timeout.
Note: If there are multiple read setups, it is possible that multiple images are taken. -
Presentation triggering continuously scans for a symbol and decodes it each time one is detected.
-
Manual triggering acquires images as long as the trigger signal remains active, and stops when a symbol is found and decoded or the trigger signal ends.
-
Burst triggering acquires a set number of images and decodes the first symbol it detects within the group. You can configure the number of images within each burst as well as the interval between each image acquisition. This trigger mode supports a read timeout.
-
Self triggering is similar to presentation triggering in that the reader continuously scans for a symbol and decodes it each time one is detected. Unlike presentation mode, however, a decode attempt occurs with every image and the reader disables the Automatic Exposure settings that allow the reader to automatically determine the best exposure settings for a desirable level of brightness in the image. You can specify several parameters in self triggering mode, such as whether the reader will read the same code more than once or how long to wait before scanning for the next code. In Self trigger mode, the trigger interval indirectly specifies a read timeout.
-
Continuous triggering acquires images as long as the trigger signal remains active. The reader acquires images at a specific interval and attempts to scan any symbol each successive image contains.
Three different assistants (Trigger Assistant, Interval Assistant, and Exposure Assistant) help you in configuring these settings.
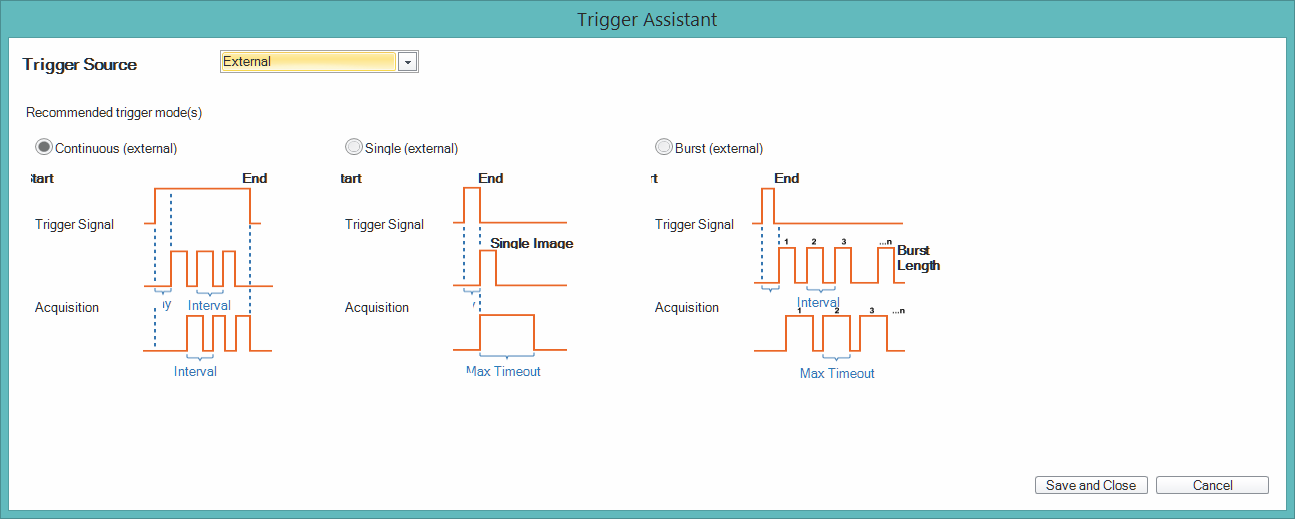
Trigger Assistant
- If you have not already done so, first select an Application Type.
- Click the Trigger Assistant button. A window pops up.
- Select the Trigger Source from the drop-down list: Undefined, Internal or External. You get a recommendation from the assistant for the trigger modes. Graphical presentations of the trigger types help you decide. Select the trigger type and click Save and Close.
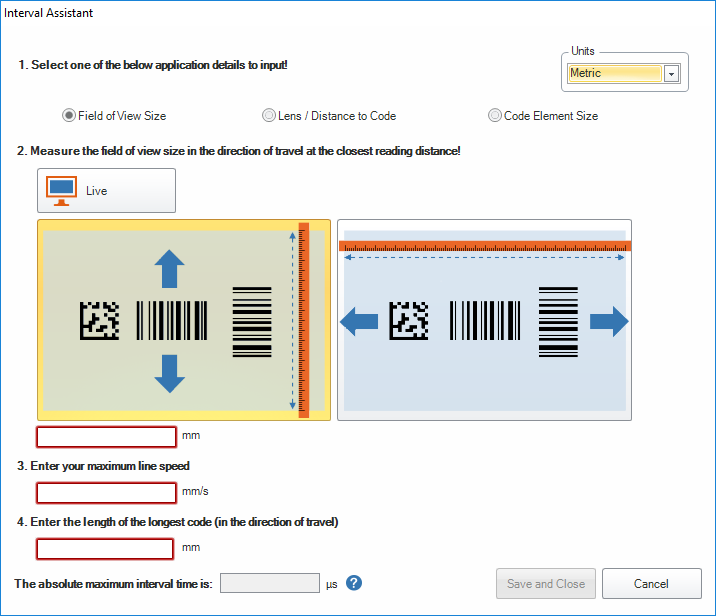
Interval Assistant
In the case of Self and Continuous modes the Interval Assistant can help you make further settings. You can select three ways to calculate the necessary data. In the top right corner select the units (standard or metric) you wish to calculate in.
With the help of Field of View you can calculate the longest possible interval time by measuring the physical field of view and giving the maximum line speed and the size of the longest code.
Clicking Lens / Distance to Code is calculating with the distance of the code from the lens. Give the focal length from the drop-down and select the direction in which the code is traveling. Here you also need to give the maximum line speed and the size of the longest code.
Code Element Size calculates with the size of the most narrow code element. Enable Test Mode to read your code. You also need to give the direction your code is traveling in, the maximum line speed and the size of the longest code.
At the bottom of the Assistant you get the recommended maximum interval time.
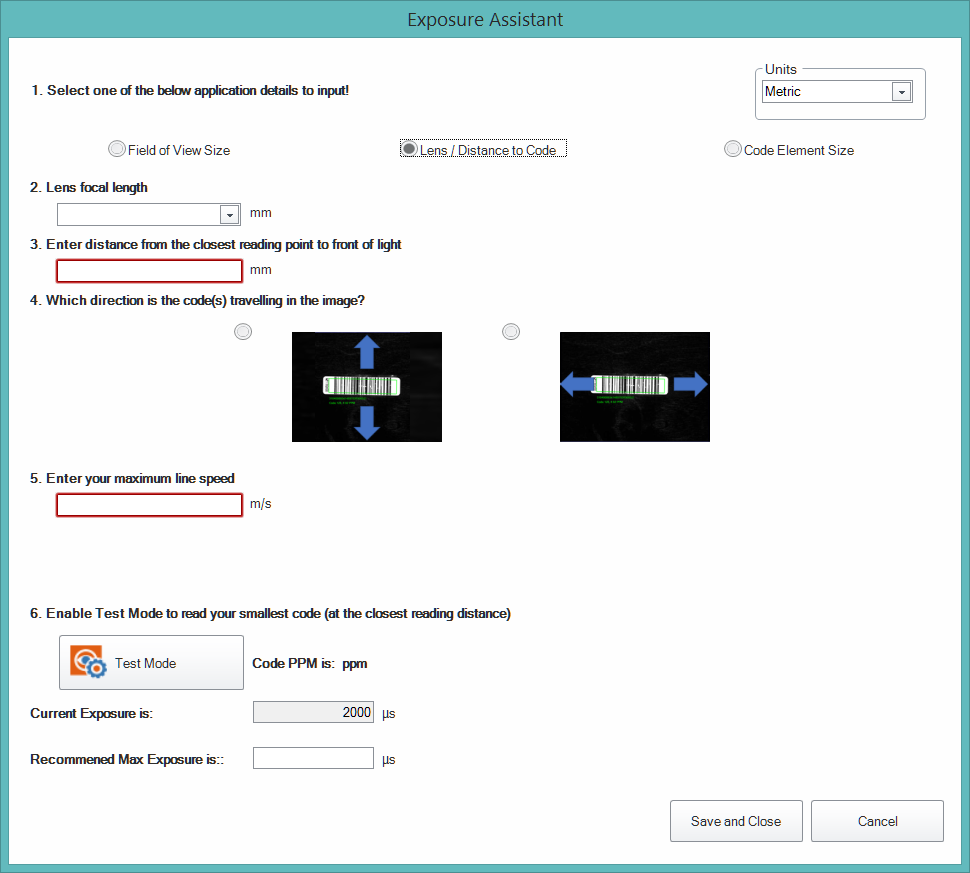
Exposure Assistant
The Exposure Assistant is very similar to the Interval Assistant. You can select the same three ways for your calculations: Filed of view size, distance to code, and code element size.
Clicking Field of View helps you calculate the recommended maximum exposure time by measuring the physical field of view and giving the maximum line speed. You can enable Test Mode to read your smallest code.
Clicking Lens / Distance to Code is calculating with the distance of the code from the lens. Give the focal lenght from the drop-down and select the direction in which the code is travelling. Here you also need to give the maximum line speed.
Code Element Size calculates with the size of the most narrow code element. Enable Test Mode to read your code. You also need to give the direction your code is travelling in and the maximum line speed.
At the bottom of the Assistant you get the current and the recommended maximum exposure time.
In the Advanced tab you have further configuration options. In a table-style view you can see the settings and the corresponding values for triggering (Motion Detection and Trigger Delay), the imager (including Image Mirroring) as well as setting decode values.
