Tuning
The Tuning substep allows you to automatically find the best code reading settings for the reader.
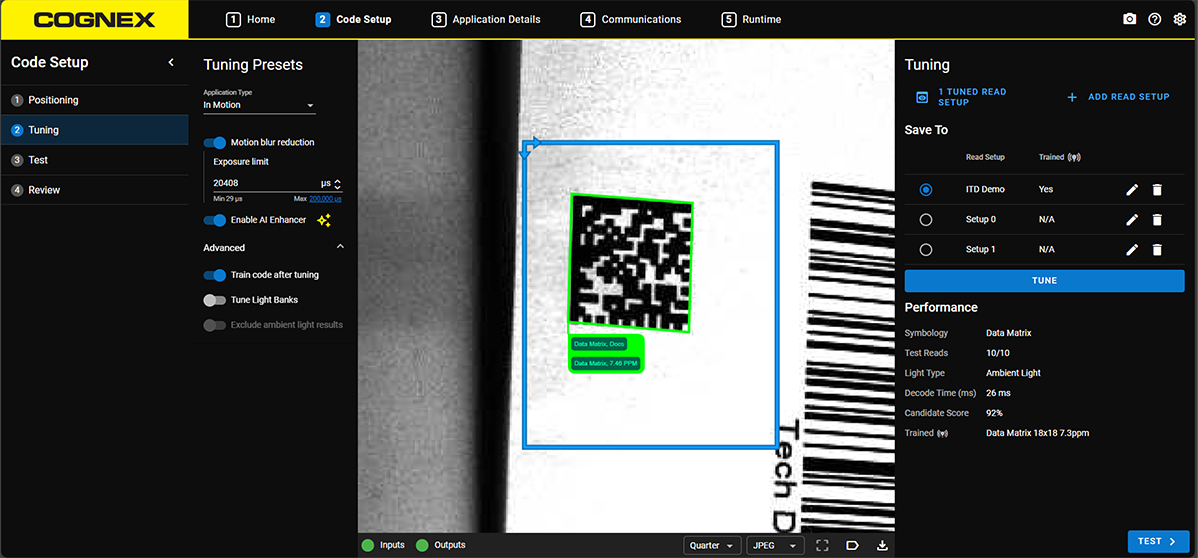
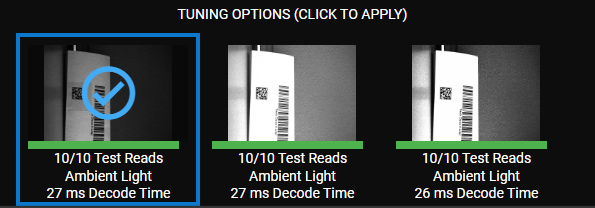
Drag and drop the blue rectangle to define the decoder Region of Interest (ROI). The reader only decodes symbols that appear in the ROI. Click the Tune button to start the process of tuning the reader to the code. Once tuning is complete, WebUI displays the tuning options with the highest candidate scores, and the best candidate of the tuning options is automatically applied. You can switch to any of the other generated tuning options if you do not want to use the highest-ranked candidate.
The tuning procedure optimizes the following image acquisition parameters to obtain the best decode time and decoder performance:
-
reader settings
-
Light banks
-
Lens Focus
-
Image-filters
-
Symbology attributes
You can also configure your tuning settings in the Tuning Presets column. Open the Advanced dropdown to access advanced parameters.
Select from the preset options to refine the tuning procedure:
-
Application Type: choose between Stationary or In Motion. If your application type is In Motion, you can reduce motion blur by properly adjusting the maximum exposure, either manually or using the embedded assistant.
-
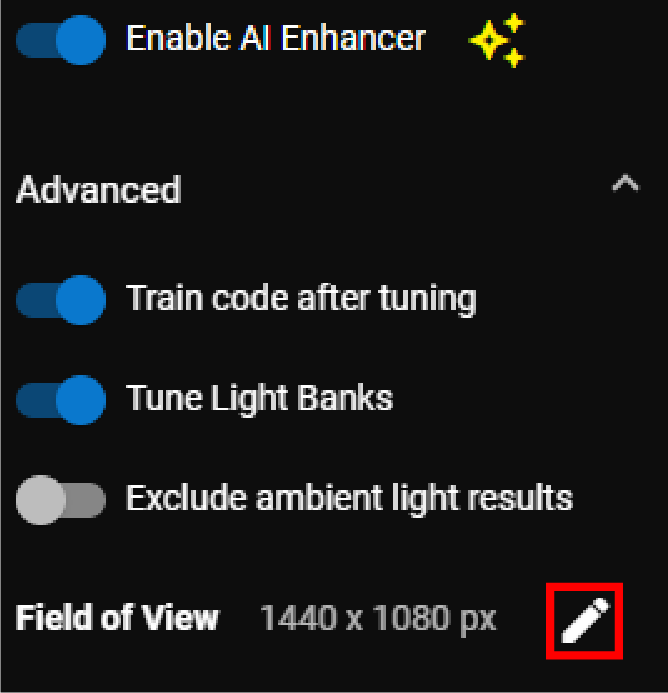
Enable AI Enhancer: use the AI Enhancer to improve decoding of damaged and degraded barcodes.
Note: The DataMan 80 and DataMan 280 do not support the AI Enhancer. -
Advanced options:
-
Train code after tuning: enable this option if the codes you want to decode have a consistent symbology type and characteristics. Training the reader with the tuned symbology and its characteristics can decrease the time required to decode subsequent symbols. and help increase readability and read rate.
-
Tune Light Banks: enable to tune the reader illumination type.
-
Exclude ambient light results: the tuning procedure ignores images acquired without illumination.
-
Field of View: shows the current dimensions of the FoV and allows you to edit the FoV.
-
For In Motion type applications with Motion blur reduction, you can use the Max Exposure Calculator to calculate the recommended maximum exposure time:
-
Click on the Suggested Max number to open the Max Exposure Calculator dialog.
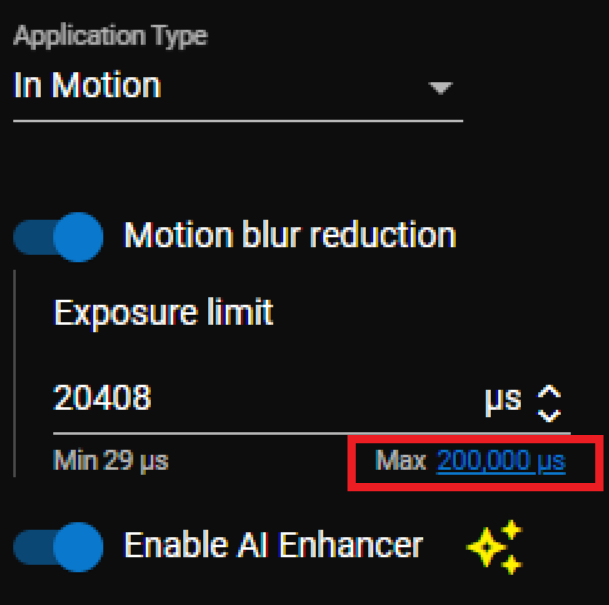
-
Enter the Code Element Size and Max Line Speed values.
The WebUI automatically calculates the recommended maximum exposure time.
-
Click Apply to use the calculated value as your Exposure limit for tuning.
You can apply the tuning results to an existing read setup by selecting the target read setup in the Save To column. You can also click Add Read Setup to create a new read setup for the current tuning settings. You can use multiple read setups when there is wide variation between parts.
When you create a new read setup, you can copy the settings from an existing read setup, or you can perform tuning to save a new set of settings to the read setup.
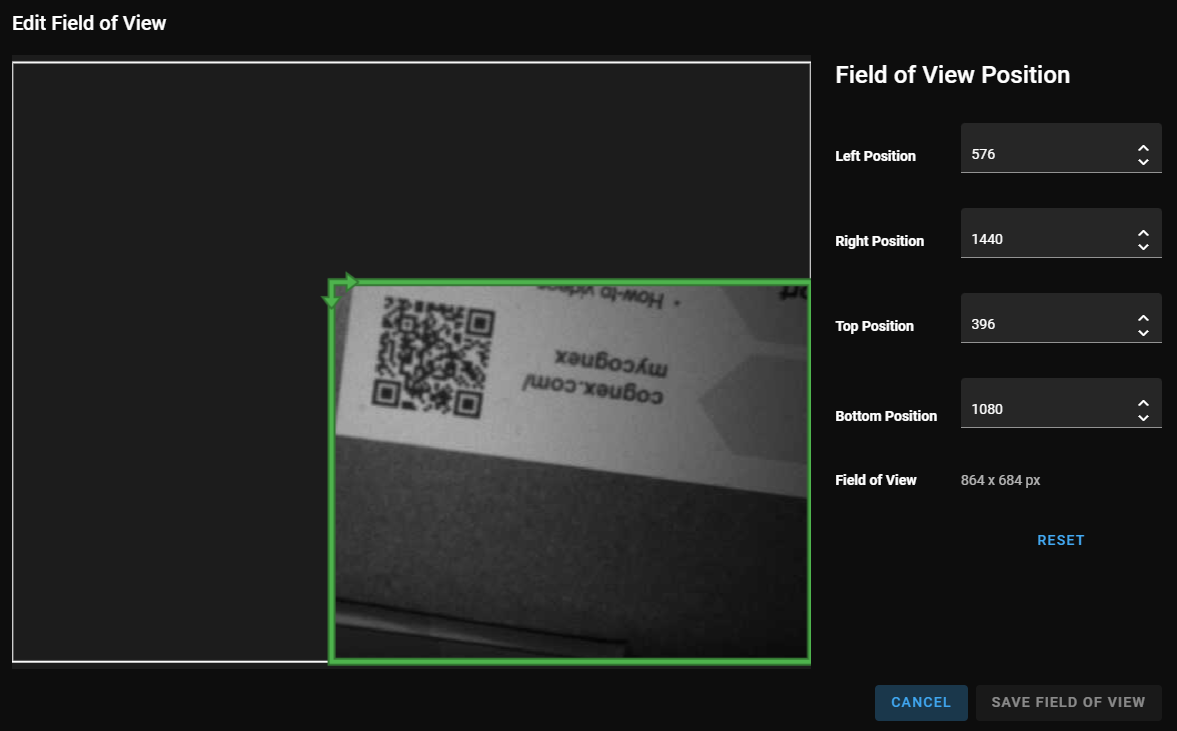
Adjusting the FoV
To resize the FoV, do the following:
-
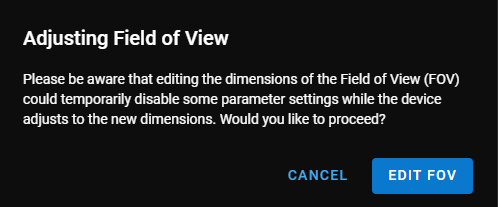
Click Edit next to the Field of View.
-
A dialog pops up informing you that the reader needs time to adjust to the new FoV settings, which means some of the functions are disabled during the adjustment process. Click Edit FoV to continue.
-
The Edit Field of View dialog pops up.
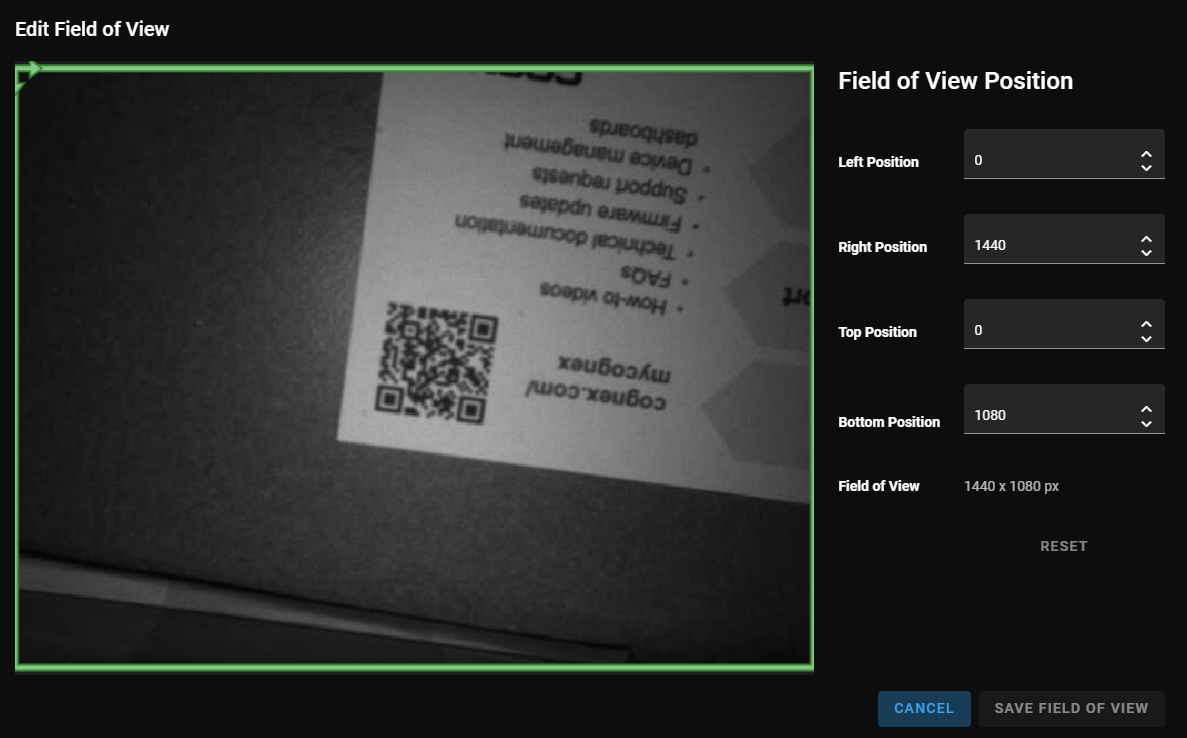
Edit the size of the FoV in one of the following ways:
-
Drag the green rectangle to resize the FoV.
-
Write values into the FoV positions.
The minimum value is 80 pixels for width and 64 pixels for height. For example, if you write 200 pixels into the Left Position, then you must write at least 280 pixels into the Right Position.
-
Increase or decrease the position value by clicking on the arrows.
One click changes the value by eight pixels for width and four pixels for height. If you type in any number, the reader adjusts the value to the next lowest valid value. For example, if you type 100 pixels for the left position, the reader automatically adjusts the value to 96 pixels because 100 is not divisible by eight.
-
Click Reset to reset the position values to the default values of the reader.
-
-
Click Save Field of View to finish. The reader acquires a new image with the new FoV.
If you click Edit Field of View again, you can see the new FoV as the subregion of the full FoV, showing where the new FoV is compared to the full FoV.