Installing a Liquid Lens
Perform the following steps to install a liquid lens on your DataMan 260 reader.
-
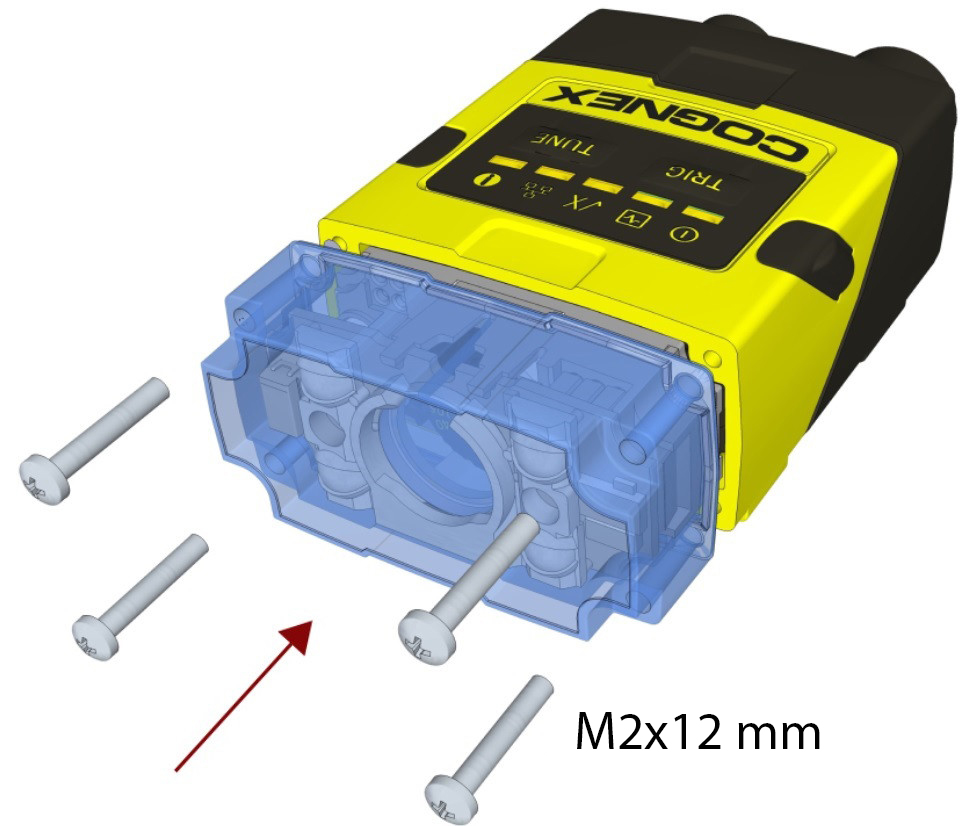
Remove the front cover: unscrew the four M2x12mm Phillips Pan screws and take off the LED cover.

-
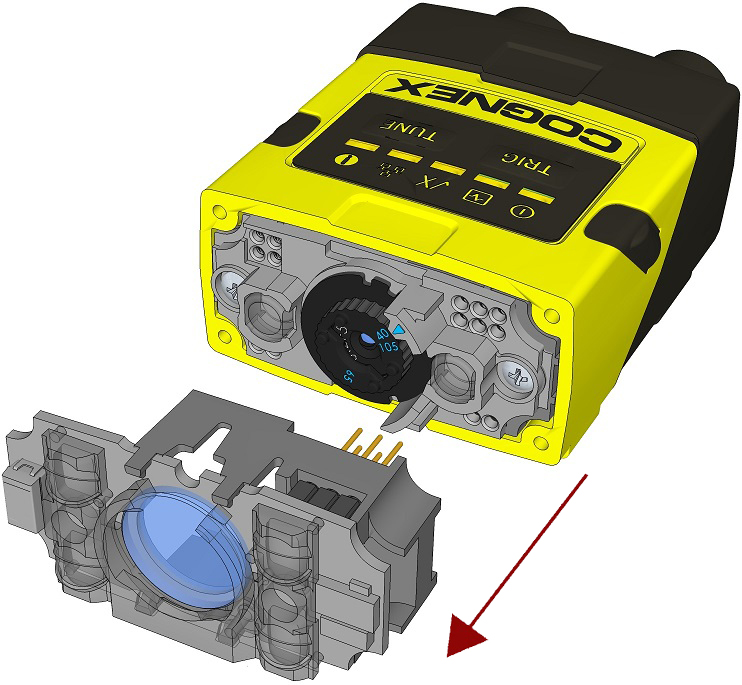
Remove the illumination module.
-
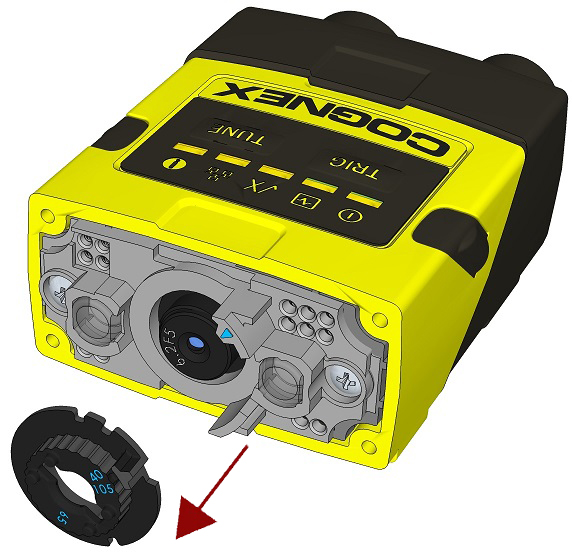
Turn the lens cap to the 105 mm position.

-
Remove the lens cap from the imager lens by pulling it.
 Note: Do not rotate the imager lens while the lens cap is removed. Otherwise, focus calibration will be lost.
 -
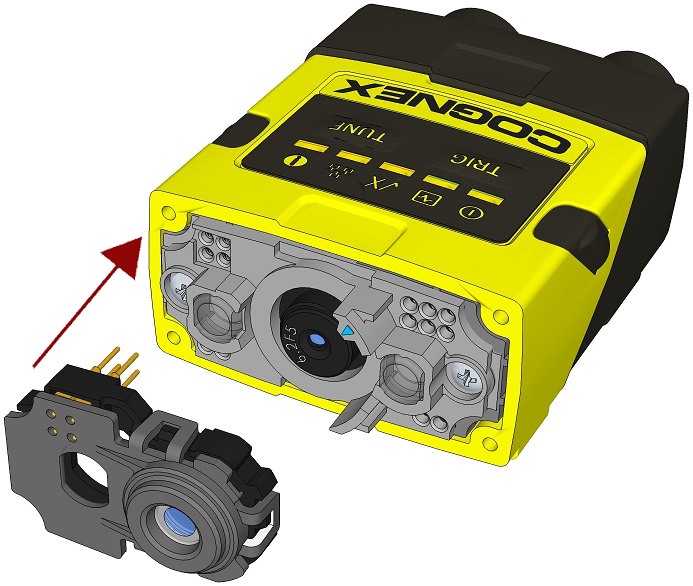
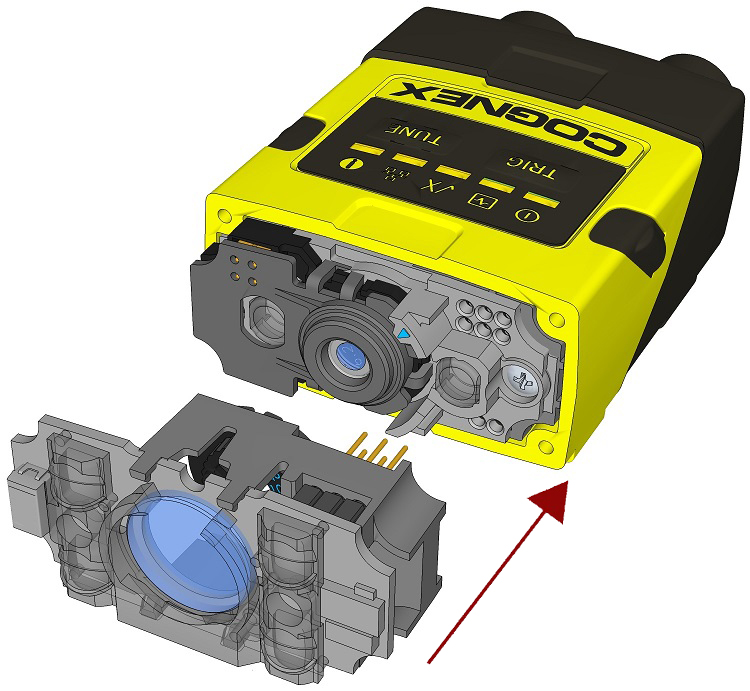
Attach the liquid lens accessory by aligning the 2x2 connectors of the liquid lens with the 2x2 sockets on the optics mount.
-
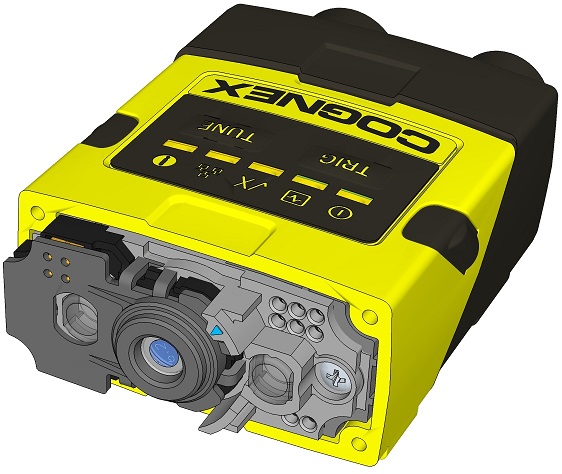
Press the liquid lens onto the imager lens until you reach the stop.
-
Reattach the illumination.
-
Attach the front cover. Observing the tightening sequence below, tighten all four M2x12mm Phillips Pan screws to 9 Ncm using a torque wrench.
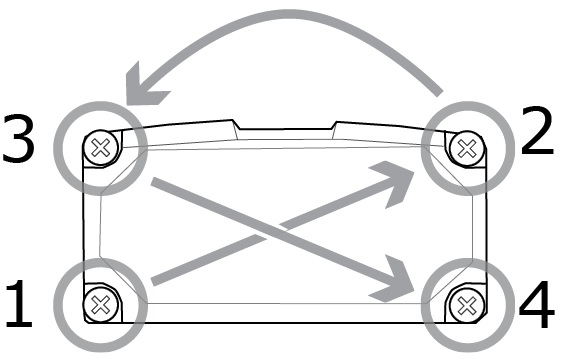 Note: The rib in the front cover must be oriented to the top side.Note: The DataMan