Markings in Blue Read
For the Blue Read Tool, the Marking contains a box outlining the character and a character representing what the tool thinks it found.
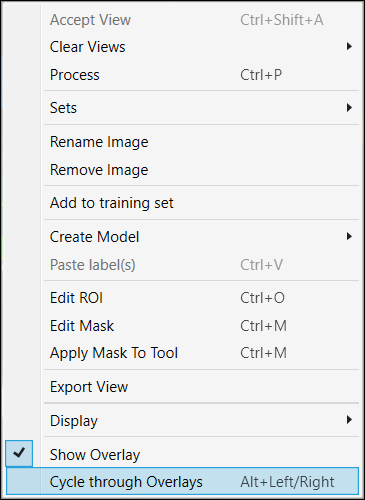
You can toggle the display of labels and markings by either using the Alt + Left arrow and Alt + Right arrow keys, or from the right-click menu in the image.
You can also show overlay with enabling the "Marking" at the Overlay Checkbox.

Mismatches
The Blue Locate and Blue Read tools indicate a mismatch with an orange marking. A mismatch refers to a feature that is found by the system in an image that you labeled, but there is either a mismatch between a corresponding label, or there are possibly more instances of a labeled feature. If encountering a mismatch, the first thing to do is to check the accuracy of the labeling on the Training Sample Image Set (among other things like the stability of your lighting and appearance of the feature in the image; see the Image Capture topic for more information).
During application development, a mismatch is indication that the training set is not generalized. For example, applications with very subtle differences between two features could have mismatches because Deep Learning does not have a full understanding of the features yet. In short, there is a difference between what Deep Learning has learned (from the training set) and what it sees in production (processing the test set). During this phase, you should create a distinct Training and Testing Image Sample Set. It is up to you to manage this, but any images in the training set should be trained (using a 100% fraction).
Markings and Results
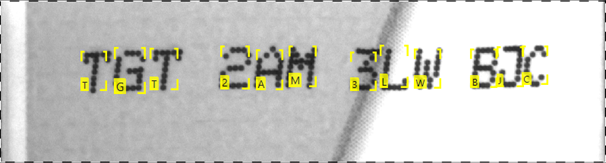
When you process a labeled image using the Blue Read tool, the tool shows you both the found features and the labels, overlaid upon the image.
Markings for Features
This is how the tool indicates the markings of found characters:
- The character in the lower left corner of each found character can be modified by clicking on the character and then entering the desired character via your keyboard.
- Supported characters can be any single UTF-8 character.
- Characters can be selected individually by clicking on them. To select multiple characters, use the Ctrl key and click each desired character. Using the Shift + Ctrl and dragging across multiple characters will select all the characters dragged across.
- Selected characters can be deleted by using the Delete key.
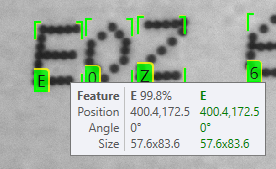
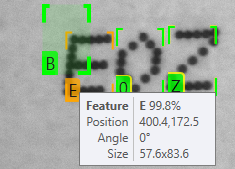
When the found feature is in nearly the same position as a label and the label value matches the found feature value, the label is shown in green, but with a yellow fringe around the graphic.
-
Hovering the mouse over the label shows information about both the feature and the label:
-
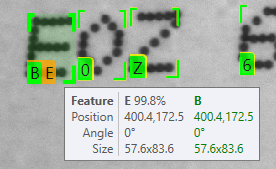
If the label does not match the found feature, then both label (green) and feature (orange) are shown:
-
If the label and feature are displaced from each other, then the graphics are shown separately:
Markings for Model
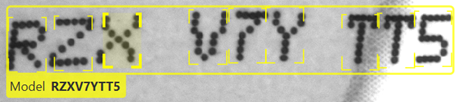
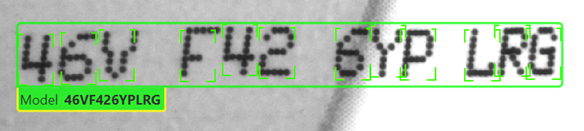
If you process your images with a Model or Models defined, the features that can be fit to a Model are enclosed within a Model graphic, and the feature values are shown together below the box:
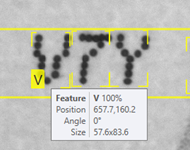
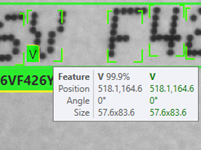
You can get more information about individual found characters and about the overall Model by hovering the mouse over individual characters or over the Model String:
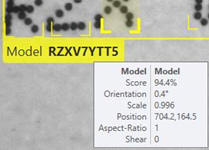
When you process a labeled image using a tool with a Model defined, the tool displays the labeled Model on top of the found features and fitted Model, with a yellow border to indicate that the match was correct:
As before, you can hover over individual characters and over the Model to see information about both the labeled and found characters:

If the found features do not correspond to the labeled features in the image, then both the found and labeled string and mismatched features are shown:
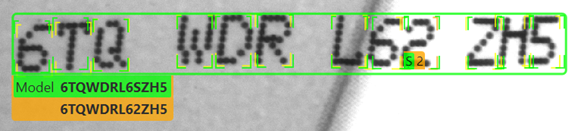
As before, found features that are unlabeled or mislabeled are shown in orange.
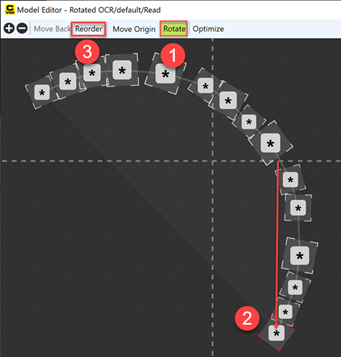
While the node model is capable of extracting curved strings, it may have trouble ordering the characters in instances where the curvature is very high, or if the characters are rotated away from the horizontal. In these cases, you may encounter a situation where the characters are all being found, but the string being returned is incorrect. For example, consider the following:
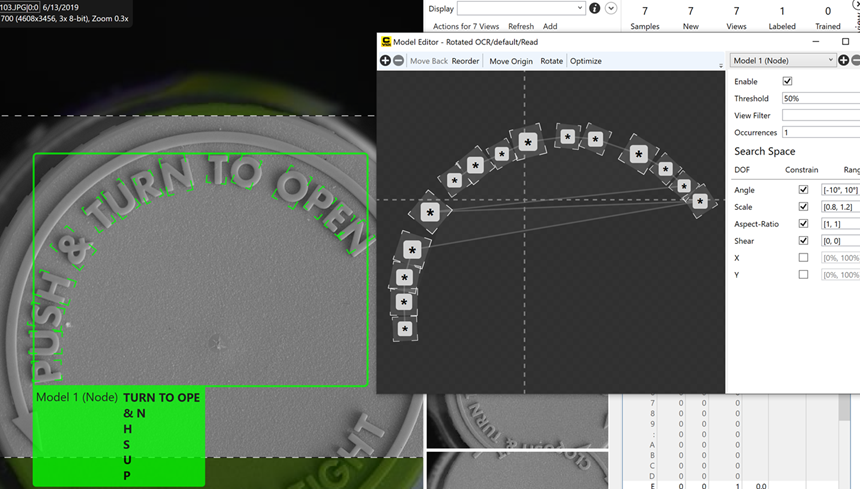
To correct this issue, you need to modify the orientation of the model so that it re-orients the order of the string.
Within the Model Editor, do the following:
- Press the Rotate button.
- Move the model so that the first character starts near the top left of the model.
- Press the Reorder button. This will place the nodes in a better order, and the returned string should be more accurate.
Markings for Features that Match Model
The Blue Read tool displays characters and their matches via the following methods:
Labeled Characters (Not Matched with Any Model)
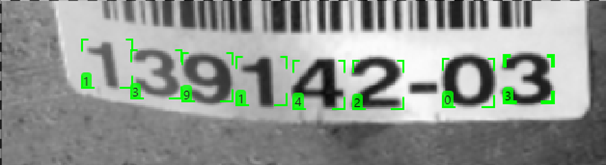
This is how the tool indicates labeled characters that have not been matched with any model. Labeled characters are displayed in the color green.
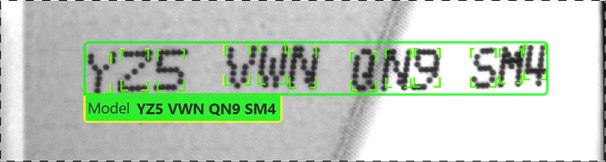
Labeled Characters (Matched with a Model)
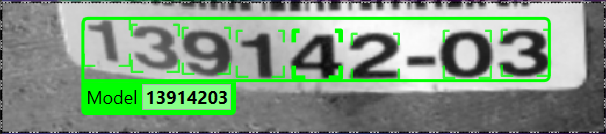
This is how the tool indicates a matched model, with labeled and matched characters. A green bounding box is drawn around the characters, and an attached tag on the lower left side displays the model name and the matched string.
- Matches can be selected by clicking on the attached tag and editing the matched string. The string that is entered will be validated against the expected model's character fielding and string length.
- In addition, there is a context menu associated with the attached tag, which allows you delete the match or edit the models.
Found Characters (Matched with a Model on an Unlabeled View)
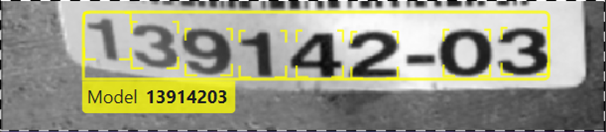
This is how the tool indicates an instance of features and a match with a model on an unlabeled view. In this instance, the context menu associated with the attached tag also includes an option to accept the match.
Found Characters (Matched on a Labeled View)
This is how the tool indicates labeled and found features/matches that are grouped together. The yellow tag below the model is displayed when the match is selected.
Found Characters (Matched on a Labeled View with a Mismatch)
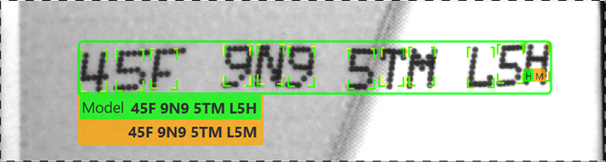
This is how the tool indicates that a labeled and found match includes a mismatch in the features. In this scenario, the found character that does not match the labeled character will be displayed in orange. Similarly, found characters which are not covering any labeled characters will also be displayed in orange.
Overlay Checkbox
The overlay graphics of labels and markings are shown back and forth or side by side whenever you press Alt + Left/Right or enable each checkbox (Labels and Markings) on Overlay Checkbox.
