Working with Labels and Models
If you have defined one or more models in your Blue Read tool, then labeling images is simplified and accelerated in some important ways.
-
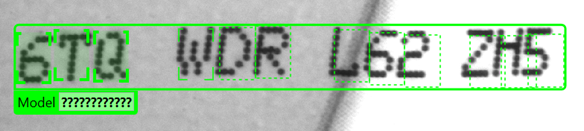
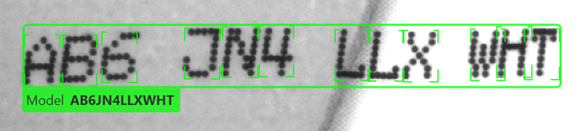
When you start to label an image that has no found features, as soon as you have labeled a few characters the tool will suggest a likely Model location, including the locations of all the features in the Model:
Once the Model has appeared, you can simply type the correct character values into the text field and the tool will automatically create all of the labels:
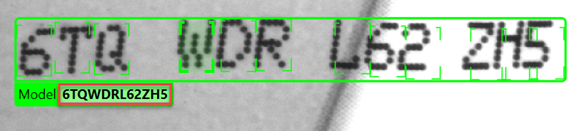
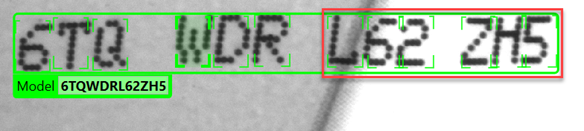
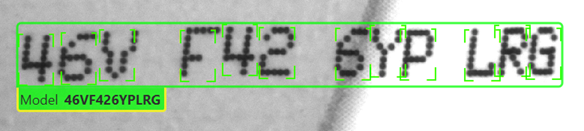
After specifying the character values, you also need to adjust the feature positions so they are correct:
-
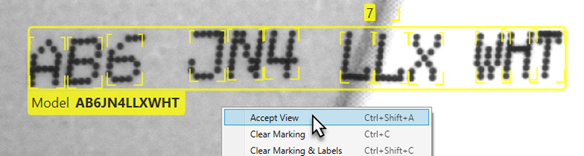
When you are starting from an image with found features, the process is even simpler. Simply right-click and select Accept View:
In this case, only the features that were matched by the Model or Models are converted to labels:
What Happens when Features are Found on a Labeled Image when Models are Defined?
When you process a labeled image using a tool with a Model defined, the tool displays the labeled Model on top of the found features and fitted Model, with a yellow border to indicate that the match was correct:
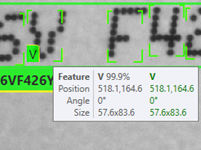
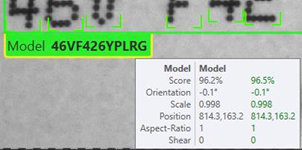
As before, you can hover over individual characters and over the Model to see information about both the labeled and found characters:
|
|
|
If the found features do not correspond to the labeled features in the image, then both the found and labeled string and mismatched features are shown:

As before, found features that are unlabeled or mislabeled are shown in orange.