Run One Time Calibration Step by Step
This topic gives an example of one time calibration in an alignment application for users to understand how to use one time calibration step by step.
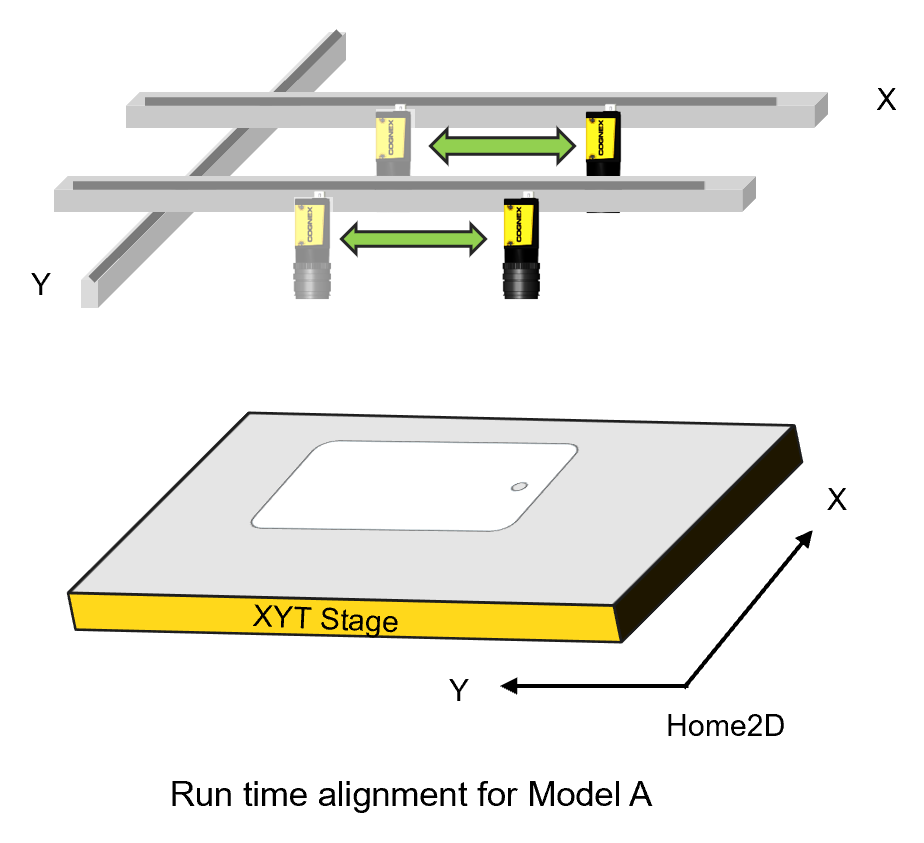
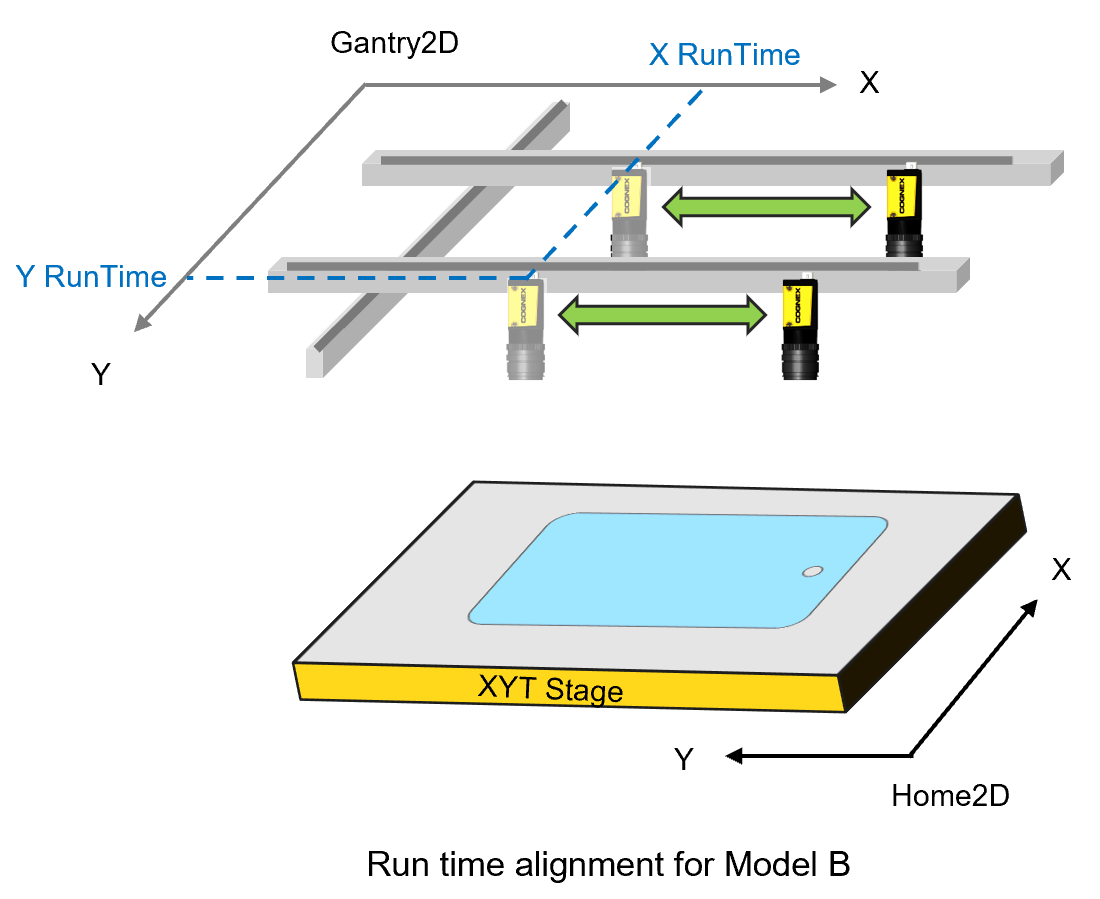
In the alignment application below, the two cameras shuttles between two positions to locate the part during run time alignment. To make mode change faster and easier, customers want to use one time calibration to avoid recalibration during model change.
The wizard configuration for this application is configured as below:

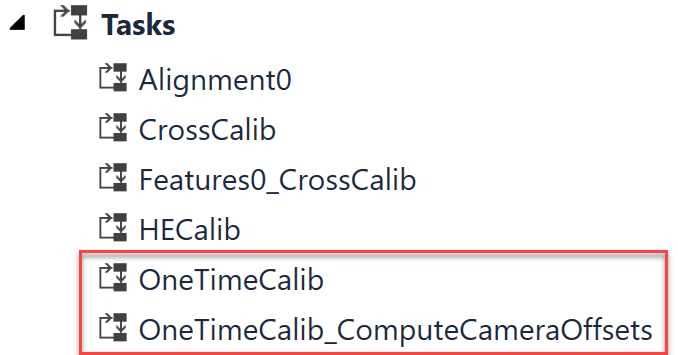
After the wizard finishes running, there will be two one time calibration related tasks be generated in the program.
-
OneTimeCalib Task
OneTimeCalib task is used to run one time calibration for each camera. The task is similar with a hand-eye calibration task which also acquires images at given positions until all positions specified in a calibration loop are covered, and in the end runs hand-eye calibration calculation.
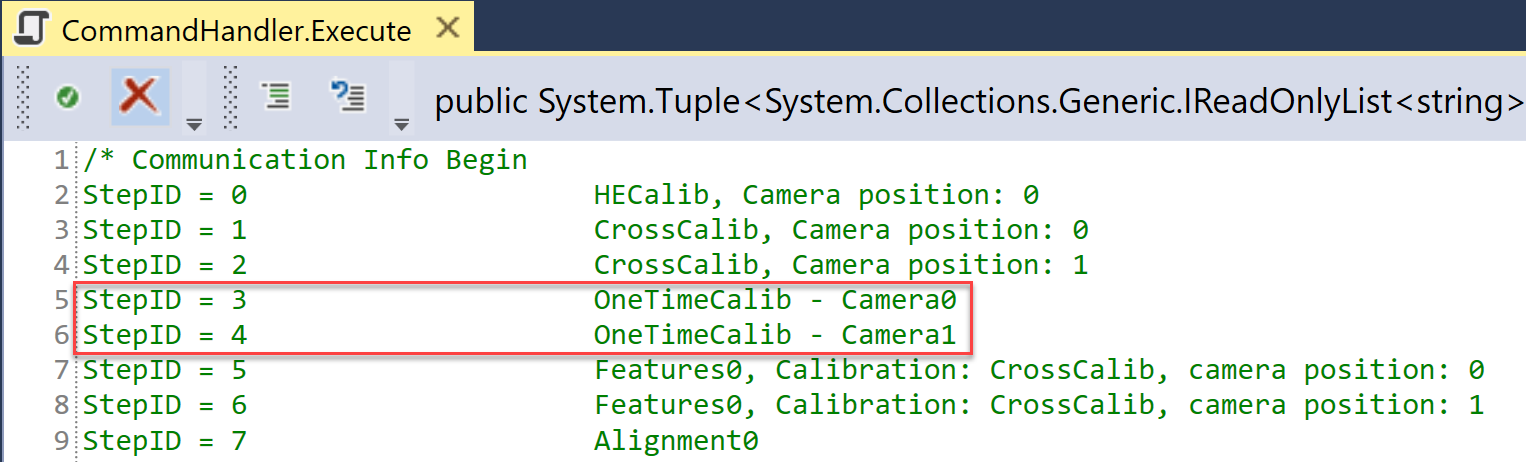
To trigger one time calibration for a camera, one can directly trigger it via "ACB, AC", or "HEB, HE, HEE" commands using the task StepID defined in CommandHandler script of generated porgram. Each camera has an independent StepID for one time calibration as shown in the screenshot below. For more information about the related commands, please refer to Motion Guided Hand-eye Calibration Commands.
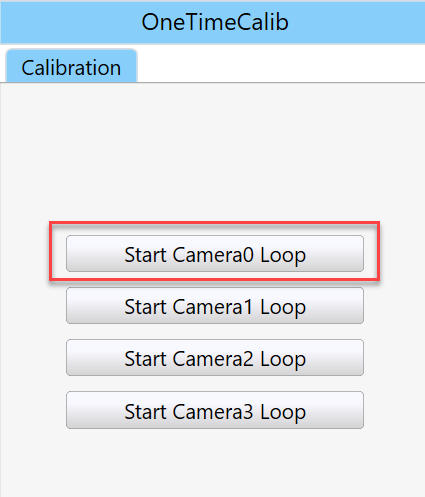
Another way to trigger an one time calibration is using manual buttons in manual mode. However, users needs to customize the x, y, theta values of camera position at each calibration point by implementing the manual button control's "GetStagePosition" callback function, or input absolute ranges in the Calibration Loop UI. For more information about how to customizing GetStagePosition callback function, please refer to How to get stage's current pose for manual buttons.
-
OneTimeCalib_ComputeCameraOffsets
OneTimeCalib_ComputeCameraOffsets task is used during mode change to recalculate cameras' positions in Home2D after users' inputs of these cameras' Gantry2D coordinates. This task is triggered by "Calculate Offset" button click on Camera Pose Adjustment page under Calibration category in Setup mode of the application.

Process to Calibrate
In this application, users can run hand-eye calibration and cross calibration first, then run one time calibration for each camera. Or run one time calibrations first, then run other calibrations.
The graphics below illustrates the process of hand-eye calibration and cross calibration of the stage.
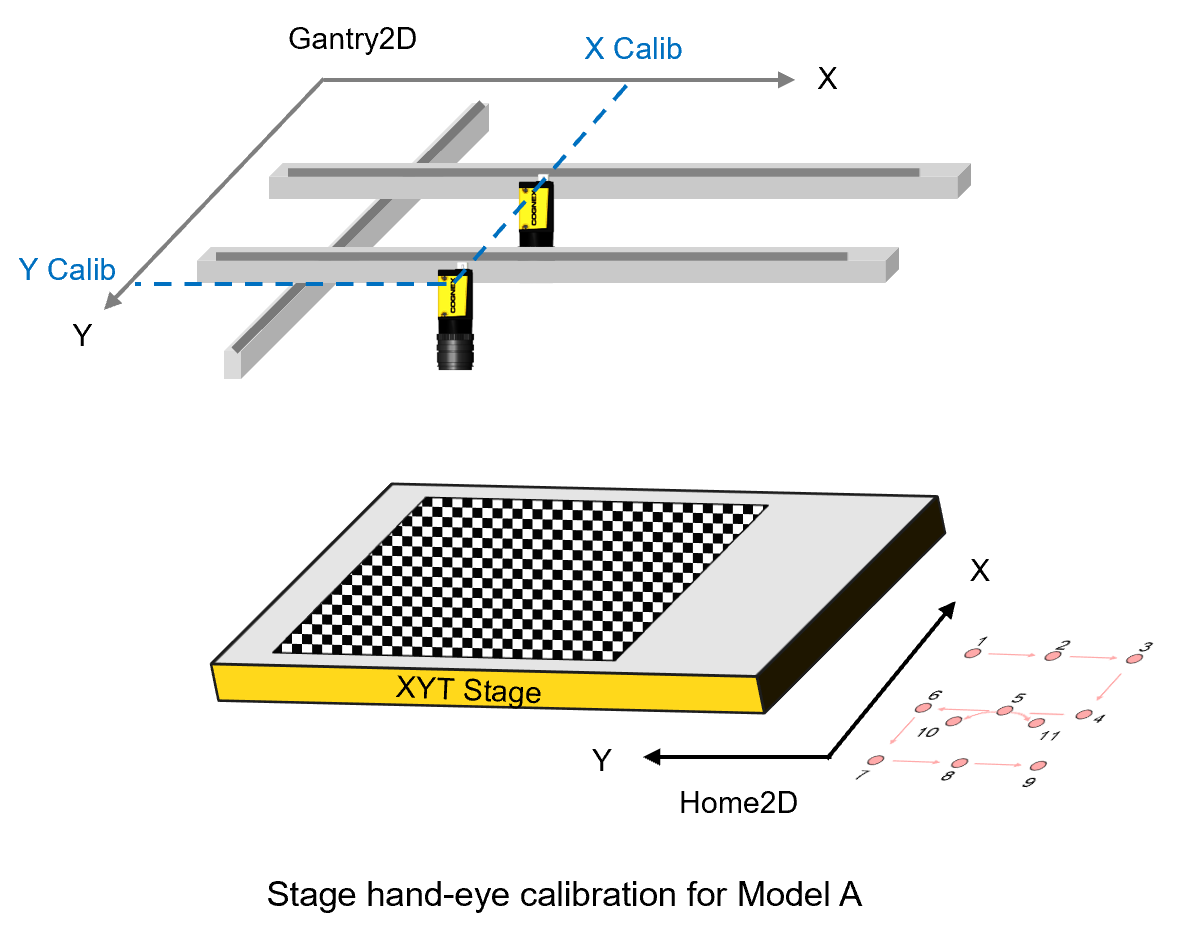
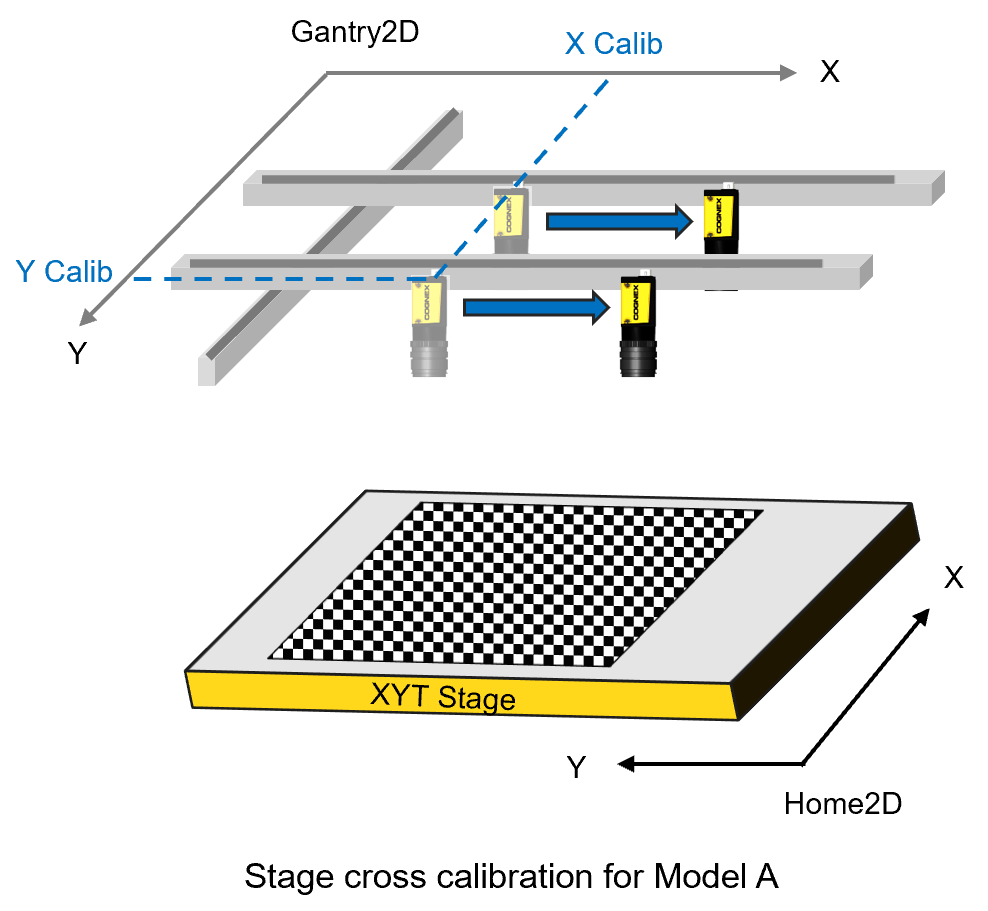
After the calibration process above, record each camera's acquisition positions in Gantry2D for hand-eye calibration and cross calibration, and then input them into "X Calib Gantry" and "Y Calib Gantry" columns on Cameras Pose Adjustment page under Calibration category in the setup mode of the application.

Click "Calculate Offsets" button and then "Save Recipe" button on the same page to recalculate and save the changes.

One time calibrations for two cameras are illustrated as below. In each calibration process, the camera is moved to a 3X3 position grid to take images of the stationary checkerboard plate attached on the stage. The two calibrations are done independently.
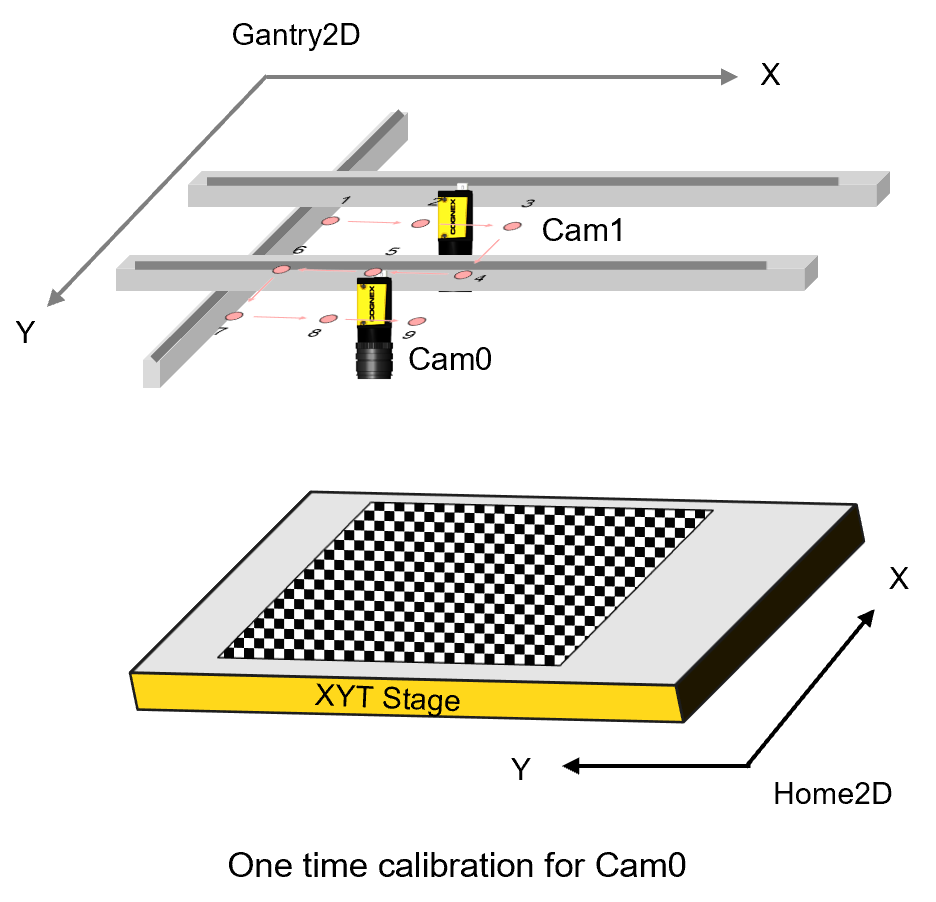
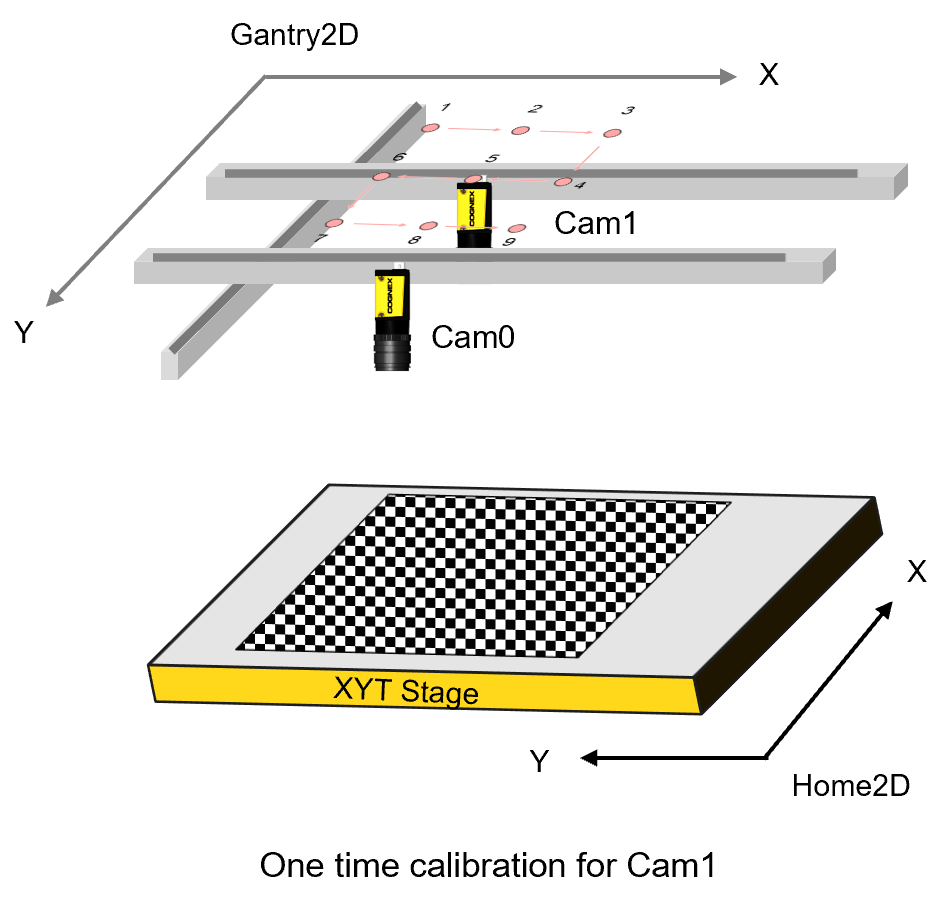
Since the vertices of the checkerboard plate already have Home2D coordinates through the hand-eye calibration and cross calibration, and they also have the Gantry2D coordinates after one time calibration, with this medium the transform from Gantry2D to Home2D can be established.
Mode Change
When a mode change requires cameras to be repositioned, with the transform from Gantry2D to Home2D established during one time calibration, users only need to input cameras' new positions in Gantry2D, then the vision system will transfer them into positions in Home2D and update the corresponding hand-eye/cross calibration results without the need of recalibration.
On the Cameras Pose Adjustment page under Calibration category in the setup mode of the application, input "X RunTime" and "Y RunTime" in Gantry2D for each camera acquisition position under new model for both hand-eye and cross calibrations.

And then click "Calculate Offset" button to trigger the OneTimeCalib_ComputeCameraOffsets task to update the new camera positions in Home2D to the hand-eye calibration and cross calibration results. And click "Save Recipe" to save the changes.
After this, users can directly run alignment.